You can capture Mac screens to quickly share content or information. However, due to various factors, you may encounter the screenshot on Mac not working problem. This article delves into the possible reasons why the Mac screenshot function does not work. Moreover, it shares five effective methods to solve it.
Before troubleshooting the screenshot on the Mac not working problem, I would like to tell you the common ways to take screenshots on a Mac. You can check these steps and ensure you are using the right way to capture your Mac screen.
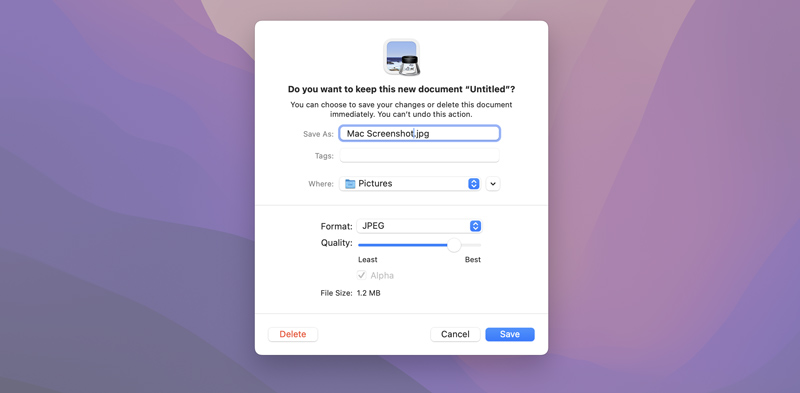
To take a screenshot directly of the full screen on your Mac, press the Command + Shift + 3 keys simultaneously. Once these three keys are pressed together, you will hear a camera shutter sound. That means the entire Mac screen is captured. You can preview the screenshot, rename it, and select a suitable format, quality, and location for it. Mac lets you save this captured image in any popular format, such as JPG, HEIC, PNG, PDF, or TIFF.
If you prefer to capture a selected area of your Mac screen, you can press Command + Shift + 4. You can see your cursor changes to a crosshair. Click and drag your cursor over the specific region you want to capture. Release the mouse button, which will take a screenshot.
When you want to screenshot an active window or menu, press Command + Shift + 4, and then press the Spacebar. In that case, your cursor will change to a camera icon. Then, click the window or menu to capture.
The screenshot on the Mac is not working for various reasons. When you fail to capture the full or a portion of your Mac screen, you should check if you are pressing the right keys to take the screenshot. The incorrect keyboard shortcut is one of the main reasons why your screenshot might not be working on a Mac.
When the screenshot function is not working on your Mac, you should also check system preferences and ensure it is enabled. System preferences issues will lead to Mac screenshot not working.
What’s more, some third-party software can interfere with the screenshot functionality. Besides software conflicts, macOS bugs or glitches and NVRAM corruption may also cause the screenshot on Mac not to work. If your Mac's storage is full, it might affect the new screenshot saving.
As mentioned above, various factors may cause the screenshot on Mac not to work. When you can’t take screenshots on your Mac, try restarting your Mac first to troubleshoot it. In many cases, a device restart can fix temporary glitches and make the screenshot function work normally again.
You should make sure you are using the right keys to take a screenshot on your Mac. Then, check the keyboard shortcut settings and ensure shortcuts are enabled and set correctly.
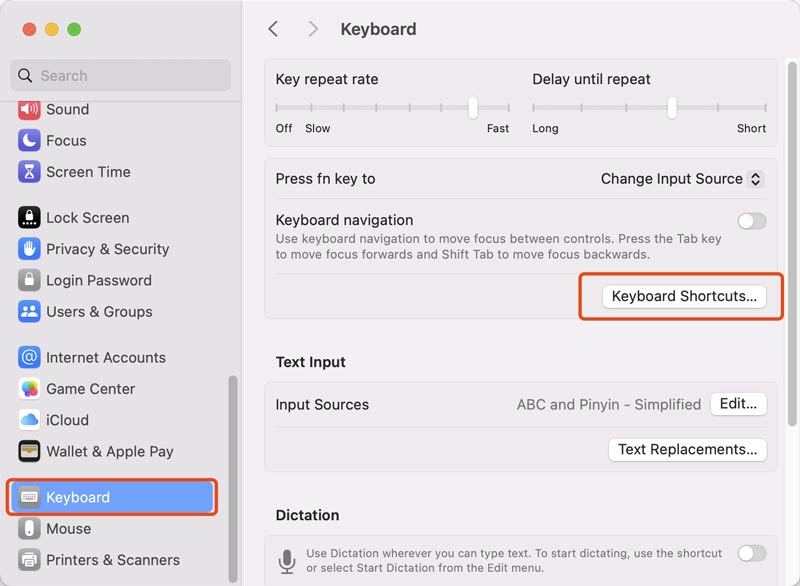
Click the Apple icon and go to System Settings. Choose Keyboard on the left and click the Keyboard Shortcuts button.
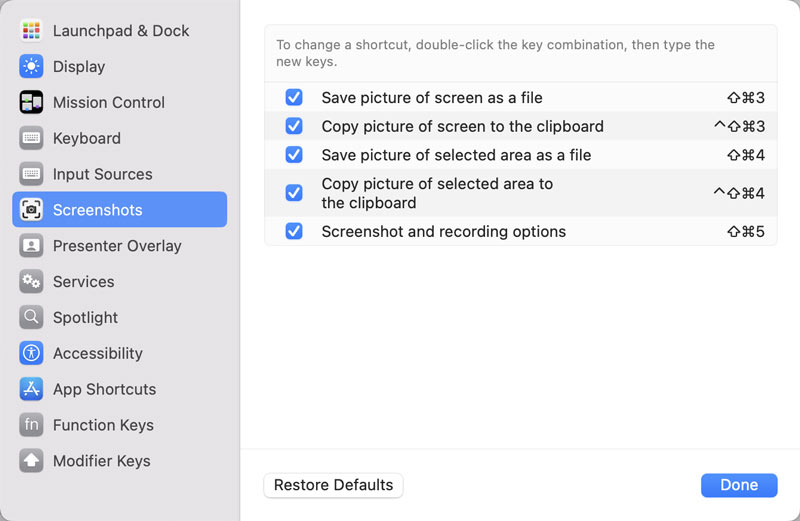
Click Screenshots and then verify that all options are checked. You can click the Restore Defaults button and then customize the shortcuts based on your needs.
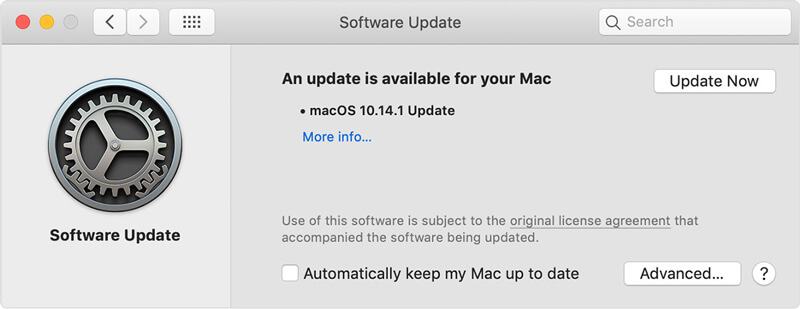
If you didn’t update macOS for a long time, you should check for system updates and ensure your Mac is running the latest macOS version. Updating system can be a simple and effective way to fix bugs and improve performance.
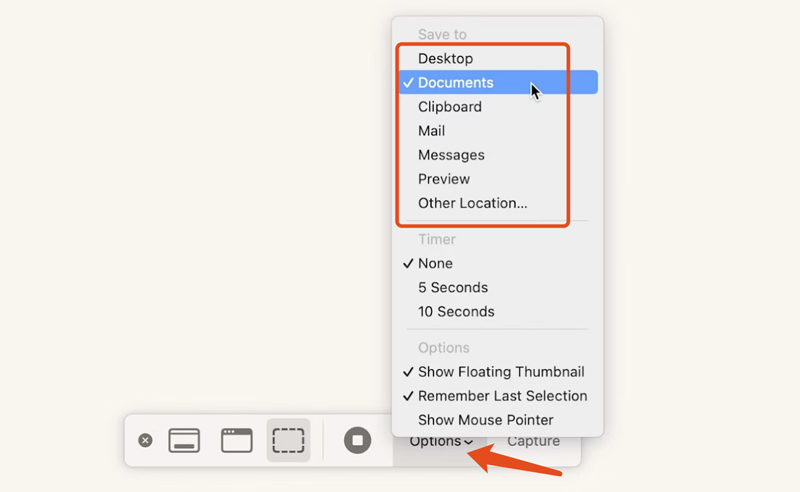
Sometimes, you can take the regular steps to capture your Mac screens, but the screenshots won’t be saved. You should check if your Mac has saved the screenshots to a different location. Open the Screenshot app, click Options, and then figure out which location is set to store your screenshots. You can freely select a desired folder to save newly captured Mac screenshots.
Resetting NVRAM is another effective solution to resolve issues with core Mac apps and functionality. You can power off your Mac, turn it on, and immediately press and hold the Option + Command + P + R keys. Release the keys until your Mac restarts or you see the Apple logo.
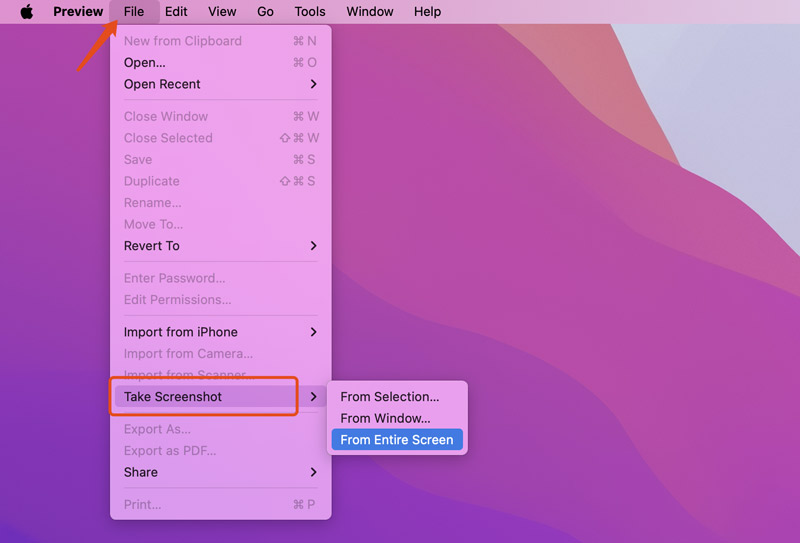
If the built-in Screenshot app on your Mac doesn’t work and you don’t want to waste time troubleshooting the problem, you can directly turn to alternative apps to capture Mac screens. For instance, you can use Preview to take screenshots on a Mac quickly. Open the Preview app, click the File menu, choose Take Screenshot from the drop-down options, and then select the specific way to screenshot a certain area, the entire screen, or a window.
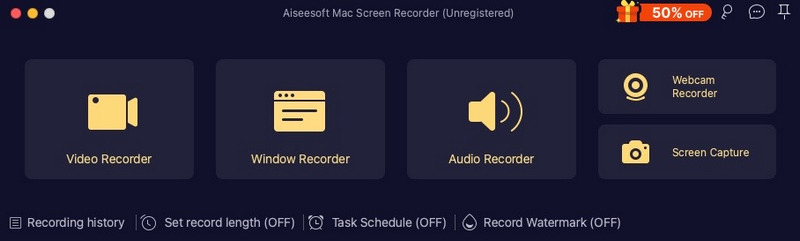
Besides the built-in Preview app, you can also rely on the all-featured Screen Recorder to capture any content and activities on your Mac. Besides screenshots, it lets you record high-quality videos, including gameplay, webcam, online meetings, and your phone’s screens, even up to 4K.
Aiseesoft Data Recovery is specially designed to deal with various data loss situations on your Mac and Windows computers. It can help you rescue all commonly used files, such as documents, photos, videos, and others. Whether you lost valuable screenshots due to a system crash, mistakenly deletion, or other accidents, use this data recovery software to recover them with ease.
![]() 100% Secure. No Ads.
100% Secure. No Ads.
![]() 100% Secure. No Ads.
100% Secure. No Ads.
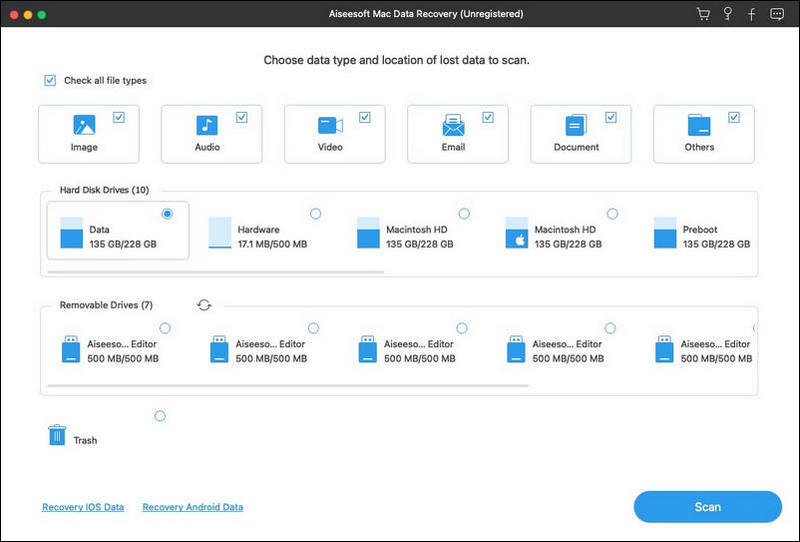
Open this Mac data recovery and choose the specific disk(s) or location(s) to scan your lost files. If you only want to restore lost or deleted screenshots, you can tick Image and untick other data types. That ensures you get a faster scanning speed.
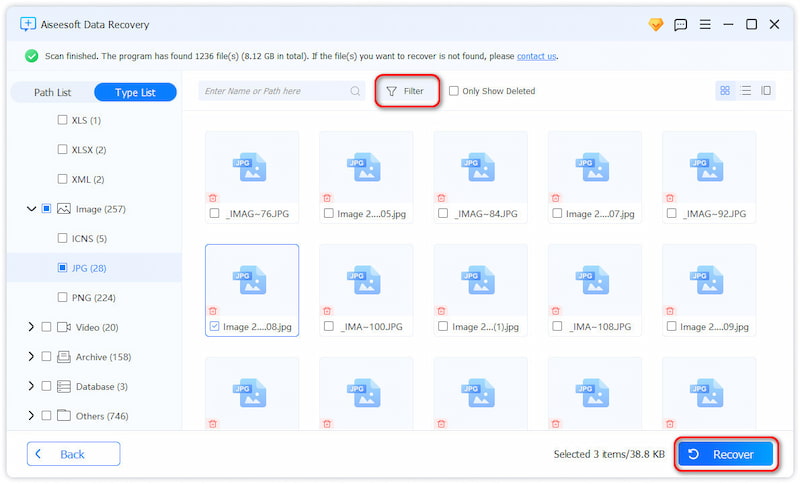
Once scanned, your Mac files will be listed in data type or path. You can easily locate target data based on that. It also offers a filter function to help you find your lost screenshots. Select Mac screenshots and other files you want to retrieve, then click Recover All.
Question 1. Where are screenshots saved on my Mac?
When you use the built-in function on your Mac to take a screenshot, the captured image will be saved to the desktop. Go to your Mac’s desktop to view all screenshots you have taken. If you want to change the default save location, press Command + Shift + 5 to open the Screenshot app (macOS Mojave and later), click Options, and then select a new location as you like.
Question 2. How do you crop a screenshot on your Mac?
While taking a screenshot using the built-in Screenshot app, you can simply crop the screen you want to capture using your cursor. If you want to crop a captured screenshot, open it in the Preview app, go to Tools to find Crop, and then adjust the selection area based on your needs. Also, you can use some third-party image editors to easily edit and crop your Mac screenshots.
Question 3. How do I copy and paste screenshots on a Mac?
After taking a screenshot of your current Mac screen, you can find the saved image file, right-click on it, and then choose the Copy option. Alternatively, you can click the screenshot to select it and then press the Command key + C. Open the app where you want to paste the screenshot and press the Command key + V.
This article shares five useful tips to troubleshoot the screenshot on Mac not working problem. If none of above methods work, consult Apple support for more help.
 How to Take High-Quality Screenshots - 3 Useful Tips
Want to capture incredibly clear screenshots? Read this post to find out. We will provide you with 3 practical options for taking high-quality screenshots.
 A Step-by-Step Guide to Crop Screenshot on Mac (2025)
If you want to crop screenshots quickly, Mac has all you need in built in. The Photos app and the Preview app can both help you remove the unnecessary part of your screenshots.
 5 Ways to Screenshot Specific/Full Webpage on Chrome
How do you take a screenshot on Chrome? Here are 5 ways of snapping a full or selected webpage on Google Chrome via top 5 snipping tools on Windows and Mac.
Recover Various Data
1. Free Data Recovery Software
2. Recover Deleted Files in Windows
3. Recover Deleted Files from Recycle Bin Windows
4. Recover Permanently Deleted Emails

Aiseesoft Data Recovery is the best data recovery software to recover deleted/lost photos, documents, emails, audio, videos, etc. from your PC/Mac.
![]() 100% Secure. No Ads.
100% Secure. No Ads.
![]() 100% Secure. No Ads.
100% Secure. No Ads.
