
Aiseesoft Screen Recorder
 100% Secure. No Ads.
100% Secure. No Ads.
Taking a screenshot on a Mac is one of the most essential everyday skills for macOS users, whether you're saving information, reporting issues, creating tutorials, or capturing design inspiration. macOS provides multiple built-in Mac screenshot methods, ranging from ultra-fast keyboard shortcuts for screen capture to a flexible screenshot toolbar with advanced options. For users who need professional Mac screen recording and screenshot tools, third-party apps can further extend editing, scrolling capture, and cloud sharing capabilities.
In this complete Mac screenshot guide, you’ll learn every method to capture screen on Mac, from basic shortcuts to advanced screen capture tools, so you can choose the most efficient workflow for your needs.

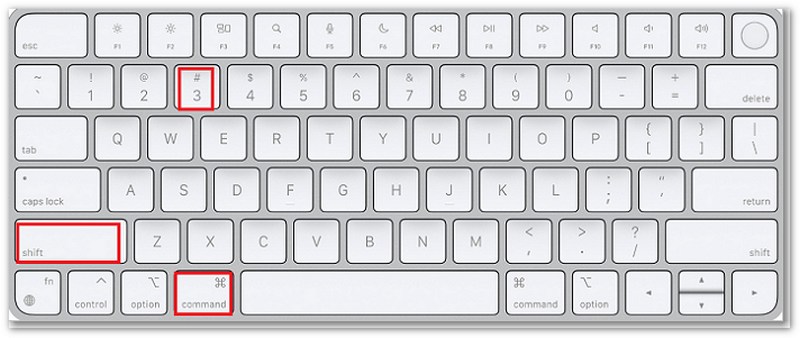
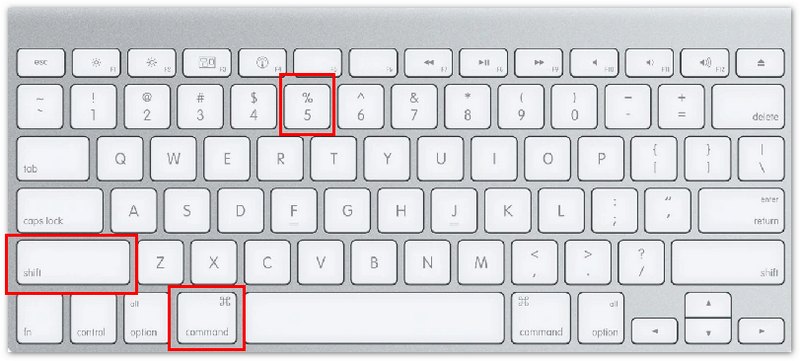
This is the fastest Mac screenshot shortcut to capture the entire screen.
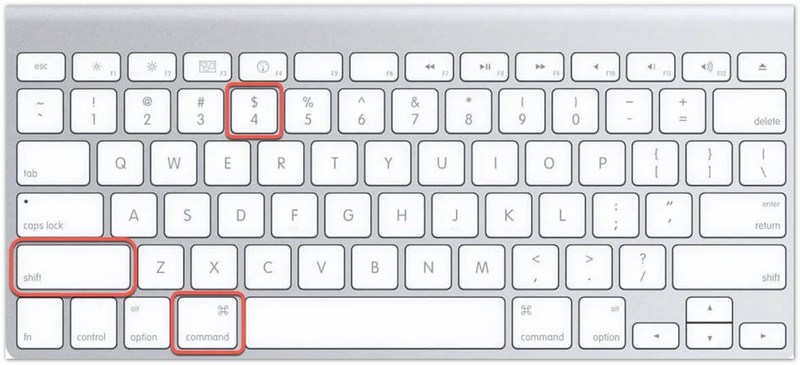
This Mac screen capture method lets you take a screenshot of a specific area on Mac.
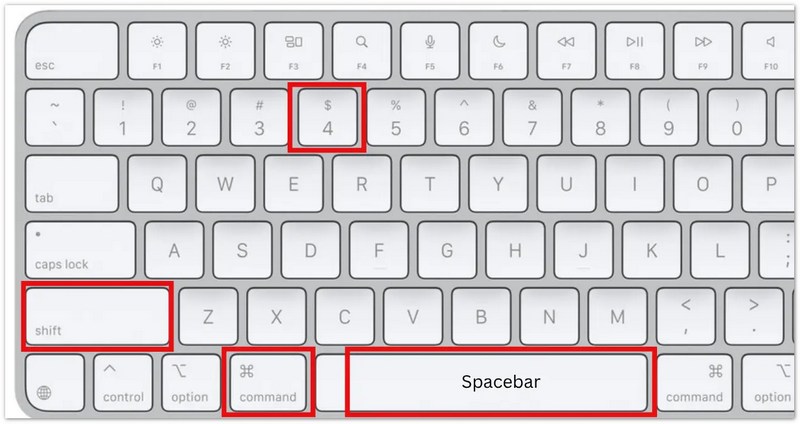
This method is ideal for clean Mac window screenshots without background clutter.
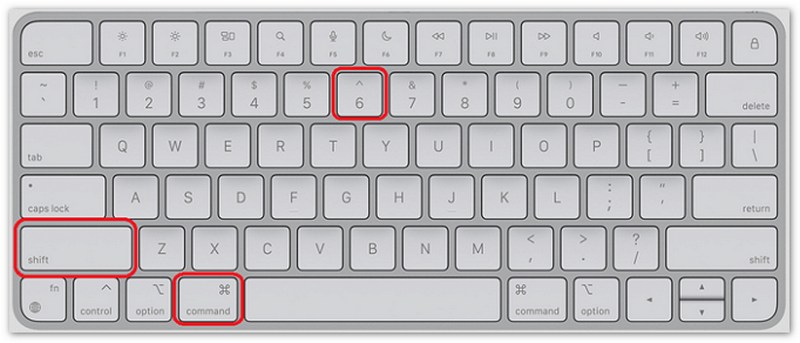
This is a specialized Mac screenshot feature for MacBook Pro users.
This is the central Mac screenshot tool for flexible screen capture control.
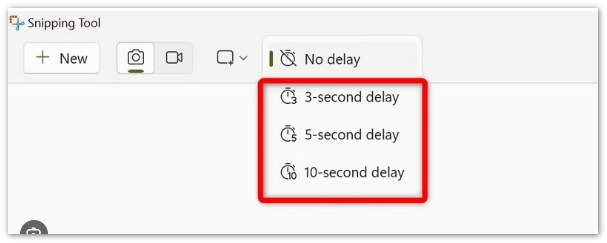
You can also switch between Mac screen recording and screenshot modes in this panel. It also allows you to set a timer and choose custom save location to improve workflow for timed or automated Mac screen captures, here’s the steps:
For users who need professional Mac screen capture, editing, or scrolling screenshots, third-party software offers more powerful features than built-in tools.
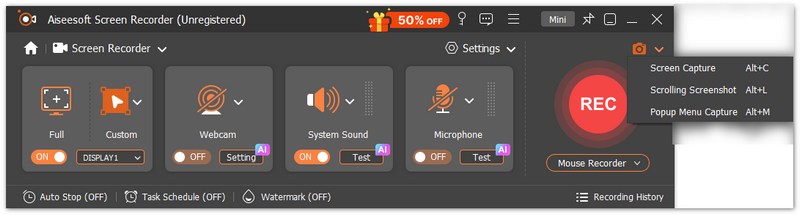
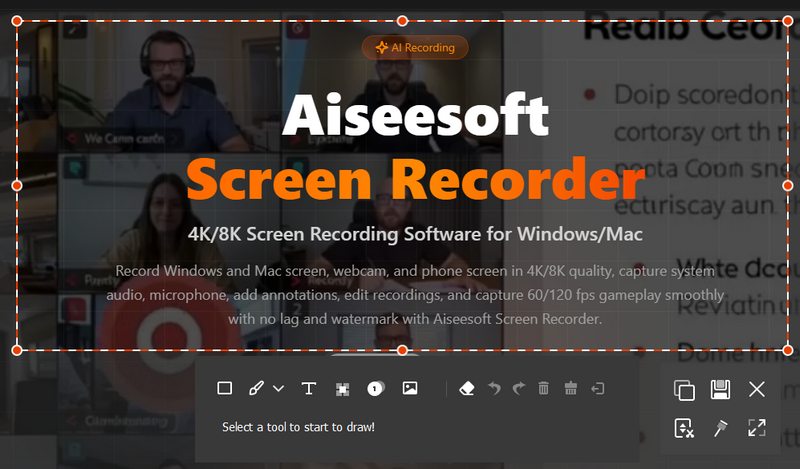
Aiseesoft Screen Recorder for Mac is a professional, all-in-one desktop utility designed for high-quality screen capture and snapshotting. While widely recognized for its 4K/8K video recording capabilities, it stands out as an advanced alternative to Mac’s native screenshot tools by offering specialized modes like Scrolling Screenshot (for full webpages), Window Capture, and Pop-up Menu Capture. Whether you are creating professional tutorials, capturing complex software interfaces, or saving online content, Aiseesoft provides a seamless workflow with integrated real-time annotation and flexible output formats (PNG, JPG, GIF, etc.), ensuring your Mac snapshots are clear, organized, and ready for immediate sharing.

Downloads
100% Secure. No Ads.
100% Secure. No Ads.
How to Take High-Quality Screenshots and Scrolling Screens on Mac with Aiseesoft Screen Recorder:
Where are Mac screenshots saved by default?
By default, macOS saves screenshots directly to the Desktop for easy access. If you take multiple screenshots, they will appear as separate image files on the desktop. You can change the save location anytime using the built-in screenshot toolbar.
Does Mac support scrolling screenshots natively?
No, macOS does not include a built-in scrolling screenshot feature. For capturing full web pages or long documents, you need third-party tools to capture entire webpage. Apps like Aiseesoft Screen Recorder or Snagit can handle scrolling screen capture.
Can I edit screenshots immediately after taking them?
Yes, macOS provides quick editing tools via the floating thumbnail preview. You can crop, annotate, or draw on the screenshot right after capturing it. For more advanced editing, third-party tools offer additional annotation and design features.
Conclusion
Mac provides multiple screenshot methods, including keyboard shortcuts, built-in screenshot tools, and professional Mac screen capture software. Whether you need a quick Mac screenshot for daily use or advanced screen capture for tutorials and content creation, macOS offers flexible options to match different workflows and productivity needs.
 [Solved] What to do when Mac won’t Shut Down: 8 Fixes
If your Mac won't shut down, you may have to force it to switch off. Here are 8 easy and fast solutions to help you fix this problem. Join us to read more!
 Title: How to Find, View, or Show Hidden Files on Mac [2026 Guide]
How to Show Hidden Files on macOS? Here we’ll tell you why files can be hidden on Mac and solutions for how to find and view them quickly. Don’t hesitate to read!
 What to do If My Mac is Frozen [Complete Fixing Guide in 2025]
What should I do when my Mac is frozen? How can I fix it? How to force quit on a Mac when frozen? Read and follow this tutorial, and you will find your answer.

*Required field
*Please enter a valid email

