Mistakenly click the "Don't Save" button after the QuickTime recording? How to recover unsaved QuickTime screen or audio recording? This post shows the best Mac Data Recovery to help you recover unsaved QuickTime recording with ease.

![]() 100% Secure. No Ads.
100% Secure. No Ads.
![]() 100% Secure. No Ads.
100% Secure. No Ads.
I clicked the Don't Save button and lost all the QuickTime recording. Is any way to recover the unsaved QuickTime recording? I definitely don't want to record it again.
QuickTime suddenly crashed while its screen recordings on my MacBook Air. I have to quit it and re-open it for the further recording. How to recover the unsaved QuickTime recording? Where the QuickTime recording may be saved? Any help?
QuickTime provides a convenient way to record screen and audio on Mac. Under most circumstances, it can offer you a stable and smooth recording. However, while the recording on Mac with QuickTime, you may also face some frustrating cases. For instance, you may click the Don't Save button to stop the recording, or QuickTime crashes while the recording. What should you do?

Recover Unsaved QuickTime Recording
Go without saying that, recovering unsaved QuickTime recording is hard job for many Mac users. Relatively speaking, you may prefer to restore a lost file, rather than recover unsaved QuickTime recording. Fact is, the unsaved recording with QuickTime is not gone thoroughly. There are still possible ways can get it back.
Don't panic if you click the Don't Save button to stop the QuickTime recording. You can try looking for the captured file in location where the QuickTime screen and audio recording saved. This part will show its default saving path and common way to find the unsaved QuickTime recording.
Step 1 Navigate to /Users/[your user name]/Library/Containers/com.apple.QuickTimePlayerX/Data/Library/Autosave Information on your Mac. Here you still get a chance to find the unsaved video or audio recording.
Step 2 Locate the bundle named Unsaved QuickTime Player Document.qtpxcomposition. Right click on it and you may find the unsaved QuickTime recording you just lost.
Read More: How to Record Screen or Audio with QuickTime
With the first method, you may find the unsaved QuickTime recording back. What if the unsaved QuickTime recording can't be recovered there?
Here we recommend the powerful Mac Data Recovery to help you easily recover lost files from Mac. You can try your luck with it.

Downloads
![]() 100% Secure. No Ads.
100% Secure. No Ads.
![]() 100% Secure. No Ads.
100% Secure. No Ads.
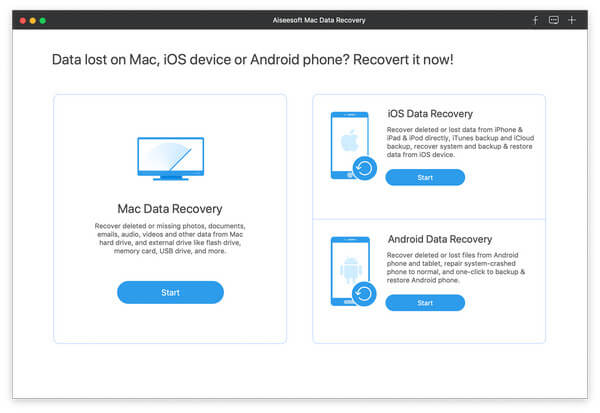
Step 1 Double click the download button above and follow the instruction to install this Mac Data Recovery on your Mac. Launch it for the unsaved QuickTime recording recovery. When you enter the main interface, choose the "Mac Data Recovery" feature and then click "Start".
Step 2 As you can see, this Mac Data Recovery enables you to restore any frequently-used data types like images, videos, audio, documents, emails and more. During this step, you can only select "Video" or "Audio" and then choose a specific hard drive where the recording may be saved.
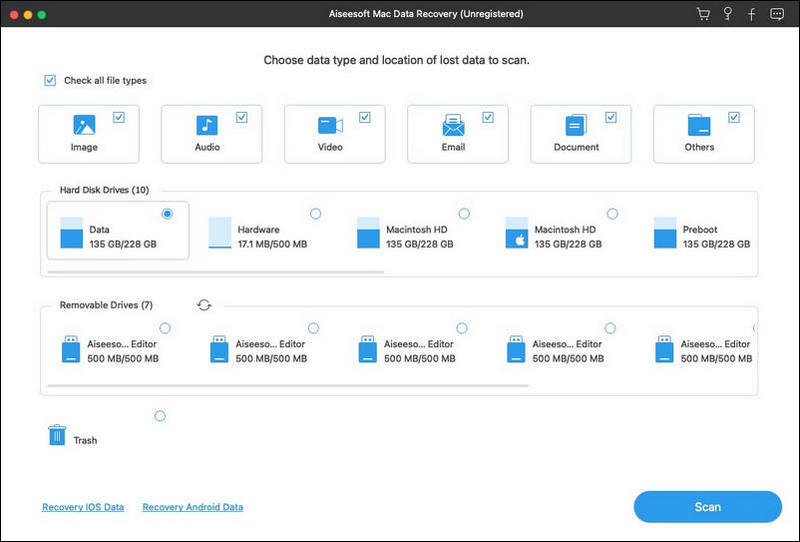
Click "Scan" to perform a quick scanning on your Mac. This unsaved QuickTime recording recovery also provides a "Deep Scan" feature to guarantee you find the unsaved or lost QuickTime recording.
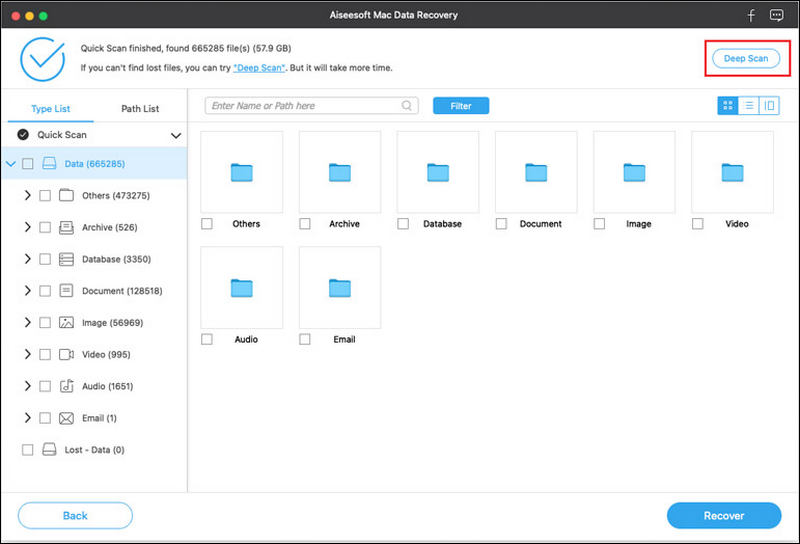
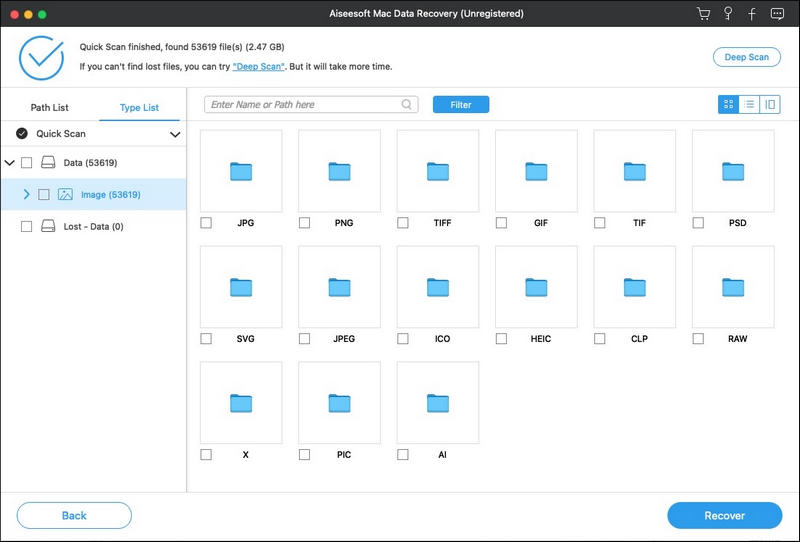
Step 3 When the scanning is finished, click specific data type on the left panel and then check details on the right window. You are allowed to preview the details of each data.
Step 4 Choose the unsaved QuickTime recording you want to recover and then click the "Recover" button to restore it to your Mac.
Note: Don't forget to use the Deep Scan feature if you can't find the unsaved QuickTime recording after the first quick scan. By the way, Aiseesoft Data Recovery can also recover the deleted videos on Windows.
Conclusion
Hope you can handily find and recover unsaved QuickTime recording after reading this post. 2 simple ways are offered to ensure you get the job done. The recommended Mac Data Recovery also has the capability to recover other data like pictures, document files, emails and more. You can free download it and have a try.
 How to Recover Unsaved Word Document 2019/2016/2011/2017 on Mac (5 Best Ways)
How to recover unsaved Word document on Mac? Whether you want to recover unsaved Word 2019/2016/2017/2011 document on Mac, or restore lost files, you can find best Mac data recovery here to help you.
 How to Convert QuickTime HD Video Without Loss
A guide about how to convert QuickTime HD video to other HD video and SD video. Free download HD video converter to convert QuickTime HD video files.
 Fast QuickTime Download for Windows and Mac
How to download QuickTime on Windows or Mac? This article shows you the sites for QuickTime download on Windows and Mac. In addition, some QuickTime alternatives you will like.
Recover Various Data
1. Free Data Recovery Software
2. Recover Deleted Files in Windows
3. Recover Deleted Files from Recycle Bin Windows
4. Recover Permanently Deleted Emails

Aiseesoft Data Recovery is the best data recovery software to recover deleted/lost photos, documents, emails, audio, videos, etc. from your PC/Mac.
![]() 100% Secure. No Ads.
100% Secure. No Ads.
![]() 100% Secure. No Ads.
100% Secure. No Ads.
*Required field
*Please enter a valid email
