If your SSD is not showing up, it can be frustrating if you depend on SSD for your storage or system performance. Numerous factors, including bad connections, out-of-date drivers, trouble setting up the BIOS, or even SSD failure, might cause this problem. The first step to fixing this is understanding the root cause. So, in this guide, we will be going through tried and trusted methods to restore an SSD that is not showing up, be it after a new install or because an old drive has completely vanished out of thin air. Furthermore, we will discuss recovering lost data from an SSD with the help of professional software Aiseesoft Data Recovery so that you can always access important files even if your SSD is not responding.
If your new SSD is not showing up, this issue is common and often fixable. A loose connection, incorrect BIOS settings, outdated drivers, or even a formatting issue could be the cause. This tutorial will show you how to fix an SSD that your computer isn't detecting using tried-and-true techniques. We’ll start with simple hardware checks and move on to software-based solutions like updating drivers, adjusting disk settings, and using troubleshooting tools. Following these steps, you can quickly get your SSD recognized and working properly again.
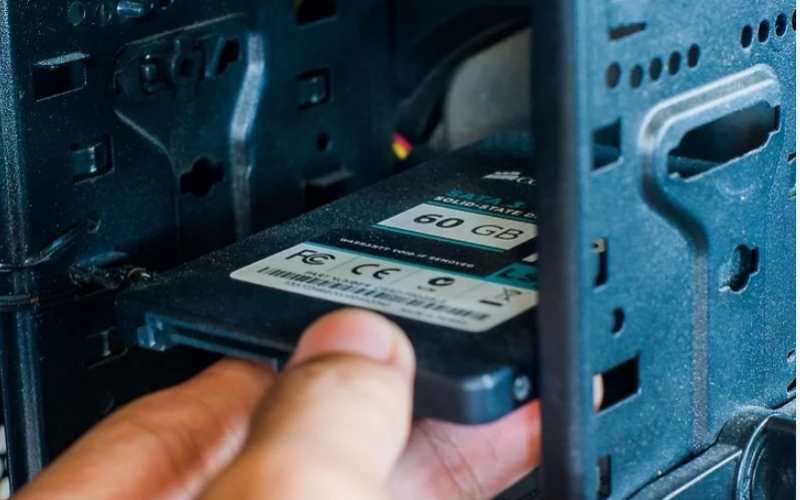
A loose or defective physical connection is one of the most common reasons your SSD doesn’t appear. If the SSD isn’t attached to your computer, you won’t be able to see it in the system, so always check its physical setup before you try fixing the software.
How to Inspect Physical Connections:

If your SSD is still undetected after these steps, continue with the next troubleshooting methods to resolve the "why is my SSD not showing up" issue.
If your SSD is not showing up in BIOS, it might be disabled, improperly configured, or not recognized by the motherboard. The BIOS/UEFI is responsible for detecting and managing connected hardware, including SSDs. If your SSD isn’t listed here, your system won’t be able to use it.
Steps to Check BIOS/UEFI Settings
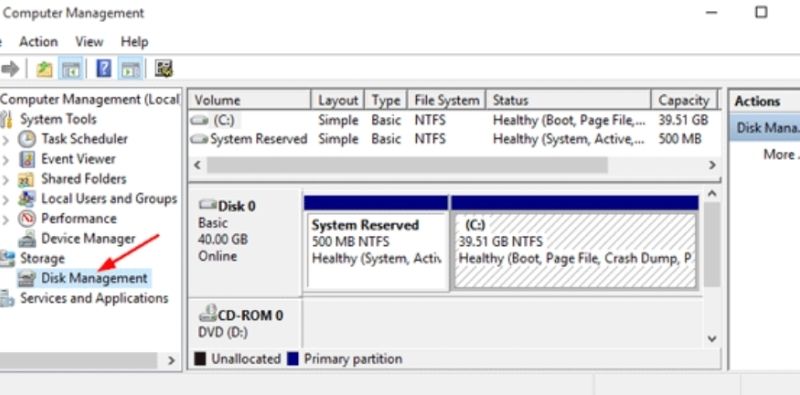
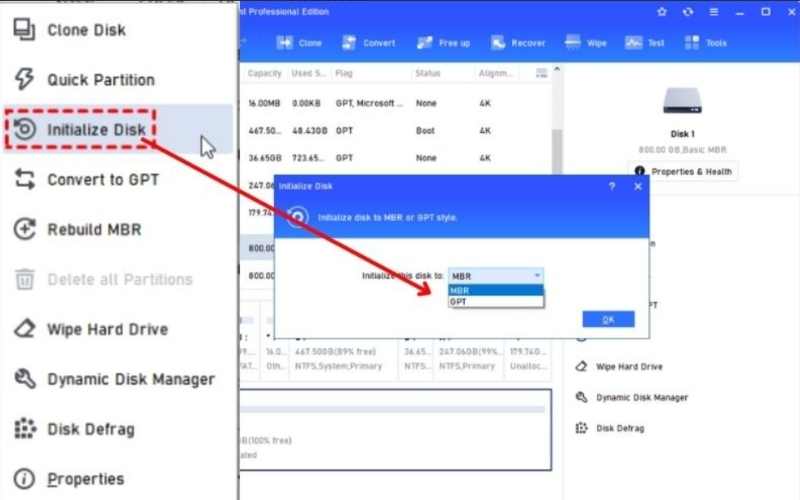
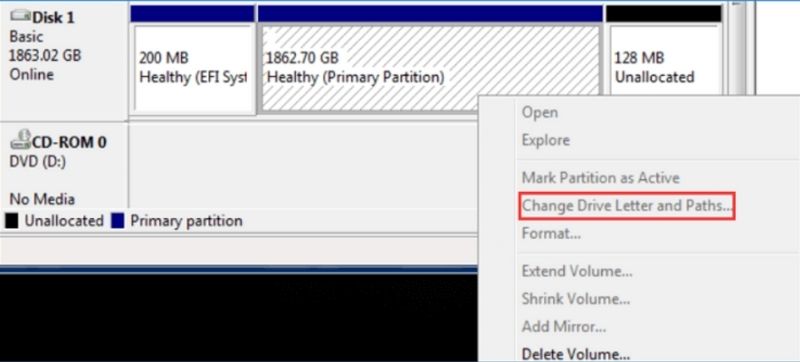
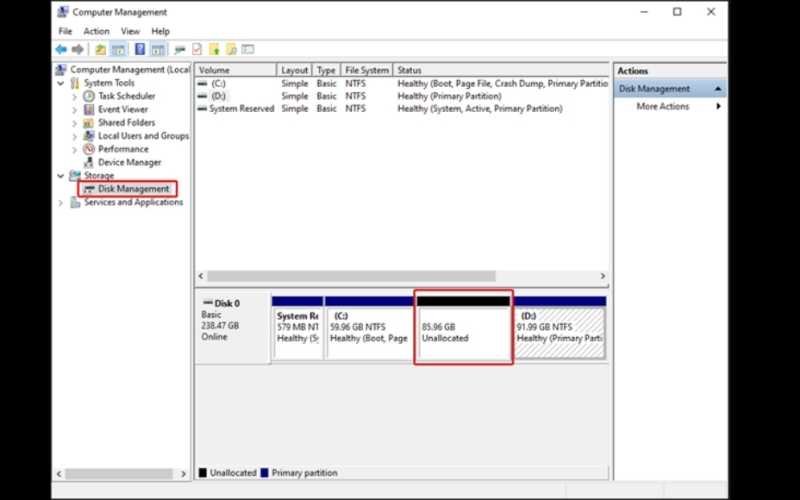
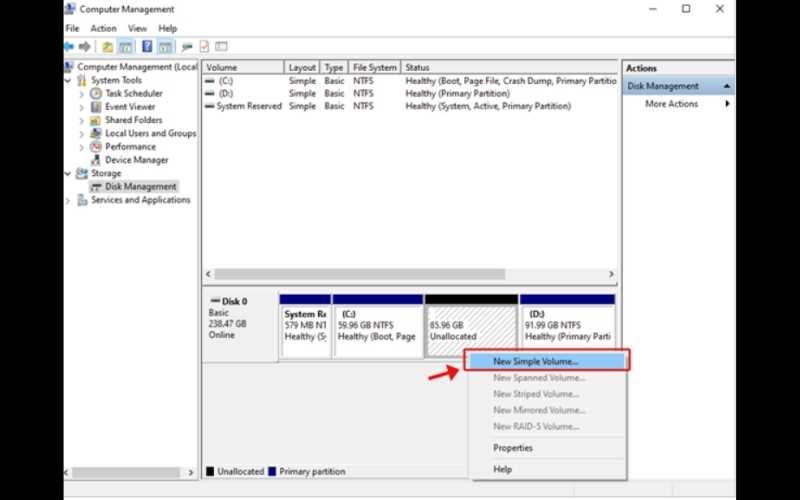
Do you experience this “SSD is not showing up in Disk Management?” it may be uninitialized, lack a drive letter, or have an incompatible file system. You may identify, format, and give your SSD a drive letter to be accessible using the Windows Disk Management program.
Steps to Fix SSD Not Showing Up in Disk Management
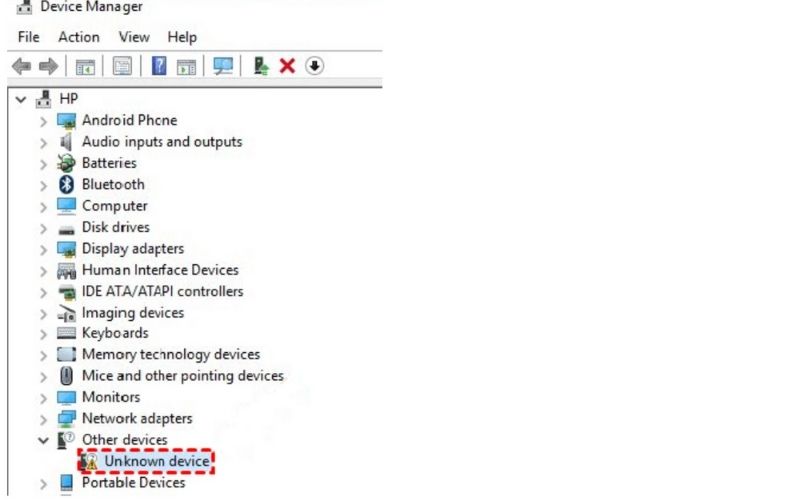
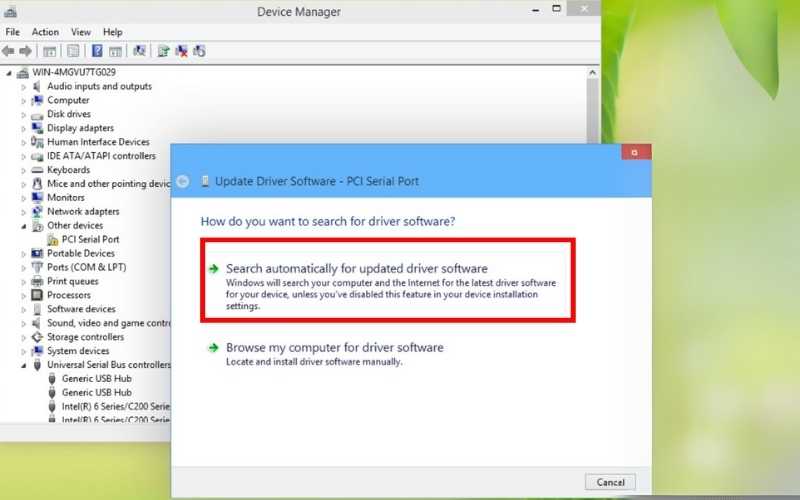
If your system does not recognize your SSD, outdated or corrupted drivers could be the cause. Updating or reinstalling the SSD drivers can help Windows detect the drive properly.
Steps to Update or Reinstall SSD Drivers
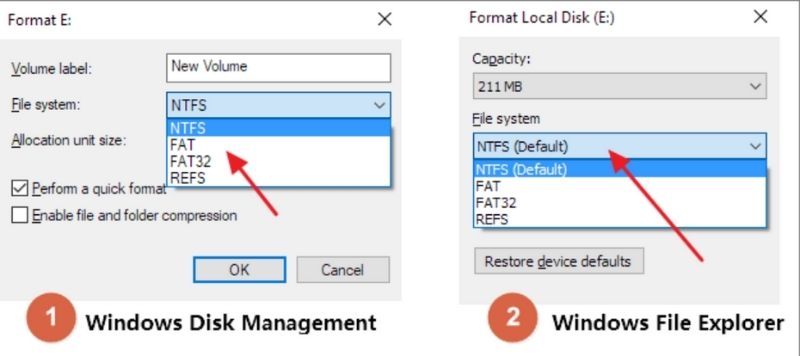
SSD not showing up in File Explorer, but you can detect it in Disk Management. It may not be formatted or assigned a drive letter. Formatting the SSD can make it accessible, but remember that formatting will remove all of the drive's data.
Steps to Format the SSD
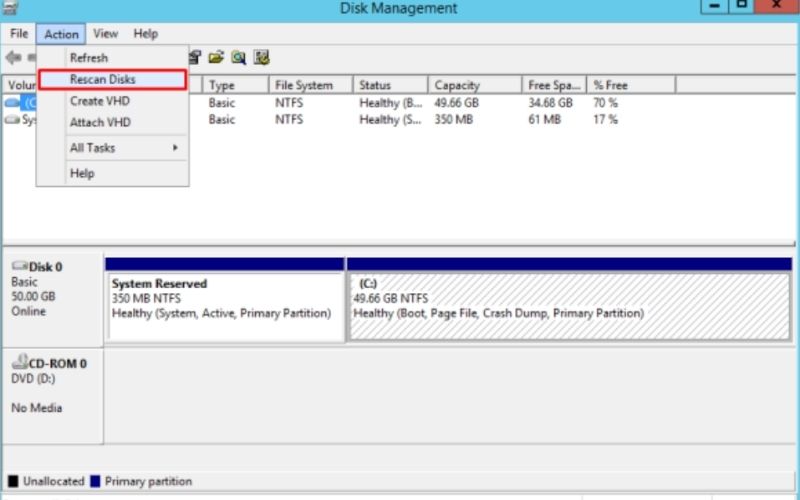
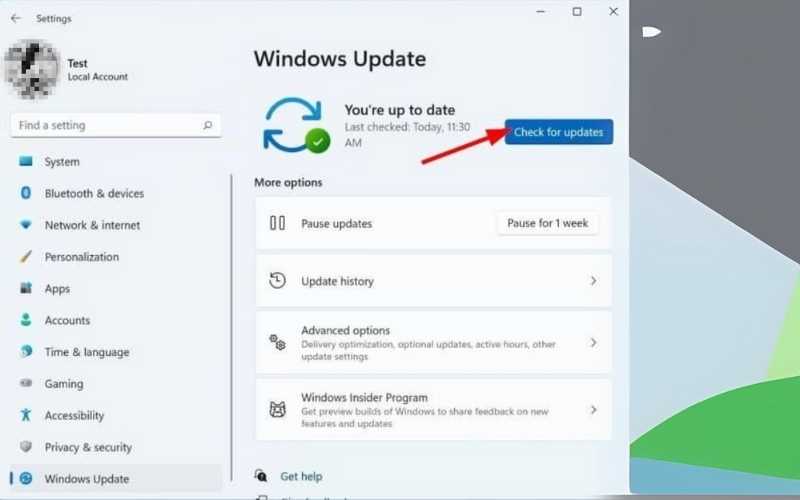
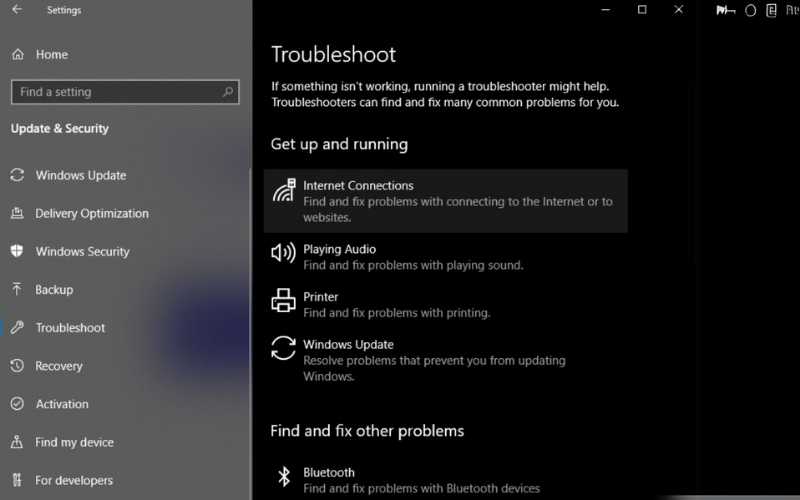
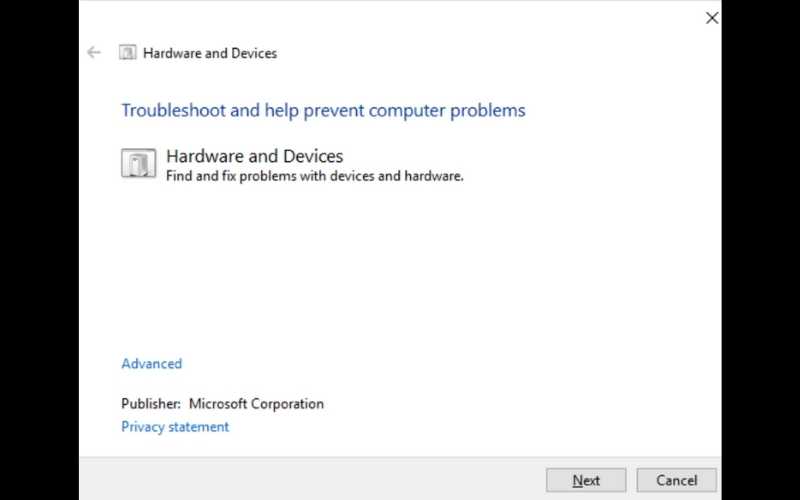
If your SSD is missing, you should run the built-in Windows Troubleshooter. This tool can identify and resolve common storage problems, fixing your SSD not showing in Windows 11 or other systems. It automatically detects potential issues with hardware, drivers, and system settings that prevent your SSD from showing up.
How to Run the Troubleshooter
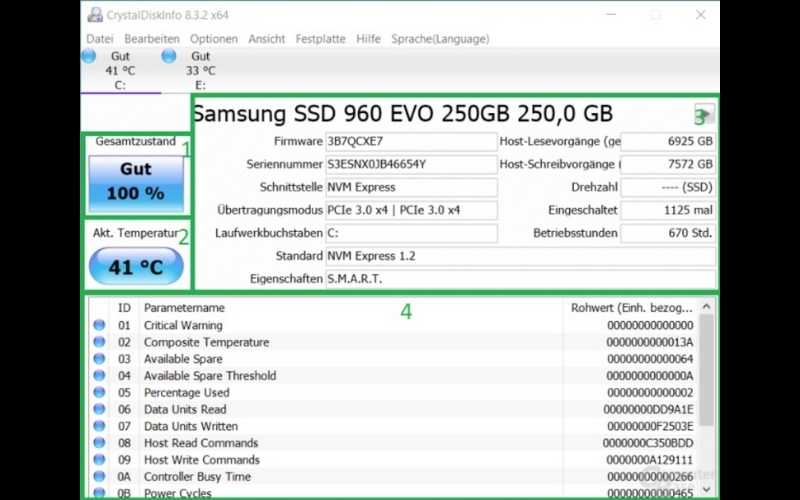
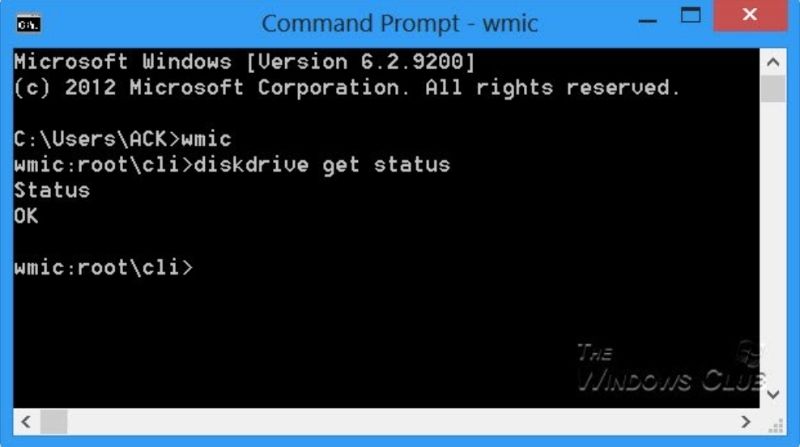
If your SSD is not showing up, it could be due to hardware failure or excessive wear. Checking the SSD’s health can help determine if it has bad sectors, firmware issues, or is nearing the end of its lifespan.
Steps to Check SSD Health
Despite their speed and dependability, SSDs are susceptible to data loss via formatting errors, hardware malfunctions, unintentional deletion, and corruption. Data loss may happen, or you cannot recognize the SSD. A powerful data recovery software like Aiseesoft Data Recovery can help recover lost data quickly and efficiently. It enables you to recover important data by scanning and restoring lost files from SSDs, hard drives, USB drives, and even memory cards.
![]() 100% Secure. No Ads.
100% Secure. No Ads.
![]() 100% Secure. No Ads.
100% Secure. No Ads.
Key Features
• Deep scans for missing or formatted data and quick scans for recently erased files.
• Recover documents, photos, videos, audio files, emails, and more.
• Works with Samsung, Crucial, WD, Kingston, and other SSDs.
• Works with Samsung, Crucial, WD, Kingston, and other SSDs.
• Read-only recovery process that prevents further damage to your SSD.
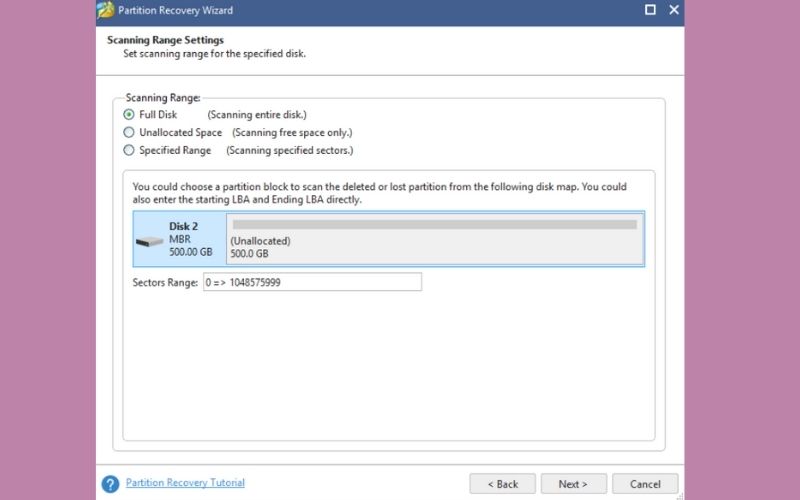
Steps to Recover Data from SSD with Aiseesoft Data Recovery
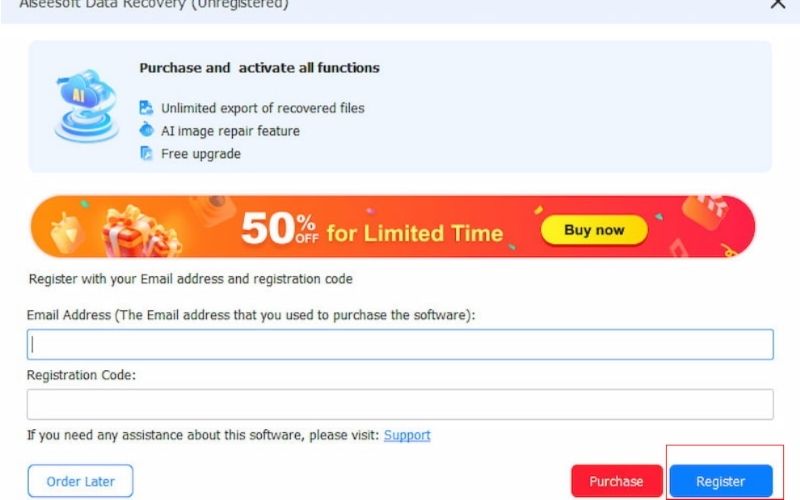
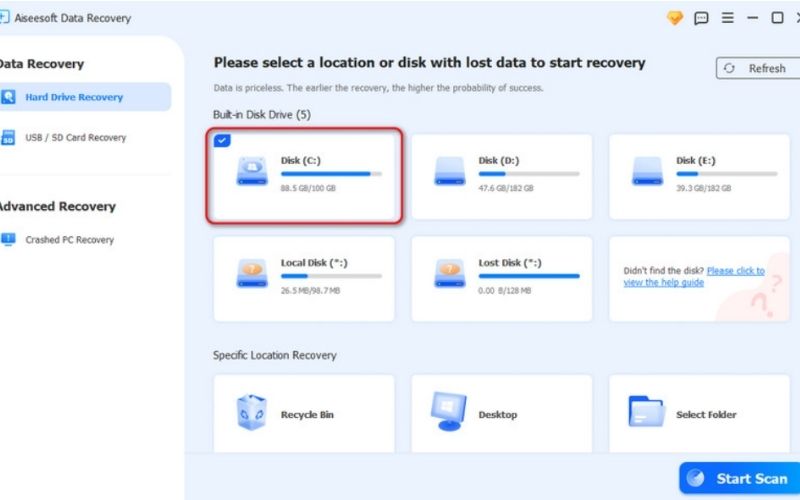
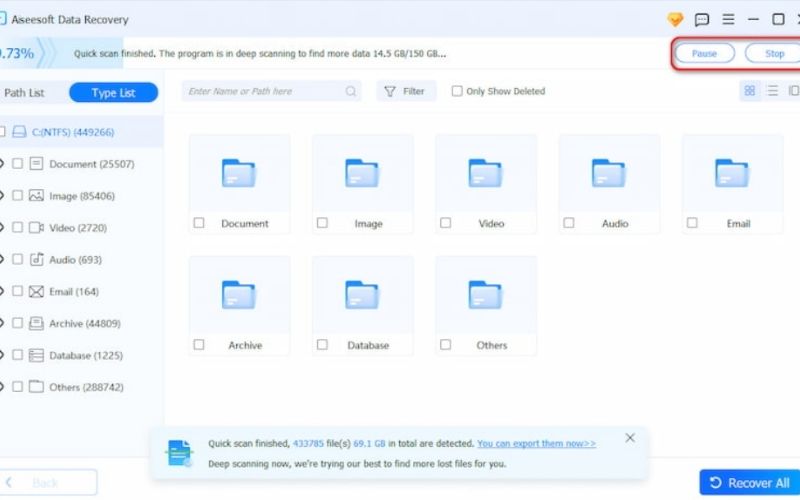
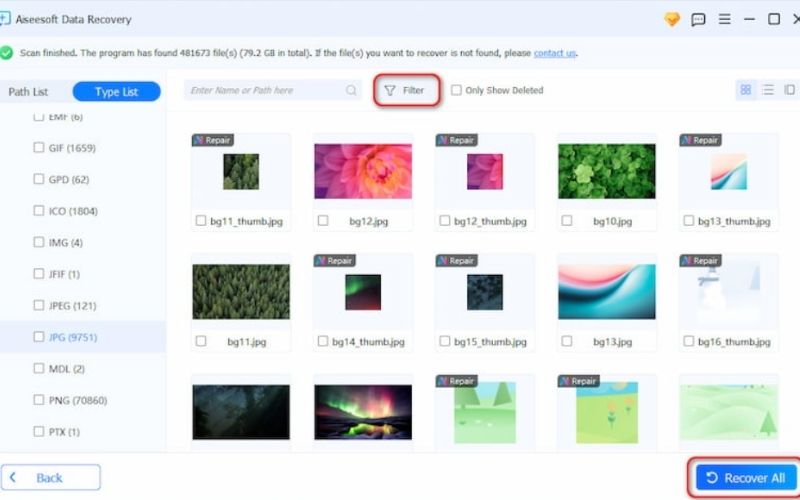
Using Aiseesoft Data Recovery, you can quickly perform SSD data recovery without technical expertise, ensuring your important files are not permanently lost.
Conclusion
A frustrating problem, an SSD that does not appear, is often fixable with the appropriate troubleshooting steps. Be it loss of physical connections, BIOS / UEFI errors, malfunctioned drivers, or disk management errors with proven solutions to fix them. Also, checking the SSD's health and proper formatting can help make your SSD detectable again. If your new SSD is not showing up, you must set it up properly, initialize it, and format it for use. You can also keep your system updated to restore lost files from the inaccessible drive using data recovery software such as Aiseesoft Data Recovery. By taking these steps, you can ensure that your SSD is functioning properly and reduce the risk of any data loss.
 [2025] Top 5 Free Data Recovery Software for SSD
Check our post and discover the best tool to recover data from Solid State Hard Drive. Find the perfect solution for you and retrieve data effortlessly.
 2 100% Working Methods to Clear a SD Card on Windows and Mac
The quick way to clear an SD card is to format it. You can learn the workflow from this tutorial as well as more ways to delete files on your SD card.
 How to Fix Corrupted SD Card Easily without Data Loss
Don’t worry if your SD card is corrupted or damaged. This tutorial is a detailed guide about repairing corrupted SD card to restore its data.
Recover Various Data
1. Free Data Recovery Software
2. Recover Deleted Files in Windows
3. Recover Deleted Files from Recycle Bin Windows
4. Recover Permanently Deleted Emails

Aiseesoft Data Recovery is the best data recovery software to recover deleted/lost photos, documents, emails, audio, videos, etc. from your PC/Mac.
![]() 100% Secure. No Ads.
100% Secure. No Ads.
![]() 100% Secure. No Ads.
100% Secure. No Ads.
*Required field
*Please enter a valid email
