Aiseesoft Screen Recorder
 100% Secure. No Ads.
100% Secure. No Ads.
What is the best software to record screens on Windows?
Whether you are trying to capture your gameplay moments, create tutorials, or simply save current screen content, knowing how to record your computer screen is often an essential skill.
Unlike a screenshot, which can be done easily through various daily apps. When it comes to screen capture or recording on Windows, you may have no clue which tool you should use. This guide shares five easy ways to screen record on Windows 10 and 11. You can compare them and select the right tool for the job.
Below is a quick breakdown of the five screen recording methods. You can compare them based on the main features and limitations.
| Method | Key Features | Watermark | Best For |
| Aiseesoft Screen Recorder | High-quality recording up to 4K and 8K Scheduled recording Real-time annotations AI-powered noise removal and audio enhancement Multiple screen and audio recording modes |
No | Professional tutorials, gameplay, webinars, and full-screen captures with system audio |
| Windows Snipping Tool | Simple, built-in, perfect for quick clips Windows 11 only |
No | Quick, short screen captures on Windows 11 |
| Xbox Game Bar | Gaming-focused Instant overlay, basic controls, Windows 10/11 |
No | Quick gameplay clips and single-app recording |
| Microsoft PowerPoint | Insert recording directly into a slide | No | Quick presentation recordings and basic demos |
| OBS Studio | Completely free Unlimited scene switching Live streaming |
No | Advanced layouts, multi-source overlays, and live streaming |
Actually, Windows 11/10 comes with native recording features. Moreover, many third-party recorders can help you capture your screen with ease.
As mentioned, Windows offers built-in tools for quick screen captures. However, they all have their limitations, like restricted recording areas, no advanced functions, poor stability, and others.
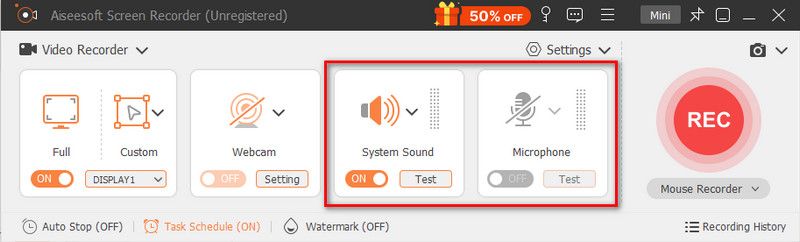
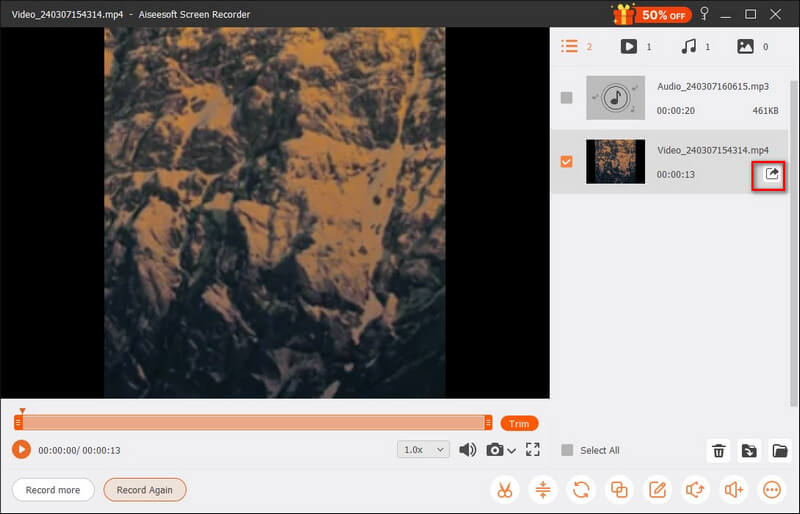
If you are looking for a dedicated screen recording program for Windows, turn to the reliable Aiseesoft Screen Recorder. It is a top-tier choice for most users who need high-quality output (up to 4K/8K) without any technical skill. Besides the high-definition image recording, it can capture clear sound from the internal system audio and microphone. Its advanced AI can automatically enhance the overall video and sound quality. Moreover, Aiseesoft provides necessary annotation and editing tools.
100% Secure. No Ads.
100% Secure. No Ads.
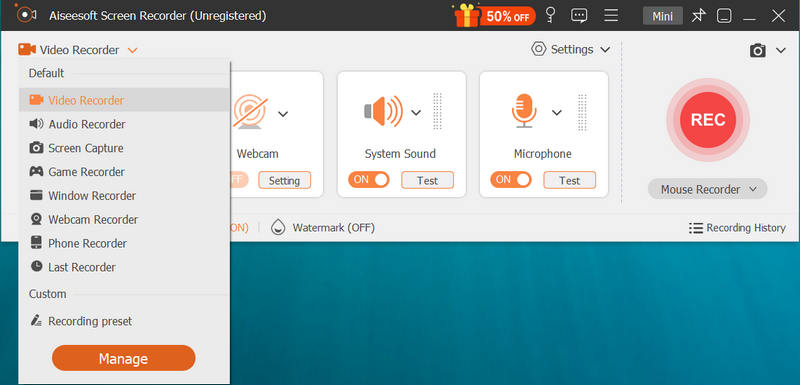
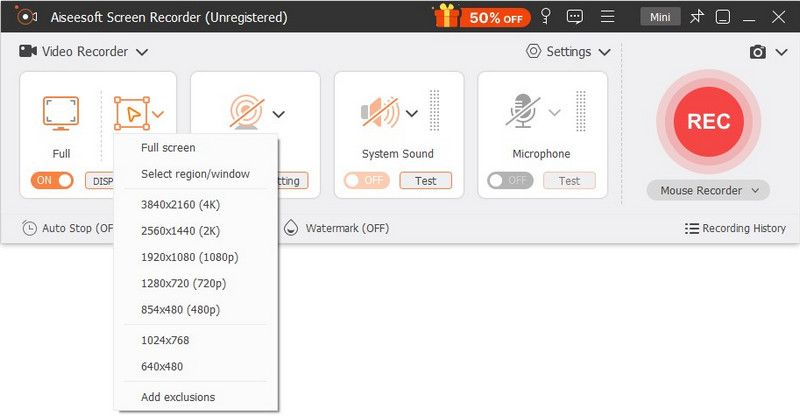
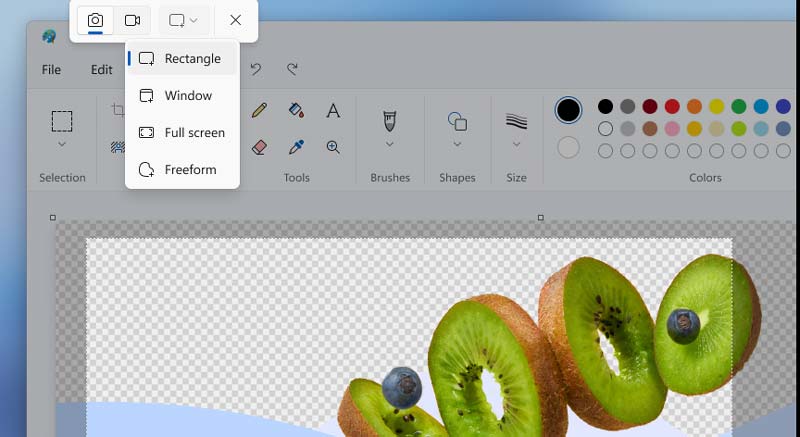
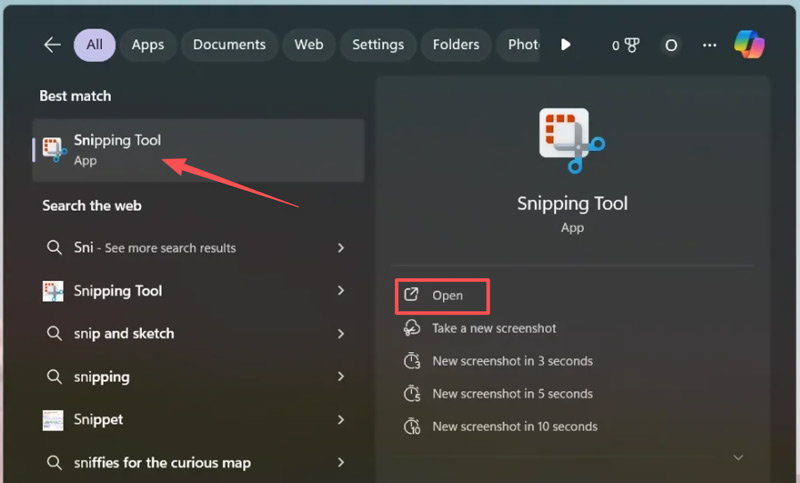
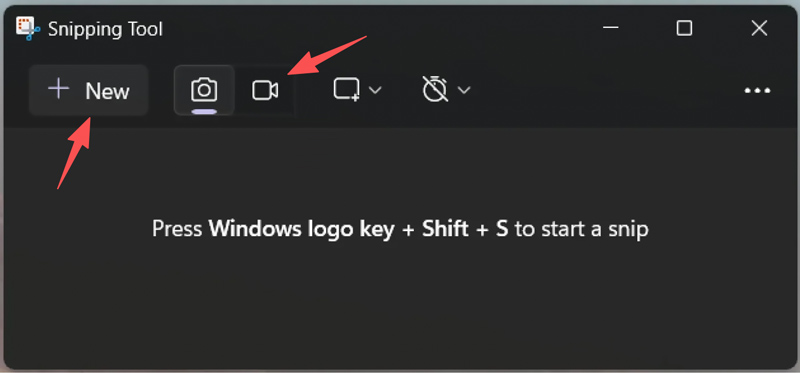
If your PC runs the latest Windows 11, you can start with the built-in Snipping Tool for quick screen captures. This native recorder is ideal for recording short clips.
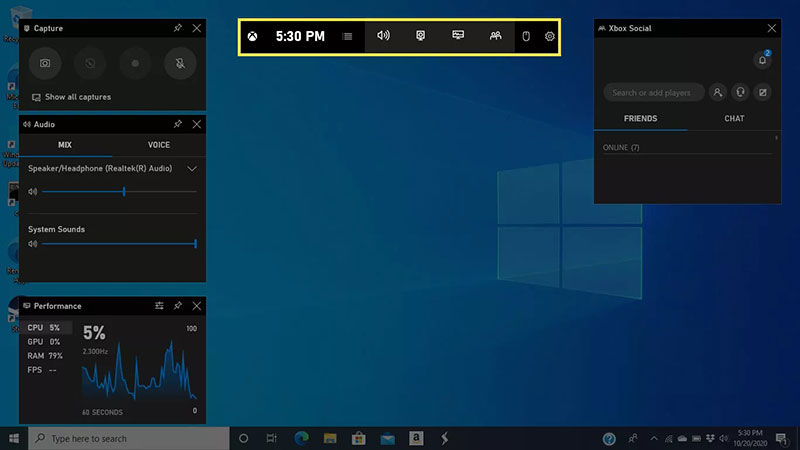
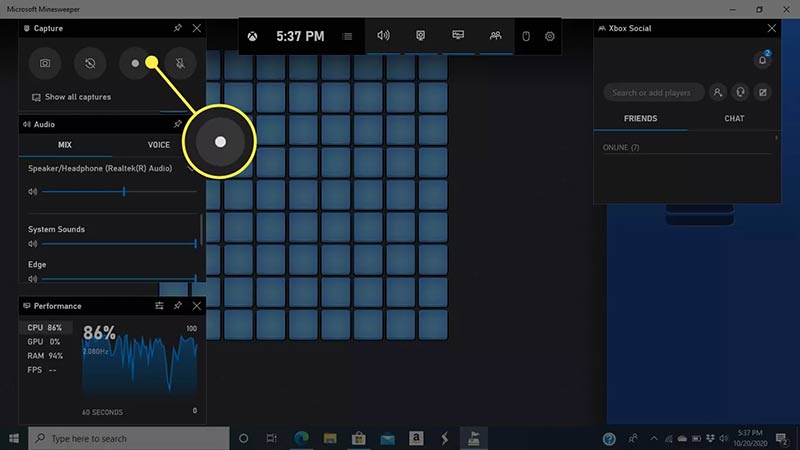
Whether you are using Windows 11 or an older Windows 10, you can rely on the preinstalled Xbox Game Bar to capture screens with ease. It is primarily designed to help gamers capture gameplay highlights. It can also help you capture various activities on your PC.
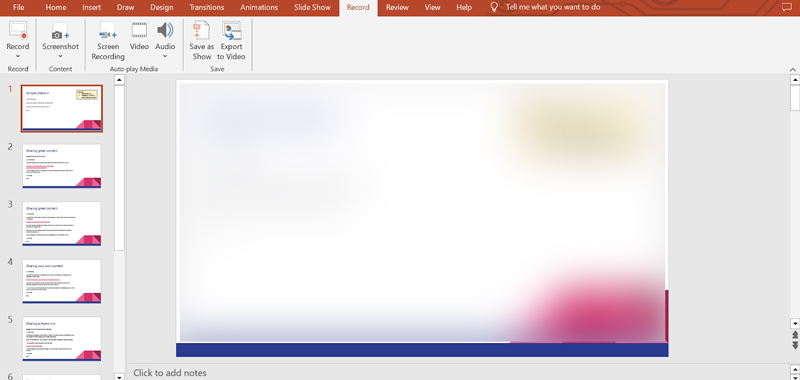
If you often edit or create presentations using Microsoft PowerPoint, you can use it for a screen recording. The tool is perfect for teachers, students, and office workers who need to capture the screen content and add it directly into a presentation.
Open PowerPoint on your PC and go to the Insert tab. Click Screen Recording and then drag the crosshair to select your recording area. After that, click Record to capture the screen.
In some newer PowerPoint versions, you can directly click the top Record menu, select Screen Recording, and then adjust settings for your screen capture.
If you prefer a free screen recording program to capture multiple windows at once, OBS Studio is a great choice. It allows you to record your screen and a browser window simultaneously.
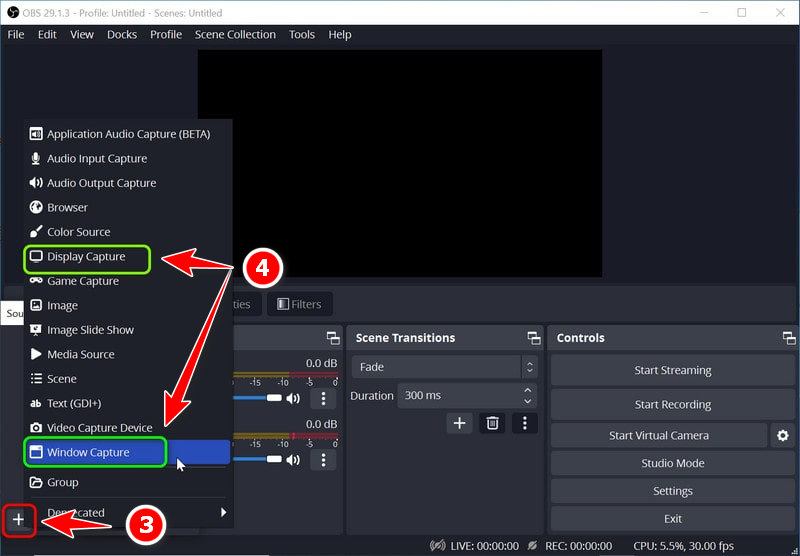
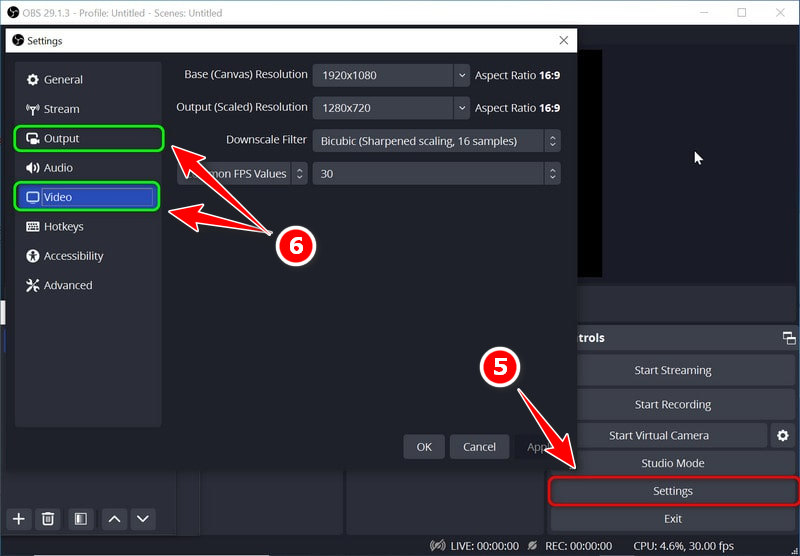
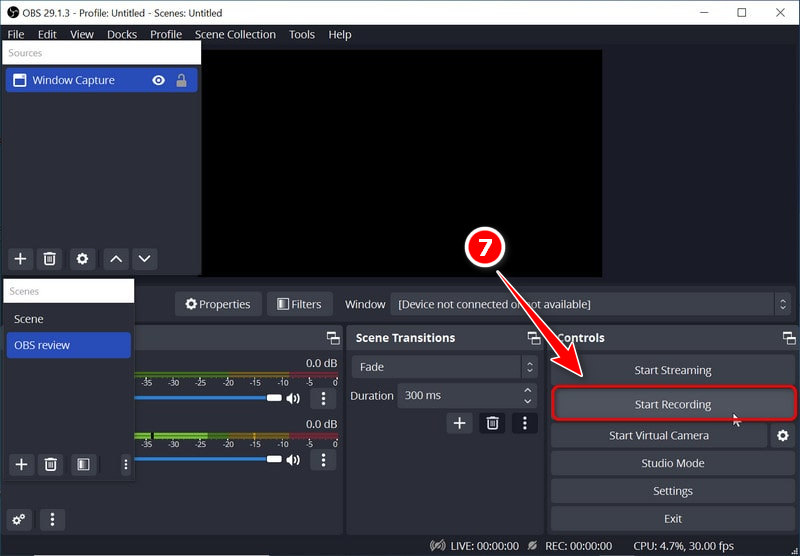
How do I screen record on Windows 11 with the webcam?
The native Xbox Game Bar and the Snipping Tool don’t allow you to record the screen alongside the webcam. Instead, you can use the built-in Clipchamp to capture your face through the webcam. Also, you can rely on a dedicated, third-party recording tool like Aiseesoft Screen Recorder to screen capture on a Windows 11 PC with your face and voice.
Where are screen recordings saved on my Windows 11 laptop?
If you screen record on Windows 10 or 11 using the Xbox Game Bar, your recordings will be stored in a dedicated Captures folder. If you use the built-in Snipping Tool to screen capture on Windows 11, you will be asked to choose a save location each time. If you are using a different recorder app and can’t find its recordings, you can open the Settings or Preferences menu, go to an Output or Recording section, and then check the related save path.
Does screen recording lower my computer’s performance?
Yes, your screen recording will always have some impact on performance. It will consume system resources and cause a minor hiccup or a noticeable slowdown. That also depends on the tool and settings. With the right settings, a powerful screen recorder that supports hardware acceleration, and a modern, reasonable computer, the recording may not affect your other operations.
Conclusion
This post has shared five helpful methods to screen record on Windows 11/10. You can select a preferred way based on your goal. If you start with the native Xbox Game Bar or the Snipping Tool for quick captures. If you want high-quality, professional results with advanced features, turn to a dedicated tool like Aiseesoft Screen Recorder or OBS Studio.
 Latest ScreenRec Review: Convenient Desktop Recording Tool
Our in-depth review of ScreenRec shares everything about this convenient screen recording tool with its pros, cons, features, and a great ScreenRec alternative.
 How to Fix Windows 11 Snipping Tool Not Working Quickly
Windows 11 Snipping Tool sometimes doesn’t work well. Don’t worry. This article will tell you the reasons and offer 8 easy solutions with detailed steps.
 [Solved] How to Screenshot Without a Print Screen Button
How to screenshot your computer without a PrintScreen button? You can solve this problem using several options we have listed below.
 Leave your comment and join our discussion
Aiseesoft Screen Recorder is the best screen recording software to capture any activity like online videos, webcam calls, game on Windows/Mac.
100% Secure. No Ads.
100% Secure. No Ads.

*Required field
*Please enter a valid email

