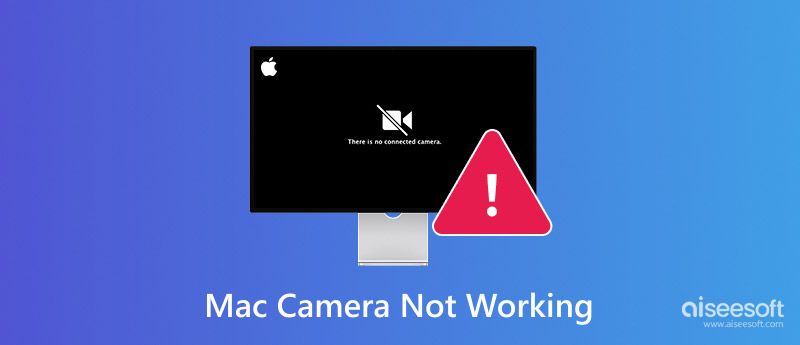
Some people reported that Mac camera suddenly stopped working during video calls or got an alert said no camera connected when opened FaceTime or Skype.
In fact, camera errors on Mac computers are usually minor, and the troubleshooting solutions can be as simple as just rebooting your computer.
If you are having trouble using the built-in camera on Mac, try the 5 fixes below to fix Mac camera not working.
| Workable Solutions | |
| Solution 1: Reboot Mac Computer | Go to tutorial |
| Solution 2: Force Quit VDCAssistant | Go to tutorial |
| Solution 3: Reset Mac Camera Settings | Go to tutorial |
| Solution 4: Update software | Go to tutorial |
| Solution 5: Quit macOS Camera Processes | Go to tutorial |
| Solution 6: Allow Camera Access on Mac | Go to tutorial |
| Solution 7: Check Mac Camera System Report | Go to tutorial |
| Solution 8: Remove Apps Screen Time Limit on macOS | Go to tutorial |
First of all, if mechanical and hardware problems cause the error that Mac camera is not working, it is impossible to fix and needs to be replaced. On the other hand, the software problems that lead to the error include:
1. The application is not compatible with your camera on Mac machine.
2. Your Mac camera settings are improper.
3. Some processes are corrupted, which may damage applications' ability to access the camera on Mac.
4. Outdated software could trigger a variety of problems, including camera stops working on Mac.
Restarting is the simplest troubleshooting. It is able to end all process and re-load the operating system.

If your Mac keeps shutting down and restarting, you need to find solutions to fix kernal panic on Mac.
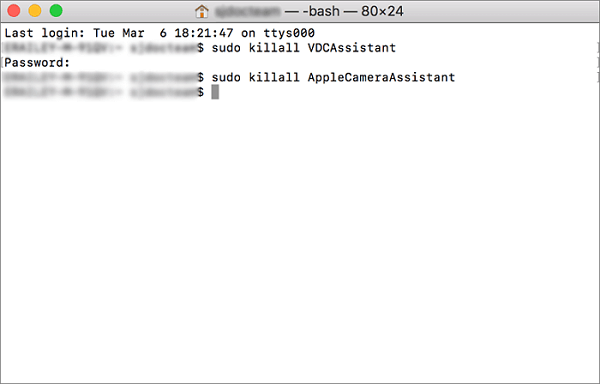
The process named VDCAssistant is responsible for activating Mac camera. When the camera is not working on Mac, force-quit the process could fix the problem.
If FaceTime camera is not working on Mac, you can resolve the problem through resetting camera settings.
If it still not work, just try to reset Mac to enable camera working easily.
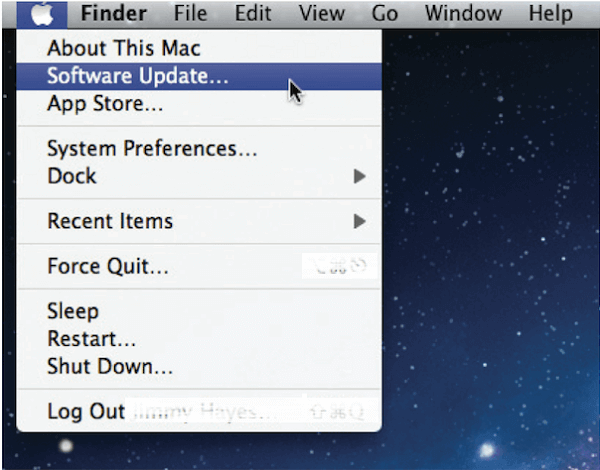
The latest but not least fix is to update software and firmware.
If your camera is not working on Mac, ending the camera processes can often fix the issue. (And if you’re worried about data loss, it’s always smart to back up your important files beforehand. Or, you can get a Mac data recovery software to help you retrieve the lost files.)
Here’s how to quit those camera processes:
You need to note that your system might ask for your admin password. Just type it in and press Enter. After these steps, restart your Mac and check if your camera is working again. If not, don’t worry, there are still other solutions to try!
A system update can disrupt camera permissions, causing your camera to stop working. In such cases, you’ll need to newly allow camera access on your Mac.
Here’s how to reconfigure your camera permissions:
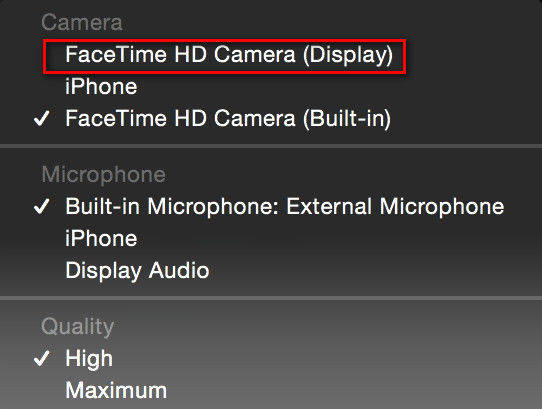
If your Mac camera still isn't working, checking the System Report can help you diagnose the issue.
Here’s how to access it:
However, if you don’t find any camera information here, it means your system isn’t detecting the camera at all. Unfortunately, if this happens, there’s nothing more you can do on your own. You’ll need to contact Apple Support to fix the problem.
There is also a situation where your Mac camera may work fine in one app but not in another. First, pinpoint the problem by testing your camera across different applications. If it’s inconsistent, the issue might be related to your Screen Time settings. Removing app-specific Screen Time limits can often resolve this.
After these steps, restart your camera app to see if the issue is solved.
As we mentioned above, troubleshooting failure could cause more problems, such as data loss. Aiseesoft Mac Data Recovery is a professional tool to help you recover data in most situations.
Downloads
![]() 100% Secure. No Ads.
100% Secure. No Ads.
![]() 100% Secure. No Ads.
100% Secure. No Ads.
How to recover Mac data after fixing Mac camera not working
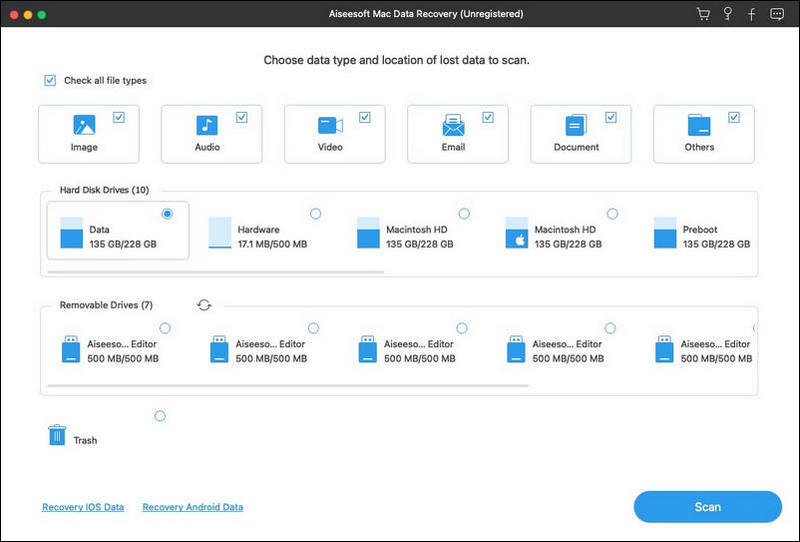
Install Mac OS X 10.6 or above on your computer and launch it. Locate the file type area and select what you want to get back, like Image, Audio and more. Then choose the location that your files stored originally.
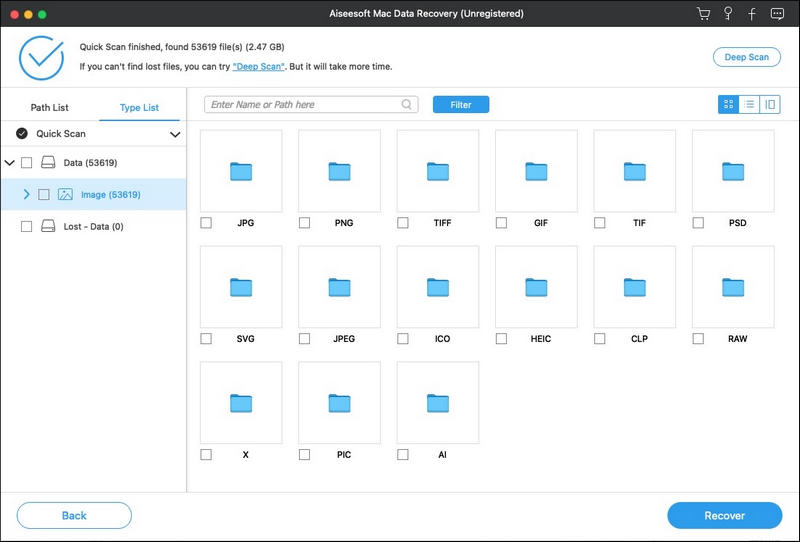
Once click the Scan button, the program will work automatically. When it is done, you will be brought to the preview window. Here you can view lost files by category.
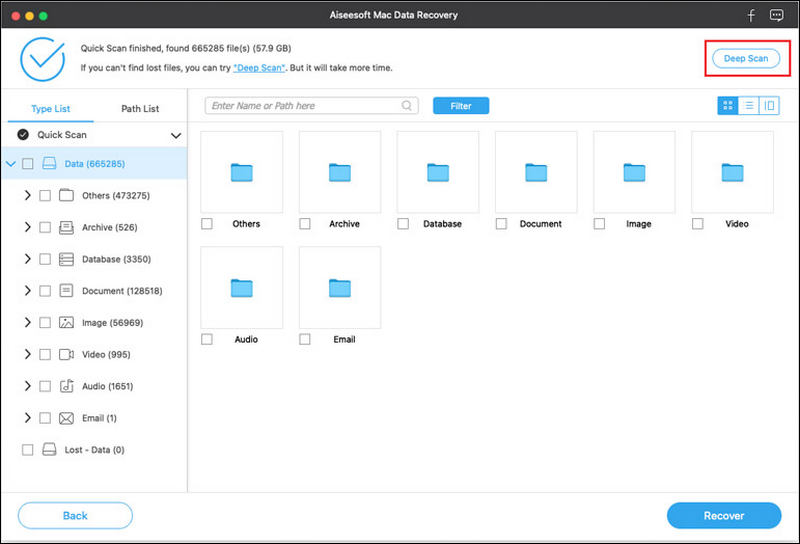
If you cannot find desired files, perform the deep scan. Select all files that you want to get back and hit the Recover button. When prompted, choose a specific folder to save the files and start the process.
Conclusion
Based on the sharing above, you should understand what you can do when Mac camera is not working. In addition to concrete solutions, we also shared a tool to recover lost data during troubleshooting, Aiseesoft Data Recovery for Mac. Now, you can feel free to solve the problem on your Mac computer.
 How to Send Large Audio Files from iPhone to iPhone, Android or PC
There are several reasons that you need to send large audio files from iPhone to another device. This article tells the best way to do it from iPhone to Android, PC or another iOS device.
 How to Delete Messages or Clear Conversations on Snapchat
Want to delete Snapchat messages and conversations? You can learn how to delete sent and unopened messages on Snapchat, and the Snapchat messages that other person saved, or clear all Snapchat conversations on iPhone in this post.
 Top 5 Solutions to Fix WhatsApp Backup Stuck on Android
Having encountered WhatsApp backup stuck at 100% on your Android phone? Check the post to learn how to fix this backup error on Android.
Recover Various Data
1. Free Data Recovery Software
2. Recover Deleted Files in Windows
3. Recover Deleted Files from Recycle Bin Windows
4. Recover Permanently Deleted Emails

Aiseesoft Data Recovery is the best data recovery software to recover deleted/lost photos, documents, emails, audio, videos, etc. from your PC/Mac.
![]() 100% Secure. No Ads.
100% Secure. No Ads.
![]() 100% Secure. No Ads.
100% Secure. No Ads.
*Required field
*Please enter a valid email
