People spend their time mostly taking photos in almost everything they do. Aside from shooting places, they also capture food, events, or any unforgettable moments. Yet, as we know, digital camera tools, including mobile cameras, are associated with large file sizes. As a result, it will take a lot of memory space on your device. Also, your patience will be tested when uploading online due to the large file size because it takes too much time.
BIn this case, compressing pictures is highly recommended. Here, we collected the best and most effective programs to compress pictures or lessen photo sizes while quality is preserved. There are online and desktop tools, so you can select which method fits you perfectly. Learn how to get this done and the tools you can use.
Aiseesoft Image Compressor Online is one of the most excellent programs for compressing images. You can use the program totally free of charge, and it accepts a wide range of image formats. It can process JPG, PNG, JPEG, TIFF, and much more. With its intuitive user interface, users can shrink the image's file size in just a few clicks. Moreover, it has a clean interface, allowing users to accomplish their tasks quickly and efficiently.
Also, it has a batch compression function. With this function, users can compress multiple image files simultaneously. What is great about this tool is that it does not add a watermark to the output file. Aside from that, there is no need for you to download, register, or pay even a dime because the tool is a 100% free web service.
Key Features:
Here are the steps to compress pictures online.
Before anything else, open your favorite browser on your computer and type in the tool link on the address bar to enter the program's main page.
Click the Add Images button from the homepage, and your file folder will launch automatically. From there, look for the photo you wish to compress and double-click on it to add it to the program.

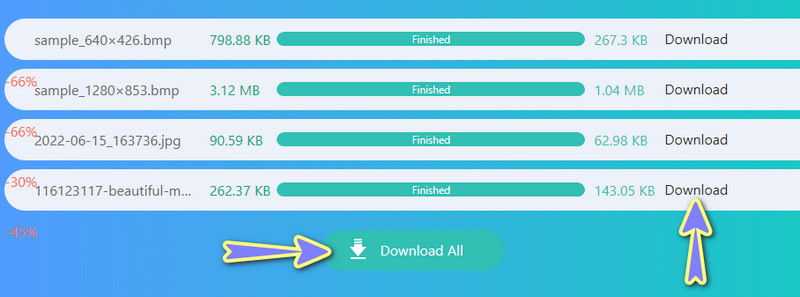
After successfully uploading the photo, the program will compress it immediately. Hit the Download button to save one processed photo at a time, or click the Download All button to save all the processed photos.
Perhaps you want to lessen the photo sizes offline. In this case, you can utilize desktop tools to get this done. Know more about these tools by reading below.
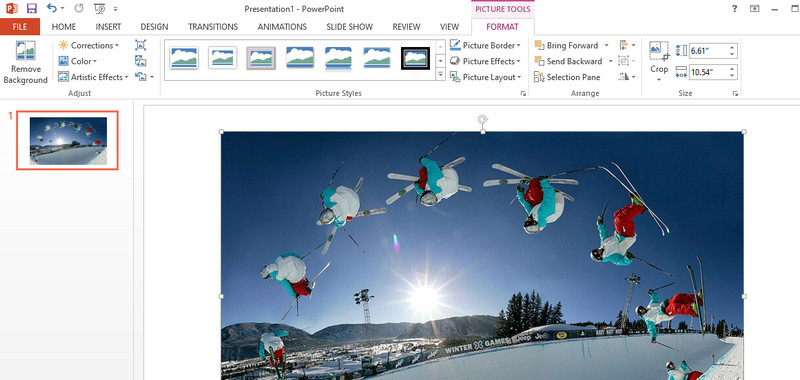
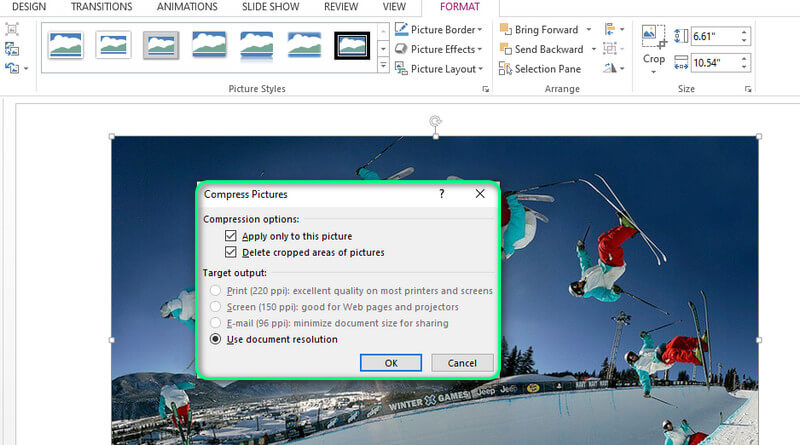
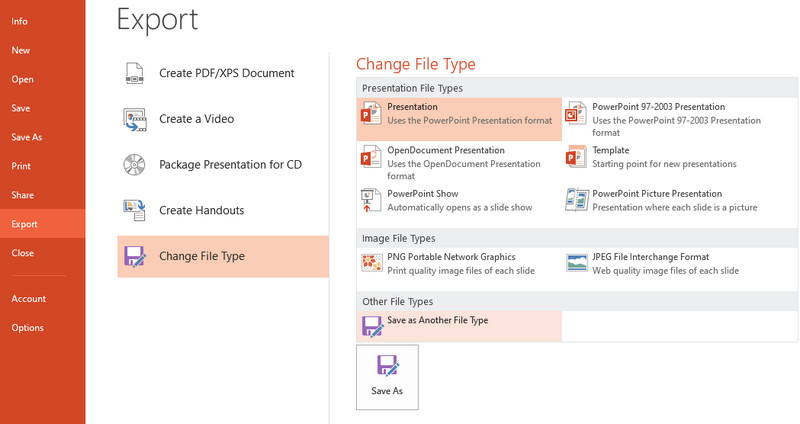
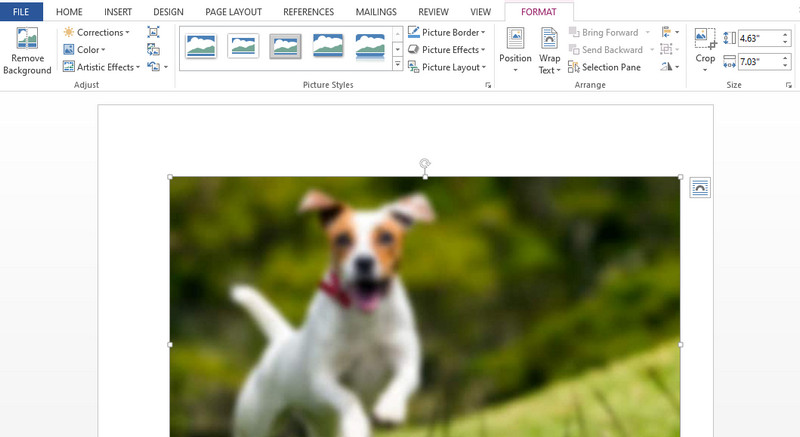
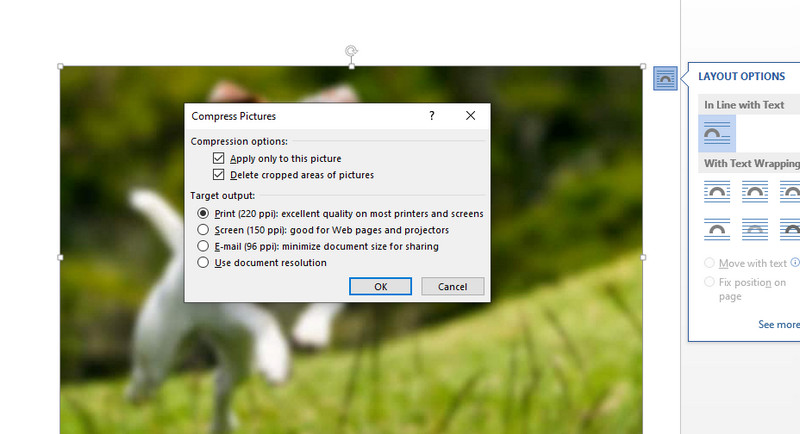
Microsoft PowerPoint is not just for making presentations and visual aids. This program is also helpful for compressing and reducing the size of an image file. In making presentations, it is easy when you are using PowerPoint. The same goes when compressing image files. You will have little to no trouble when going through these steps. And that is a valuable skill to learn, so you do not have to use another program for compressing images. On the other hand, follow the guidelines below to learn how to compress pictures in PowerPoint.
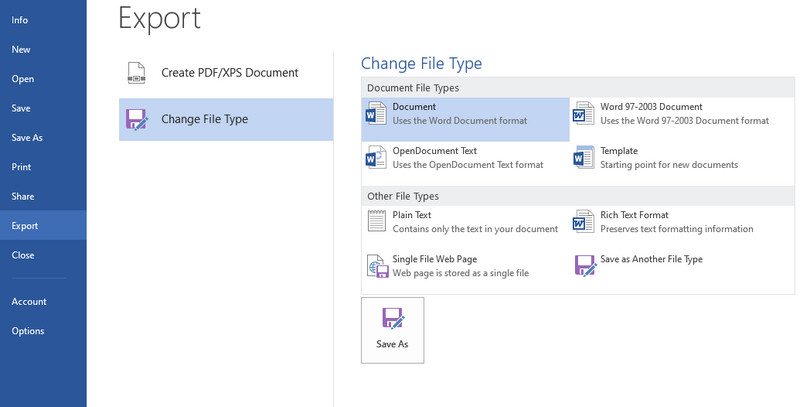
Word is another most valuable product of Microsoft. It does not only allow you to process words and make documentation. It can also help users to compress their large images. Likewise, it enables users to process multiple photos by applying the changes to all the images added in Word. Moreover, you can change the resolution perfectly for web and email. On top of that, it only takes a few simple steps to compress pictures in Word. Read on the outlined steps below to learn the procedure.
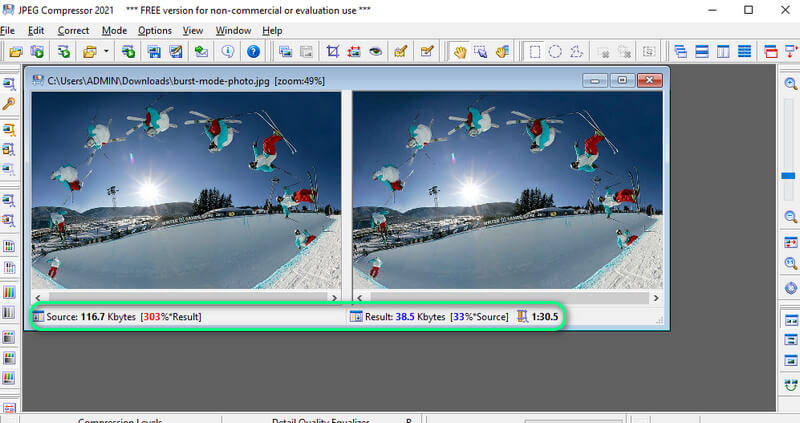
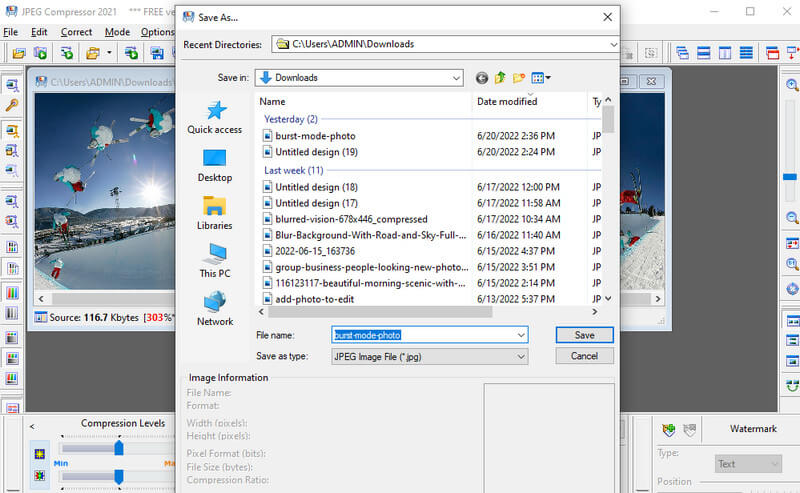
JPEG Compressor is an excellent tool for compressing JPEG files and resizing digital images. The program allows you to resize photos according to your specified dimension and file size. Whether the photo is for web, graphics, sending pictures, email, ads, and much more. More importantly, you can expect that it will retain the quality of the original photo as it effectively reduces file size without losing the picture quality. Therefore, it will take less disk space or make the pictures on your website load faster. Follow the instructional guide below if you wish to compress a picture's size using this tool.
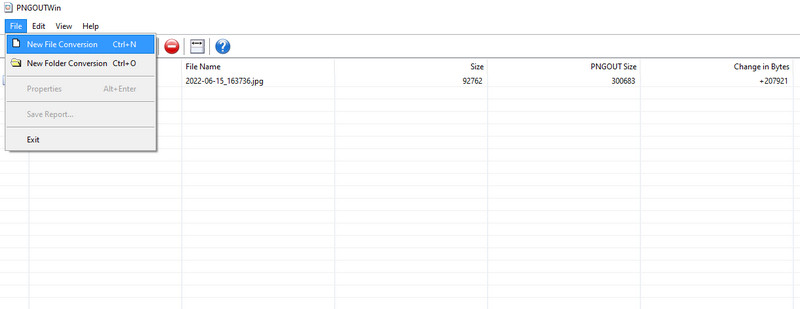
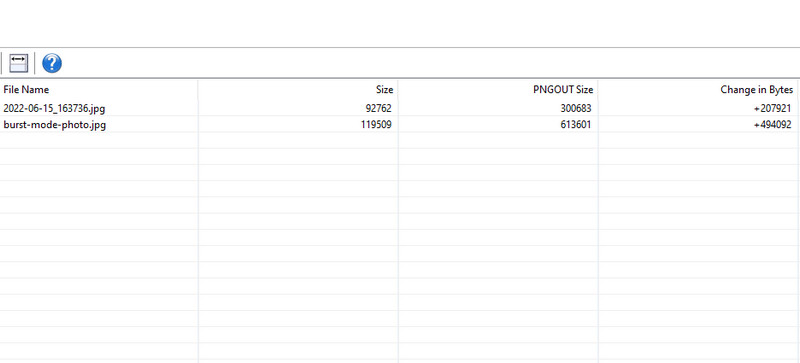
If you are looking for an easy-to-use desktop tool to transform your image files into more useful for ads, websites, or graphics, PNGOUTWin is a nice tool. Furthermore, you can use the tool, especially if you are a novice in photo editing. That is because it has an intuitive user interface. Apart from that, you can also utilize the program as an image converter. That allows you to transform formats such as GIF, BMP, TGA, etc. See the tutorial below for a step-by-step process on how to use this program.
Smaller images allow users to download or upload online. On other occasions, your presentation will have a small file size when the pictures added to it are small in file size. Aside from compressing files, you can also employ the following methods.
You can try cropping an image to make small pictures. This method is advantageous when you must cut out a specific photo part. Just be mindful of cutting edges that might result in a bad look at the photo.
Resizing is usually associated with the size of the photo. So, when transforming photos into a smaller version. Moreover, the dimension/pixel will be less affected, or it will be preserved.
Not all software is created equal. In this case, you can explore other programs for editing photos. You may try Adobe Photoshop, Paint, Canva, Pixlr, and many more. Get hands-on experience with these programs and see which tool works for you best.
How can I compress a photo to 50 KB?
It is possible to compress your photo to 50 KB when the original file size is around that size. Say, 100 or 70 KB. But some programs allow you to customize the size according to your needs.
Can I improve the quality of a compressed photo?
Yes. Various tools can be used to upscale photos. Just be mindful of the possibility of an increase in the file size.
How do I compress BMP files?
Since BMP files are significant in file size, you can still make them useful by shrinking their size using a compressor. Simply look for tools that support BMP because not all compressors support this image format.
Conclusion
Listed above are practical and effective ways to compress pictures. You can try the online method if downloading a program is not your cup of tea. On the other hand, you may switch to desktop tools for working offline.
 5 Effective Photo Resizers You Must Have! [2024 Updated]
Do you need a photo resizer on your desktop? Well, you can read this article entirely to know what are the available tools on your platforms.
 Ultimate Guide on How to Resize an Image on iPhone [Easily & Effective]
How to resize an image on iPhone? This article will give you a complete tutorial on how to remove and resize the image dimension on iPhone.
 Compress Audio: Reducing Audio Media Size on Desktop and Mobile
Discover some of the superb compressors in this post and learn to compress audio files while preserving sound quality effortlessly.
Image Compressor
GIF Compressor PNG Size Reducer Image MB to KB Converter Photo Size Reducer Image Shrinker Imagify Review SVG Compressor TinyPNG Review Snapchat Filter Size Twitter Image Size JPG Compressor
Video Converter Ultimate is excellent video converter, editor and enhancer to convert, enhance and edit videos and music in 1000 formats and more.
![]() 100% Secure. No Ads.
100% Secure. No Ads.
![]() 100% Secure. No Ads.
100% Secure. No Ads.
*Required field
*Please enter a valid email
