I upgraded my PC to Windows 10 and it got stuck on boot when scanning and repairing drive C, even if a driver test eventually ends up and the system starts up, the procedure is repeated the next time, how to fix this problem?
If you are facing the same issue, you can get the basic knowledge about it and how to get rid of the problem of scanning and repairing drive stuck quickly.

Windows Stuck at Scanning Repairing Drive
If your PC is shut down inappropriately, like turn off abruptly, the next time when you turn it on, Windows will initiate scanning and repairing drive process. In brief, it is a self-test process to discover and repair the corrupted system files. The common causes of scanning and repairing drive include:
1. A PC is turned off in an incorrect way.
2. There are bad sectors on the hard disk that stores system files.
3. The computer is attacked by virus or malware.
4. Outdated drivers or improper configured drivers.
5. Unknown reasons.
For ordinary people, it is impossible to diagnose what causes Windows 10 stuck at scanning and repairing drive, but you still can fix it with the methods below.
Many people use external keyboard and mouse, which are connected to computers via USB cord. Sometimes, Windows may misunderstand the USB device and boot from it. So, if your PC works abnormally, the first thing you should do is to remove all peripherals, including USB keyboard and mouse.
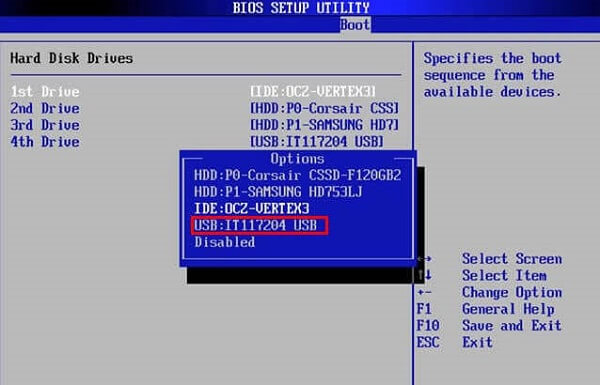
When you stuck at scanning and repairing drive C, you should check if the boot drive is set correctly in BIOS.
Step 1 After Windows 10 completely loads, hold down the Shift key and click Shut down on the boot menu.
Step 2 Hold the F2 button and press the power button. When the BIOS screen shows up, release the F2 button.
Step 3 Go to the Boot section, check the priority list and place your boot drive to the top. Restart your PC, and it should work well.
This way also works when your Windows gets stuck in blue screen Bad_Pool_Header.
Safe Mode is always a good way to fix various problems on Windows, including stuck at scanning and repairing drive.
Step 1 Repeatedly press the power button to shut down until the Recovery screen pops up.
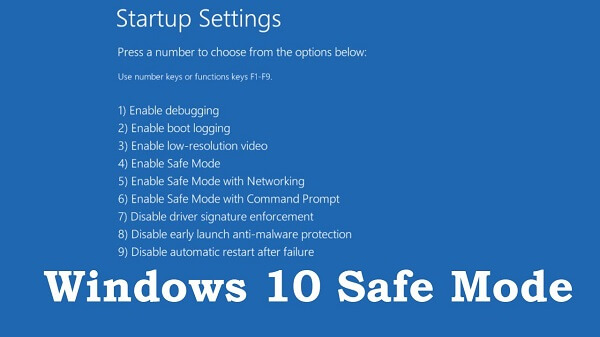
Step 2 Click See advanced repair options, and head to Troubleshoot -> Advanced options -> Windows Startup Settings -> Restart.
Step 3 Wait for your PC to restart and select Enter Safe Mode to boot into Safe Mode.
Safe Mode enables you to fix many issues on Windows, like Excel file corrupted, Windows startup loop, etc.

After going into Safe Mode, you can fix the problem that scanning and repairing drive stuck at 10 percent with the Check Disk tool.
Step 1 Open a Windows Explorer, right-click on your boot drive, which is usually disk C, and select Properties.
Step 2 Go to the Tools tab and click the Check button. Then select Scan and repair drive and follow the onscreen instructions to complete it.
If you get a flash drive, just repair flash drive here.
Driver Maintenance is another powerful tool to fix the problem of scanning and repairing c drive repeatedly.
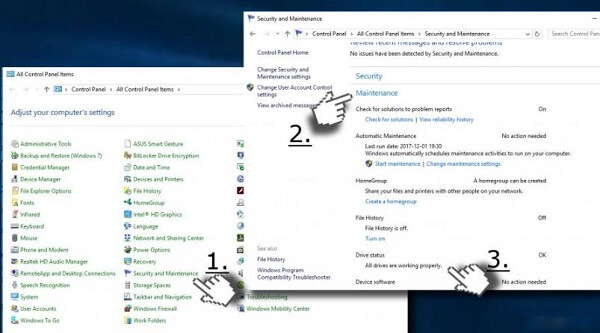
Step 1 Boot in Safe Mode and open Control Panel from the Start menu.
Step 2 Choose Security and Maintenance and then Maintenance.
Step 3 When it is done, you will be presented the issues under Driver status. Click the link next to the error, Windows 10 will fix it.
One of the valid ways to get rid of scanning and repairing drive stuck is to disable the process.
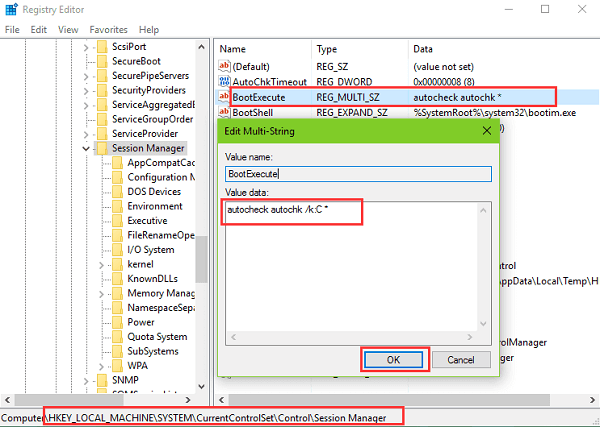
Step 1 Press Win + R buttons in Safe Mode to open the Run dialog. Input regedit and hit Enter key.
Step 2 Navigate to HKEY_LOCAL_MACHINE -> SYSTEM -> CurrentControlSet -> Control -> Session Manager on the Registry Editor dialog.
Step 3 Find and double-click on the BootExecute entry, and replace the default value with autocheck autochk /k:C *. Click OK and restart your PC to check if it works.
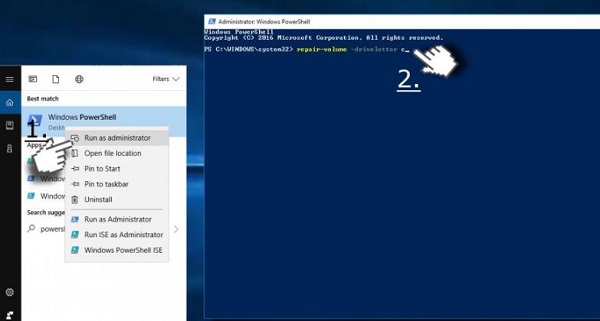
Windows PowerShell is framework consisting of commands to repair Volume-Letter. In fact, improper volume letter could lead to Windows 10 stuck at scanning and repairing drive.
Step 1 Enter into Safe Mode, search for PowerShell and run it as administrator.
Step 2 Input repair-volume -driveletter C in the PowerShell window and hit Enter key. Then it will repair issues on your boot drive.
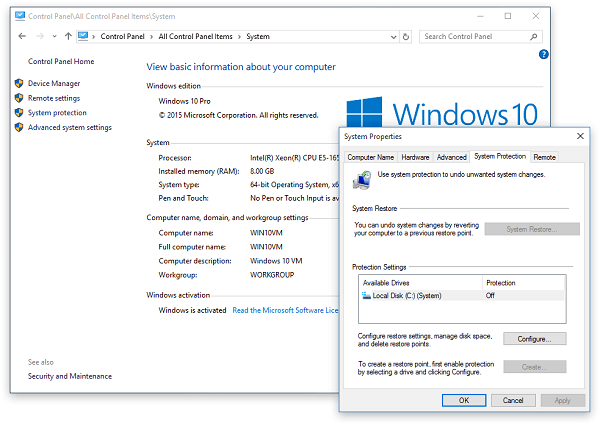
After booting into Windows 10, the System Restore Point is able to fix the scanning and repairing drive stuck simply.
Step 1 Head to Control Panel -> Recovery, press the Open System Restore link and click Next.
Step 2 Select a restore point created before the error occurred and click the Next button.
Step 3 When it completes, you PC will reboot and Windows will load normally.
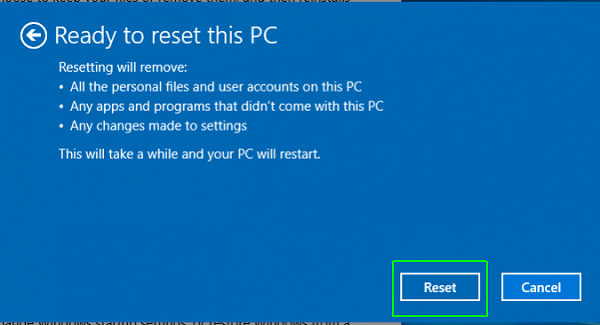
Resetting your PC will remove the updates and efficiently fix the scanning and repairing drive loop.
Before resetting computer, you had better to backup computer data to external hard drive.
Step 1 Open Settings in the Start menu, navigate to Update & security -> Recovery and click the Get started button under Reset this PC.
Step 2 When prompted, select Keep my files or Remove everything depending on your situations and follow the assistant until you reach the Ready to reset this PC screen.
Step 3 Click the Reset button and then Continue to start resetting.
The above steps are the universal steps to reset most computers.
HP users learn here to start to reset HP computer.
Dell users can get the detailed steps here to start a Dell computer reset.
The last way to stop the issue of scanning and repairing drive stuck on booting is to reinstall Windows 10 on your PC.
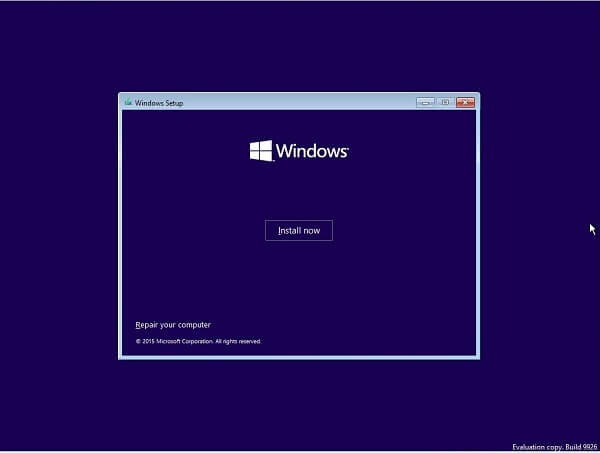
Step 1 Insert the installation media into your PC and restart it.
Step 2 Select the language and other information according to your conditions, and then click Next button.
Step 3 Hit the Install now button, enter your Windows 10 product key and select a proper version. Once click Next button, the process will start and you can finish it with the onscreen instructions easily.
Lost some important files during troubleshooting? Aiseesoft Data Recovery could help you to get back your files.
How to recover lost data after fixing scanning and repairing drive stuck
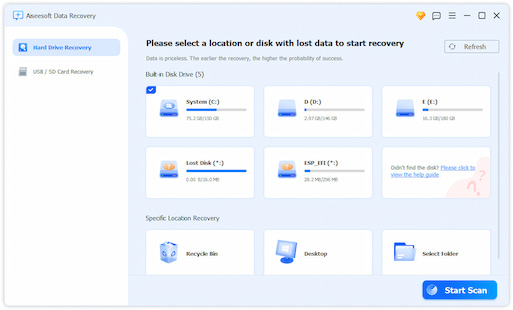
Step 1 Select file type and location
Download and install Data Recovery on your PC and launch it. Choose the file types that you want to get back and where they are stored. Click the Scan button and wait for it to complete.
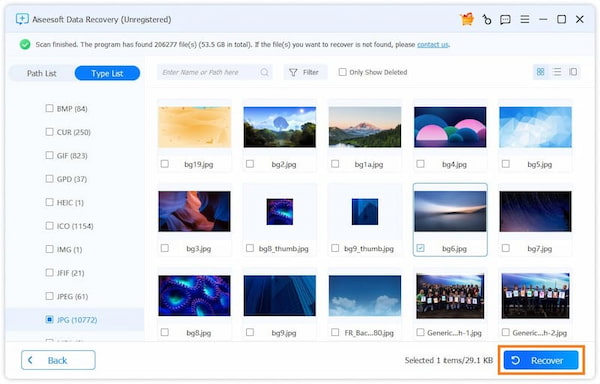
Step 2 Preview lost files
When you are brought into the result window, check your files by types and formats. For instance, go to Image -> JPEG from left sidebar, and you can see all lost images in JPEG format on the right pane.
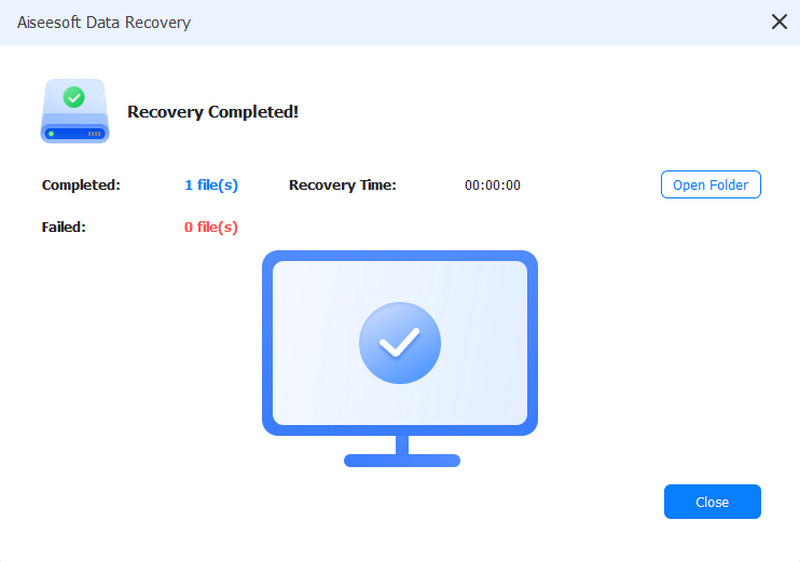
Step 3 Restore files in the original condition
Select the desired files and click the Recover button. A few seconds later, you can open and use your files normally.
Recently, Windows 10 users submit the problem that Windows 10 stuck at scanning and repairing drive on Microsoft website, social pages and forums. However, you should understand what you can do when this problem happens based on our sharing above.

November 19, 2018 09:00 / Posted by Andrew Miller to Recover Windows Data
 10 Solutions to Fix WHEA_UNCORRECTABLE_ERROR on Windows 10/8.1/8/7
What is WHEA_UNCORRECTABLE_ERROR? How do I fix WHEA_UNCORRECTABLE_ERROR? Red this post and take the easy 10 solutions to remove the error.
 The Complete Guide to Fix Bad Pool Header BSOD In Windows 10/8/7 [Solved]
What is a bad pool header? How do I fix bad_pool_header error in Windows 10/8/7? Bad Pool Header is a common blue screen of death error. This article would provide you with the complete ways.
 5 Ultimate Solutions to Fix External Hard Drive Not Showing Up Errors
What should I do when my external hard driver is not showing up? Here are the 5 solutions you should know to fix these problems and retrieve the important data.
