Summary
How to make a slideshow in iMovie on my Mac? This post gives you the comprehensive answer to your question. 6 steps to create a high-end movie with photos, videos and music can be done in iMovie on Mac.
Summary
How to make a slideshow in iMovie on my Mac? This post gives you the comprehensive answer to your question. 6 steps to create a high-end movie with photos, videos and music can be done in iMovie on Mac.
When you want to weave your good memories into a movie, you can make it into slideshow. When you get all the photos stored on Mac, then you cannot miss the free slideshow tool, iMovie to help you reach the goal.
This page directs you the full guide in detailed steps to create a slideshow in iMovie in 6 steps.
Cannot wait? Just read the steps and get your iMovie work to make the slideshow now.

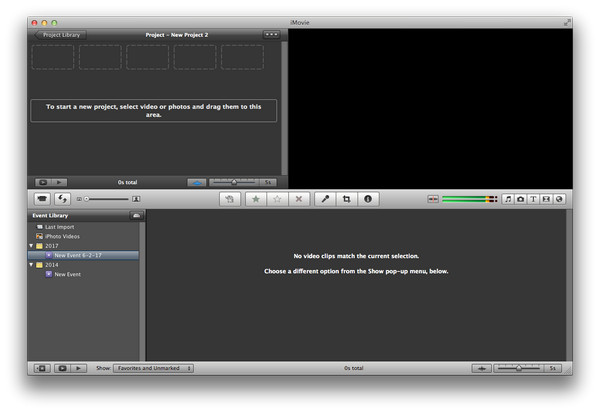
Step 1. Create a new project
Open iMovie on Mac, click "File" button at the top center of your screen, and then click "New Project".
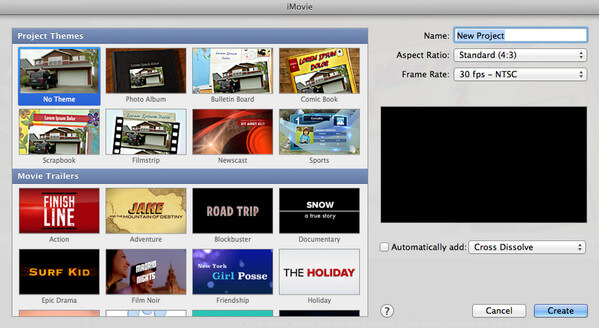
In the pop-up window, you need to pick up one theme for your slideshow.
It has various templates, like photo album, sports, etc. Still, you will find you are given the movie trailer to create your slideshow.
On the right side, you can rename your slideshow, set the aspect ratio as 4:3 or 16:9, and frame rate for 24 fps for Cinema, 25 fps for PAL and 30 fps for NTSC.
Do not miss select the slideshow presentation effects from "Automatically add".
Click "Create" to go into the next step.
Step 2. Import photos & videos
Navigate your materials folder, select the items, drag the videos and photos from the left side of project area. When you see the green plus appears, you can release your mouse to put the photos into the project.
Moreover, you can click "File" > "Import" > "Movies" to add videos, or "File" > "Import from Camera" to import photos, if you do not put them in one folder, or during the process of editing a slideshow.
Step 3. Edit photos and videos
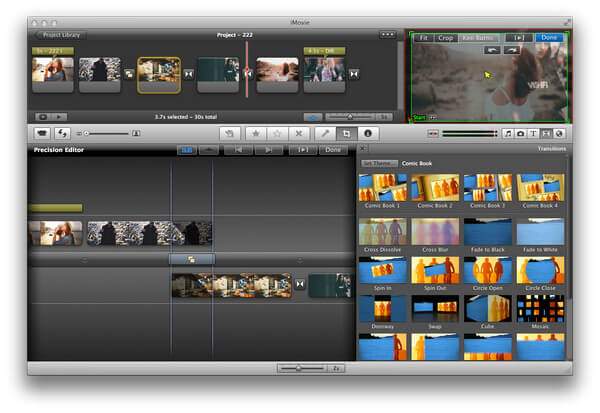
You can simply dragging the photos from one point on the timeline to another one to put them in new order.
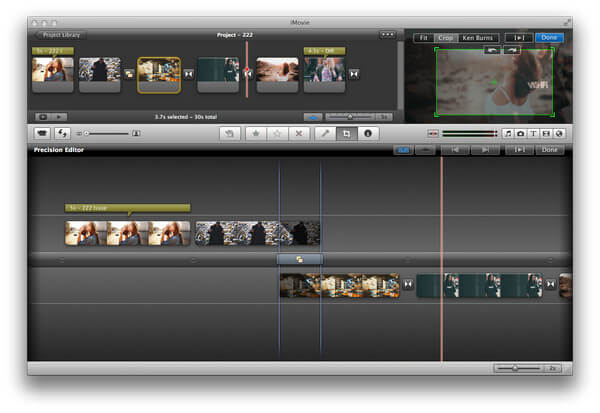
When you mouse over the item that you want to edit, you will see the edit icon in the image, right click it and you will be given the 4 options, Precision Editor, Clip Adjustments, Video Adjustments and Cropping, Ken Burns & Rotation.
Precision Editor: Edit slideshow themes, change or add transitions, set duration time.
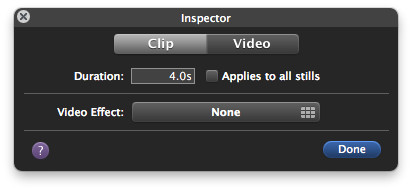
Clip Adjustments: Here you can clip the slideshow duration and change the video effects freely.
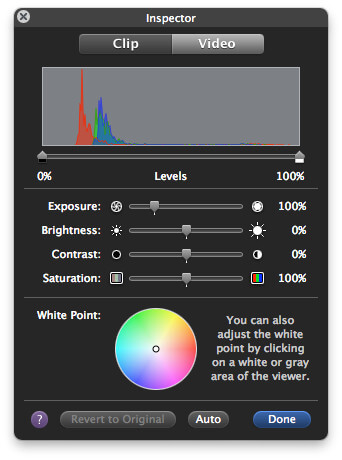
Video Adjustments: For the video, you are able to set the exposure, brightness, contrast, saturation and white point.
Cropping, Ken Burns & Rotation:You can drag your mouse to crop the video and get rid of the annoying letterbox. (Ratio aspect feature had been changed into crop feature in iMovie.)
For your sideways video, you can also rotate to get the correction direction.
For Ken Burns, also named as the change from still to motion.
Step 4. Edit the title
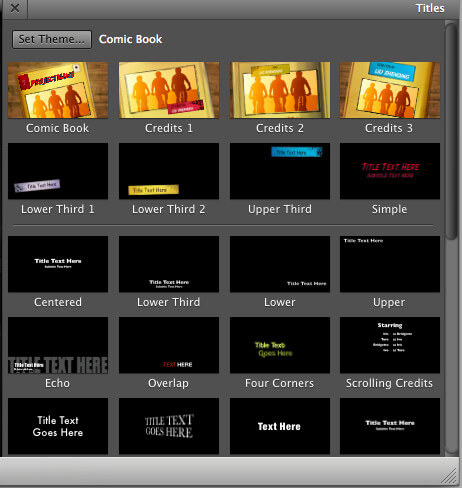
Click the "T" icon to start to edit the title for the slideshow. It gives you various templates to select the text theme, like simple, overlap, echo, scrolling credits, soft edge, drifting, lens flare, sideways, drift, etc. Select what you like, and edit the text as the slideshow title.
Step 5. Add music to slideshow
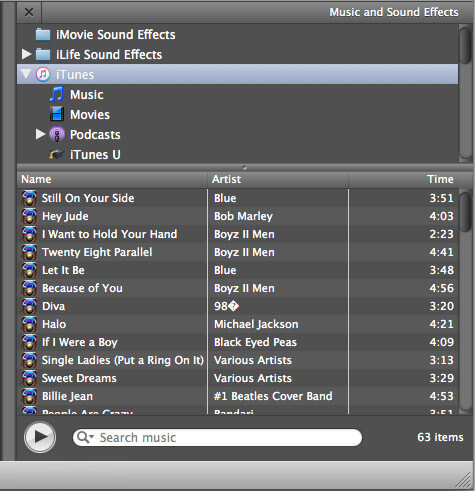
iMovie gives you the option to import the background music from iTunes and iMovie sound effects. You can drag and drop the music you want to the project timeline for your slideshow directly.
Learn details here to add music to iMovie.
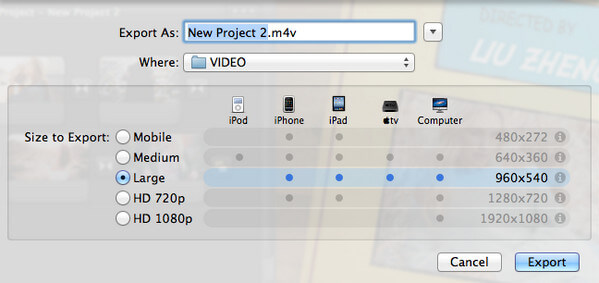
Step 6. Export and share slideshow
Preview the whole slideshow effects to play all the photos and videos.
Click "File" > "Finalize Project" to saving your slideshow as the project on your Mac.
Click "Share" > "YouTube/Facebook/Vimeo/CNN iReport/" to upload it to social media directly.
Click "Share" > "iTunes/" to put it on iTunes, so that you can play it on iTunes or sync iTunes movie free with your Apple devices.
You are able to click "Share" > "Export Movie" to convert slideshow to video for iPhone, iPad, iPod, Apple TV or computer in high resolution up to 1080p HD.
The detailed guide to saving iMovie is here.
Here's the video about making slideshows for you. Click it to check.

1. iMovie lets you drag the content, so you had better put all the materials in one folder for easy movement.
2. When you use the theme, the transitions and titles are turned on automatically and you cannot edit the photos or videos separately. For editing the individual photos or videos, you need to turn off it.
3. You can get the quick editing window by clicking "Windows" to select the referred editing feature you want.
iMovie is the free and professional tool to help you create the slideshow with photos, music and videos. The effects it gives to you are various. However, for the novice, you may feel labored to use it to edit the slideshow, except you use the theme template.
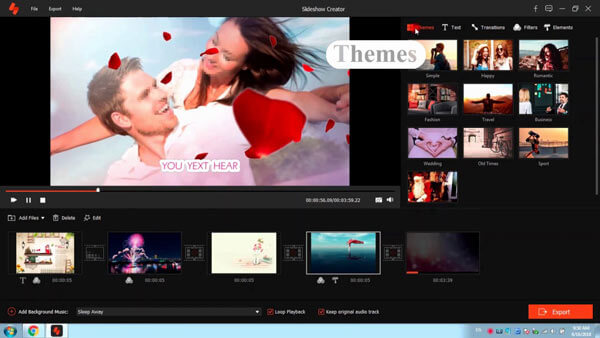
Moreover, iMovie is the free tool only for Mac users, if you are using a Windows users, you may miss it. Do not worry, here we also gather an easy-to-use slideshow maker on Windows, SlideShow Creator.
Learn here to know how to use Slideshow Creator to make a photo slideshow with videos and music on Windows computer.
This page shows you the detailed 7 steps to make a slideshow on iMovie with photos, videos, and music. You can prepare your Mac with iMovie and make a slideshow while reading the steps.
Do you make it clear for all information? If not, do not hesitate to leave your comments below.

December 10, 2020 11:06 / Updated by Andrew Miller to Edit Video
 [Free] Three Ways to Add Music to a Slideshow
This article gathers you three ways to direct you how to add music to a slideshow via Free Slideshow Maker, iPhoto and PowerPoint.
 Record in iMovie - How to Record Video and Voiceover in iMovie
Want to record a video or voiceover in iMovie on your Macbook/iMac? You can find detailed steps here to record in iMovie.
 Get iMovie and 5 Best Alternatives on Mac
Learn how to download iMovie for Mac and its best 5 iMovie alternatives on Mac (macOS High Sierra included).
