Getting Started
Introduction
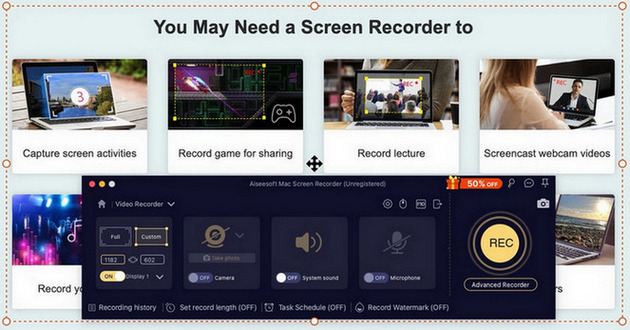
Screen Recorder is the most professional recording software you could find. It helps you to record video with high output video quality. In the following, we have offered you solutions to record video/audio with Screen Recorder.
Part 1. How to Record Video on Computer
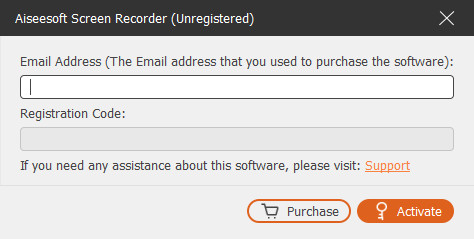
Step 1 Free download, install and launch Aiseesoft Screen Recorder on your computer. Register with the email address and registration code you have received from us.
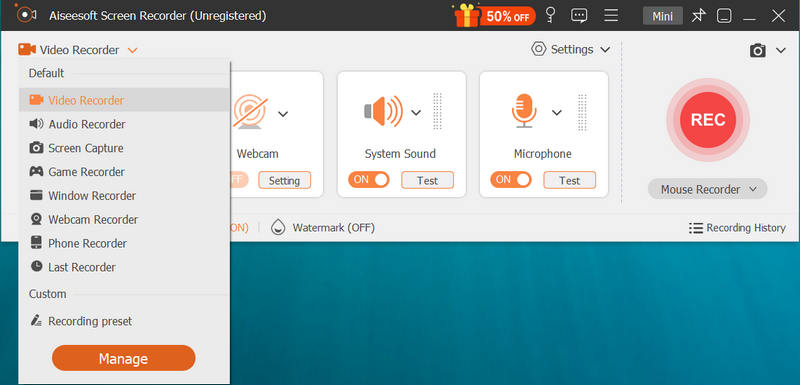
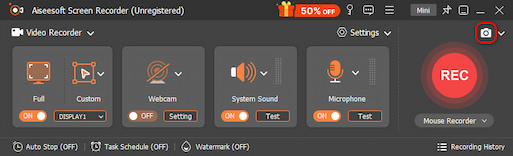
Step 2 Choose Video Recorder mode at the top left corner. Here, you can record both video and audio.
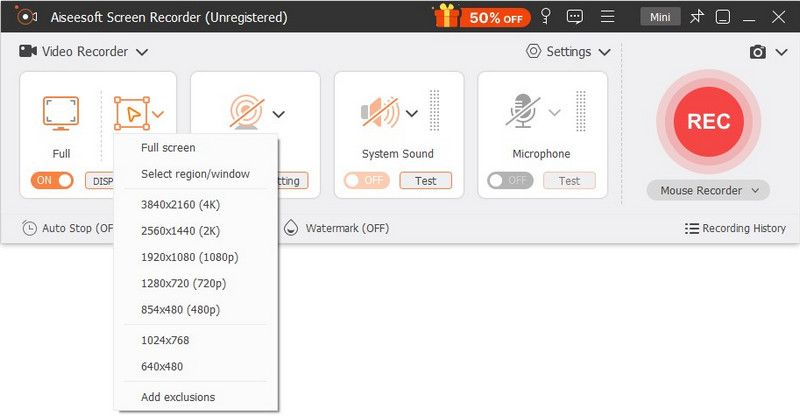
Step 3 Move down and click Custom, you can select a full screen or a fixed screen like 3840×2160, 2560×1440, 1920×1080, 1280×720, 1024×768, 854×480, 640×480. You can also click Custom > Select region/window to draw a recording area with your cursor.
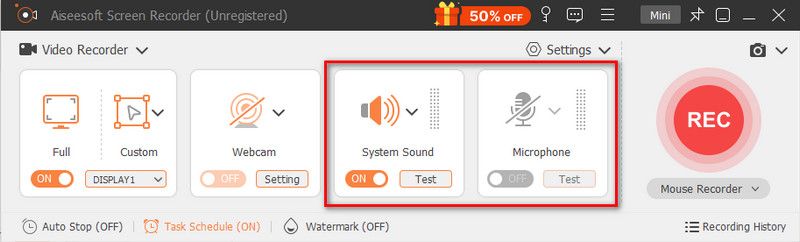
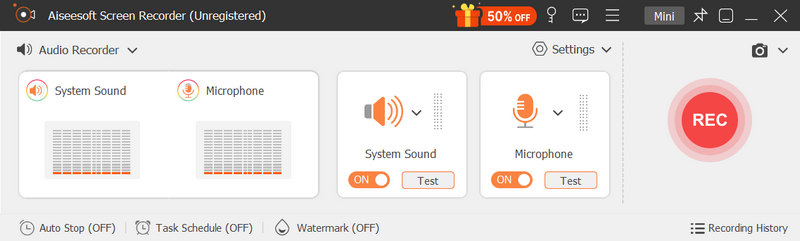
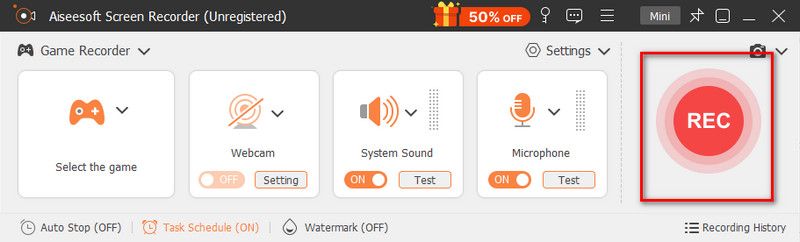
Step 4 Select the audio source by toggling on System Sound option, Microphone option, or both.
For recording videos, audio, and lectures, you can only keep the System Sound option on. For recording games, webinar, meetings, or video tutorial, you may need to turn on the System Sound option and Microphone at the same time.
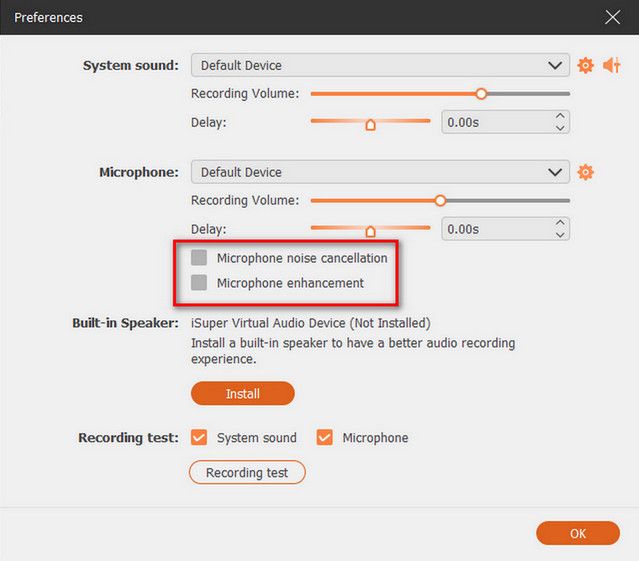
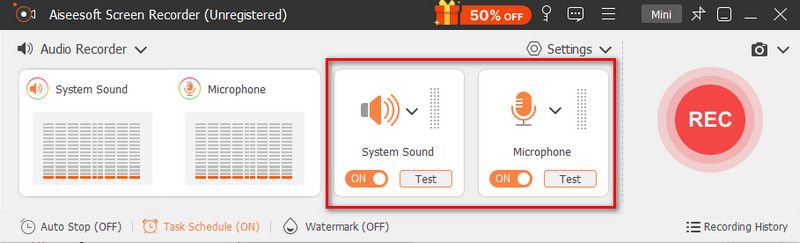
Moreover, while you toggle on the microphone audio recording, click Settings from the drop-down next to it.
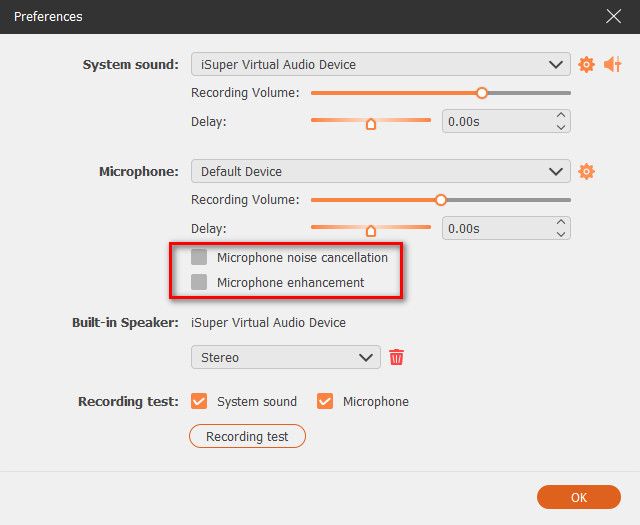
The new window allows you to enable Microphone noise cancellation and Microphone enhancement. It can also let you change the microphone source and choose other microphones for recording.
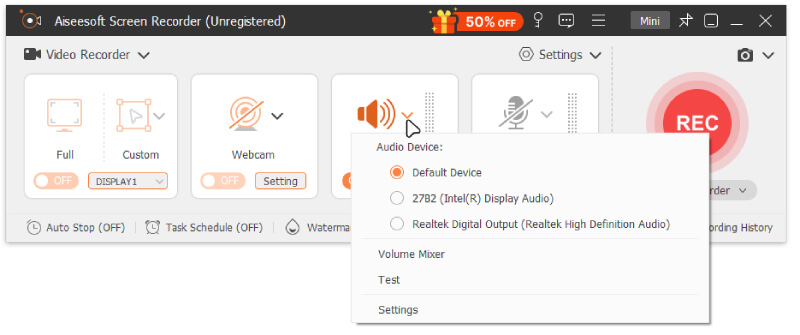
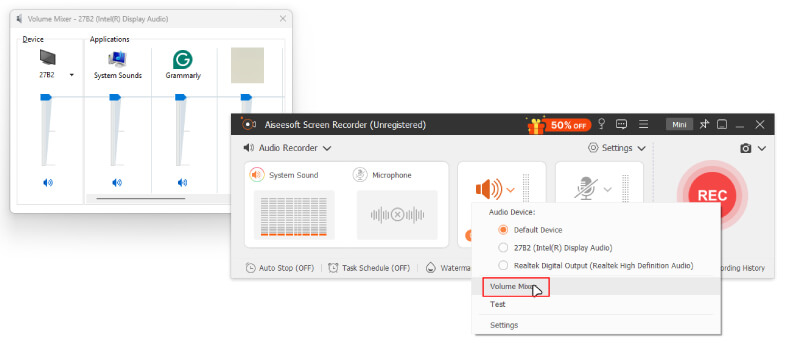
When you want to record computer speaker audio, click System Sound and the drop-down option will show you the computer speaker option.
Step 5 During the recording, you are able to edit video and add text, line, arrow and specific labels to the captured video.
Step 6 Click REC button to start the screen recording on your computer. After recording, you can preview the recorded video, and then click the Export button to save the recording to your computer.
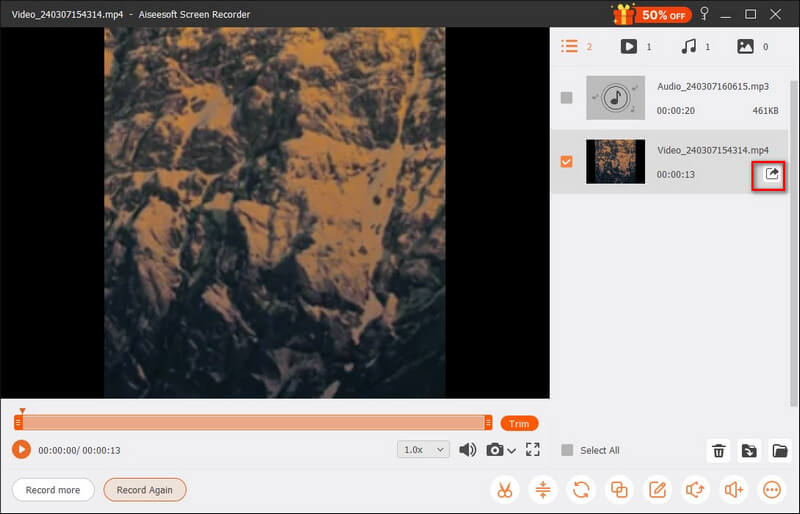
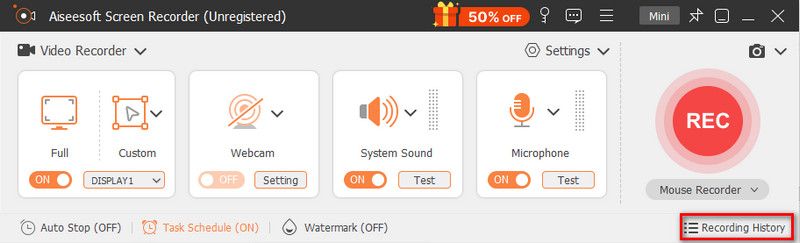
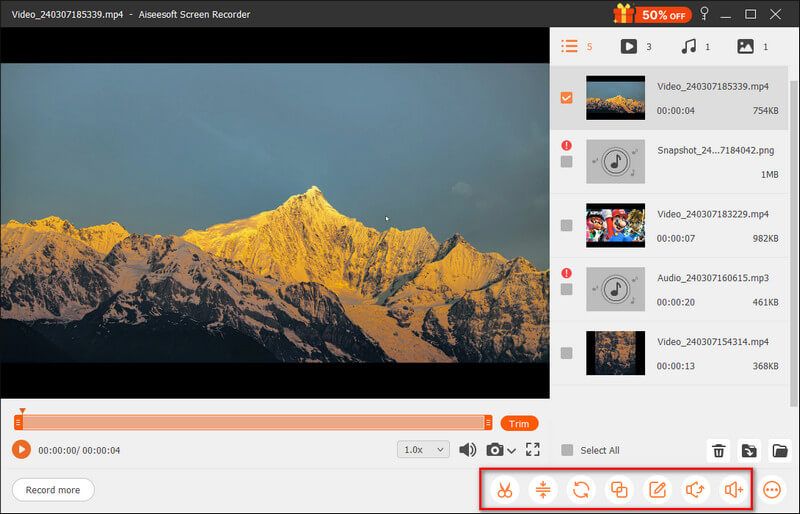
Note: All your video or audio recordings are saved in the Recording history list. You can click the Recording History at the bottom to view, edit, or delete them.
Part 2. How to Record Audio on Computer
Step 1 Run Screen Recorder on your computer, and choose Audio Recorder mode at the top left corner to enter the audio recording interface.
Step 2 Set recording audio from System Sound or Microphone voice according to your need. You can turn on the Microphone option and disable System Sound if you just want to capture your voice. If you want to capture the sound from your computer as well as your voice, you need to enable both Microphone and System Sound.
While recording audio from a microphone, do not forget to checkmark the option of Microphone noise cancellation and Microphone enhancement, which can reduce video noise and amplify audio to stop audio echo while recording.
Moreover, you can click Volume Mixer of System Sound’s drop-down to adjust the speaker audio for separate audio applications while recording.
Step 3 When voice recording is complete, click the Stop button and you will be taken to the Preview window. Then click the Export button to save the audio recording to your computer.
Part 3. How to Record Gameplay on Computer
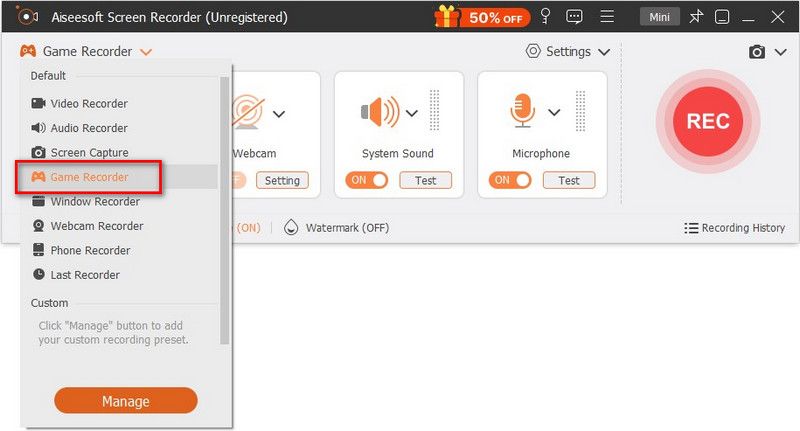
Step 1 To start with, start the game you want to record. Run Aiseesoft Screen Recorder and select Game Recorder to capture your gameplay.
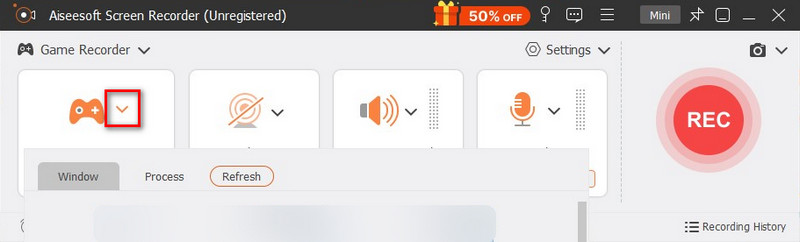
Step 2 On the Game Recorder window, go to the Select the Game panel, and click on the arrow-down button to tick your running game from the list. The recording area depends on the size of your game window.
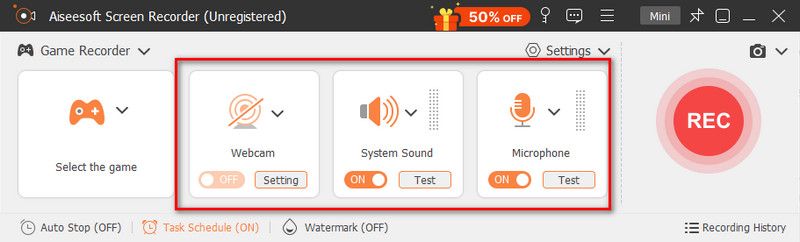
Step 3 If you need to capture your own reactions, you are recommended to turn on the Webcam option. After that, you can toggle on the System Sound, Microphone, or both if necessary.
Step 4 When you're ready, click on the REC button to start recording. While recording the game, you are allowed to use the features on the toolbar, including snapshot-taking, record-length setting, and editing tools as you like.
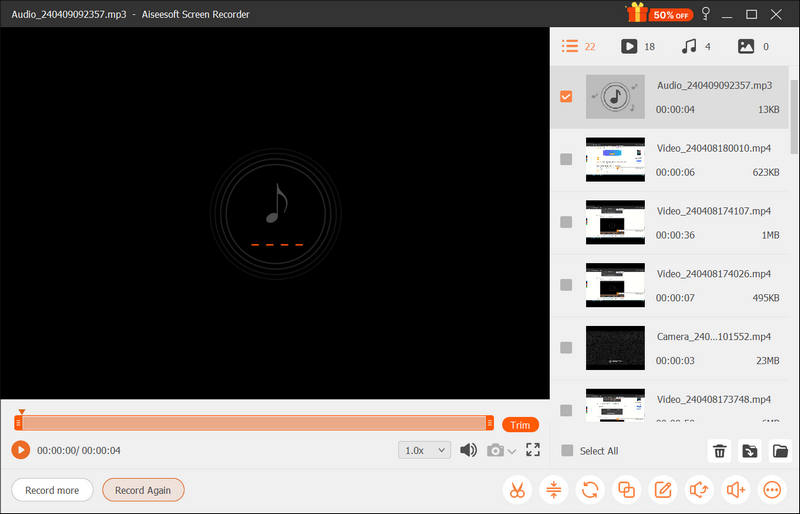
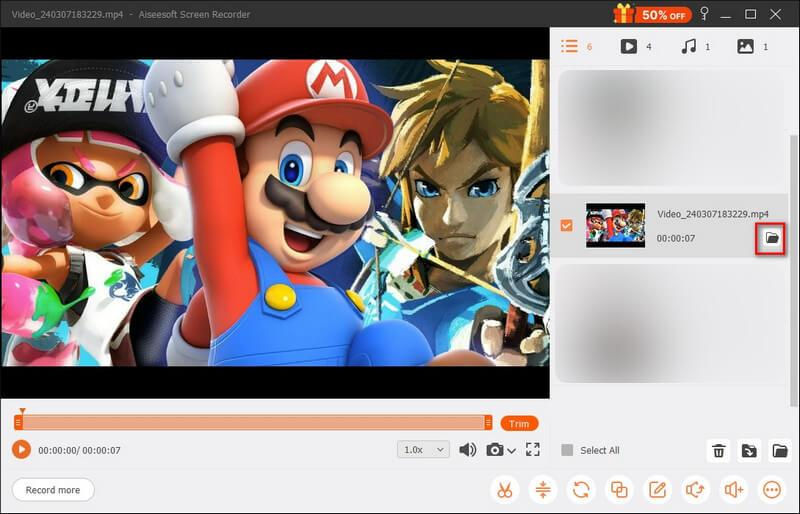
Step 5 Once the recording is over, click on the Stop button to end the recording process. After that, you'll be able to preview and clip your recordings before saving. Here you can play, rename, and delete the file. If you're satisfied with the result, click on Export button.
Part 4. How to Record Webcam on Computer
Step 1 Open Screen Recorder on your computer. Then, click at the top left corner to find Webcam Recorder.
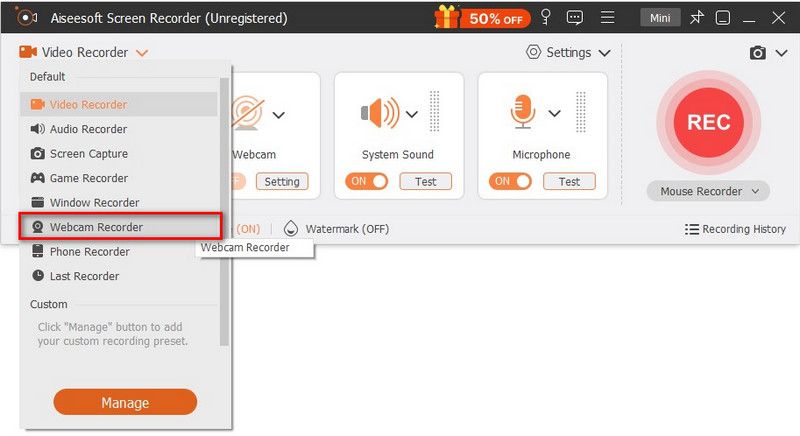
Step 2 After that, you should see a preview window of your camera image. Also, there will be a setting window next to it, where you can change the source camera, adjust the camera effects, choose resolution, modify volume, and rotate the image. If you're okay with all settings, just hit the Record button on the top.
Step 3 While recording, you can pause or stop the process at any time. You can also take a snapshot by clicking the Camera button on the floating bar.
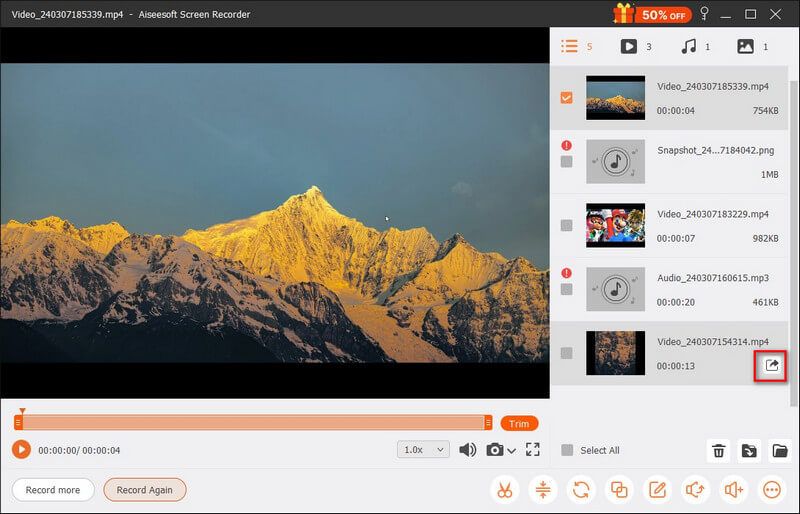
Step 4 Once you finish recording, you can preview and trim the video as you like. After editing, please select the Export button from the right list.
Part 5. How to Record Phone Screen on Computer
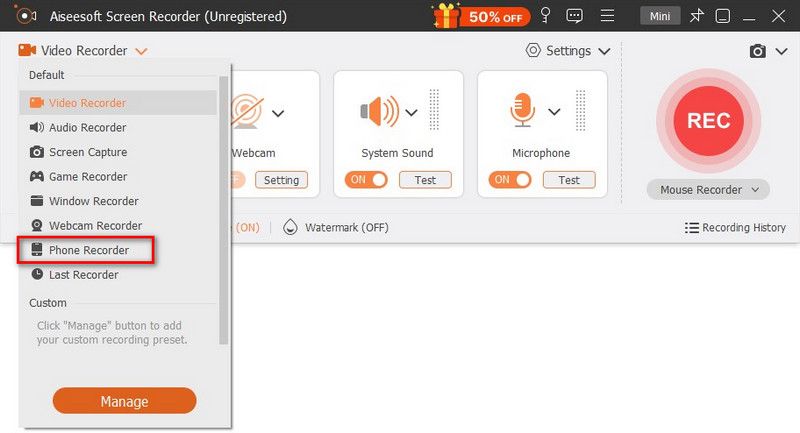
Step 1 Launch Aiseesoft Screen Recorder on your computer. To record the screen of your iPhone or Android phone, please select the Phone Recorder from the main list.
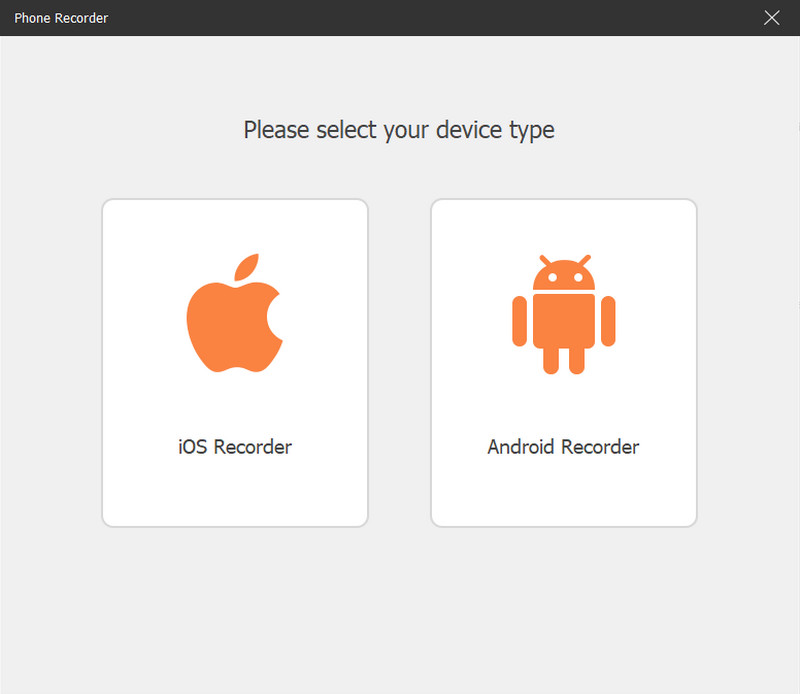
Step 2 Then you need to choose from iOS Recorder and Android Recorder. Please decide which one to use based on your device. If you want to record iPhone screen, you need to mirror the phone screen to the computer first.
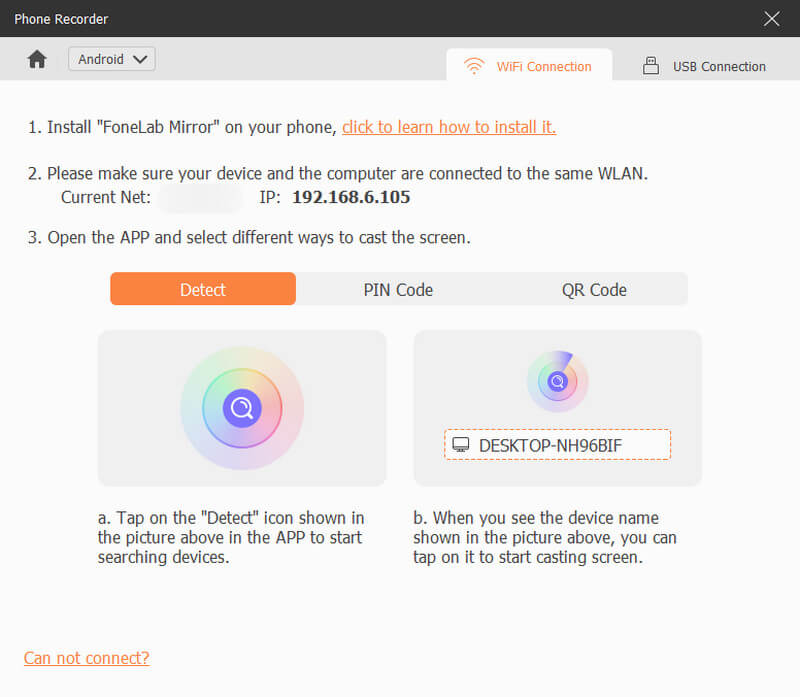
As for Android users, you can choose to mirror your phone screen through WiFi or USB. We also provide you 2 WiFi connection modes: PIN Code and QR Code. You can pick either one.
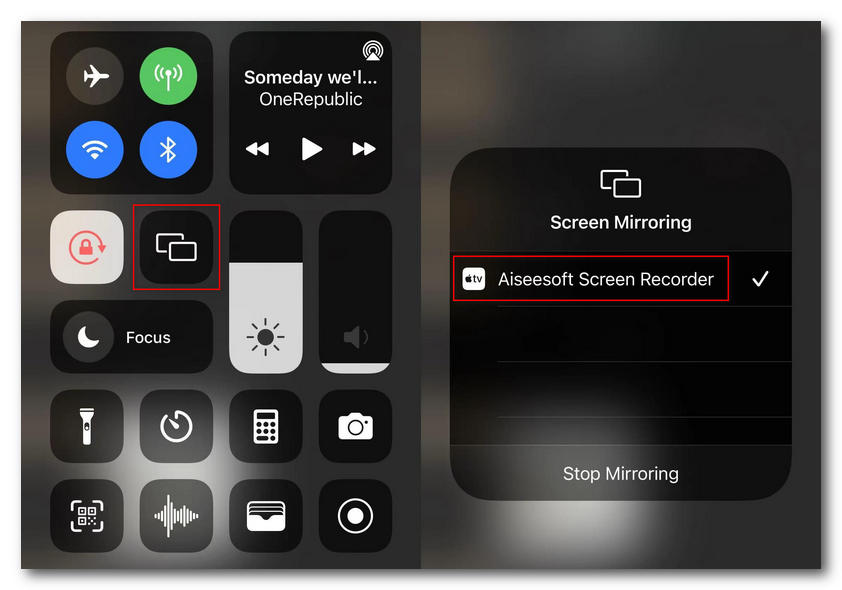
Step 3 To mirror your iOS device to the computer, you need to make sure your iPhone and computer has connected to the same WLAN. Then swipe down from the top of your iPhone to open the Control Center. Find the Mirror button and select Aiseesoft Screen Recorder as the output device.
Step 4 Once connected, you can view your phone screen on the computer. Then you can record your phone screen to the computer.
Step 5 After recording, you can preview and edit the recorded video according to your needs. Click Export if you find the result satisfied.
Part 6. How to Edit Video and Audio Recording
After saving the recording file, you can edit the recording further with its Advanced Trimmer, Video Compressor, Media Converter, File Merger, Edit Media Metadata, Sound Extractor, and Sound Booster.
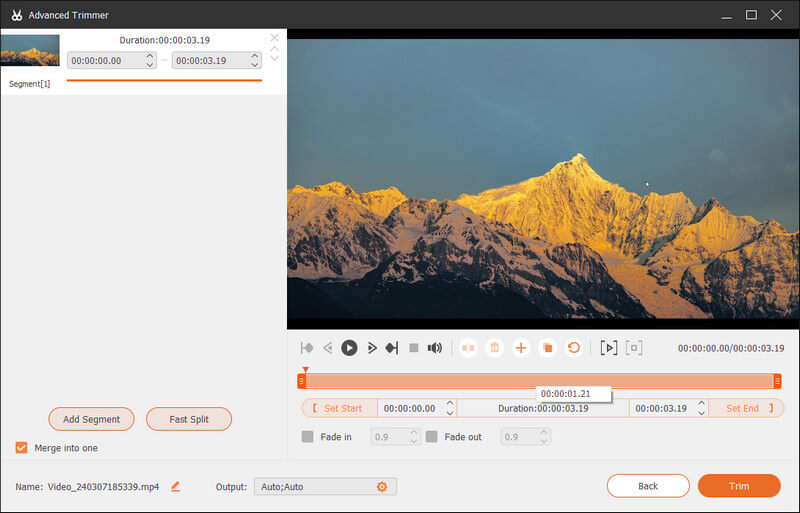
Advanced Trimmer
To trim your recording file in an advanced tool, you need to select Advanced Trimmer from the toolbar at the bottom right.
It gives you 2 options to use this tool.
Add segment: You can move the processing bar at the right panel to create a new segment, copy and paste a clip, or split a file.
Fast Split: You can split 1 recording file into several parts by average files or time. Finally, click Trim to confirm your operations and export it to your computer.
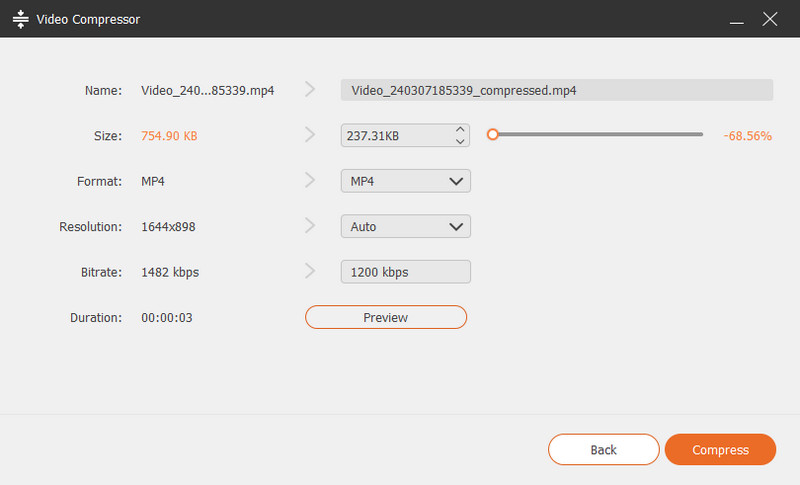
Video Compressor
To compress a large recording file into a smaller size, you need to find Video Compressor next to the Advanced Trimmer.
Move the file size bar to get the video size you want to save.
Media Converter
Media Converter comes to help you change your recorded video format to MP4, GIF, MOV, etc. Meanwhile, you can use it to adjust resolution, frame rate, video/audio encoder, and more.

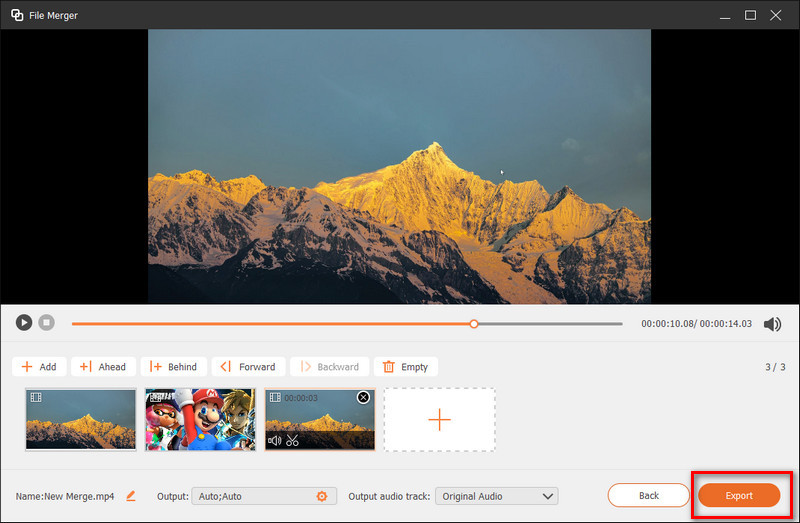
File Merger
To combine several clips into one file, locate the File Merger option from the toolbar.
Here, you can click the plus button to import the photo, videos, or audio from your recording history or local computer.
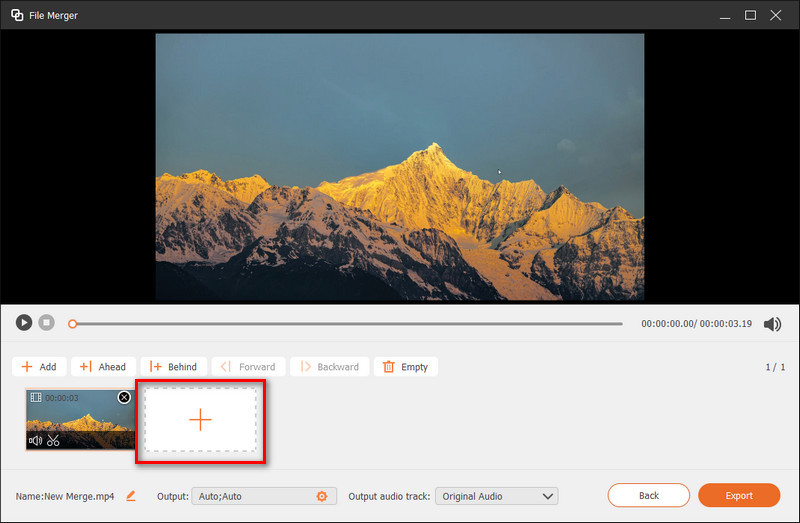
After all the segments are well ready, click the Export button to save the merged file on your computer.
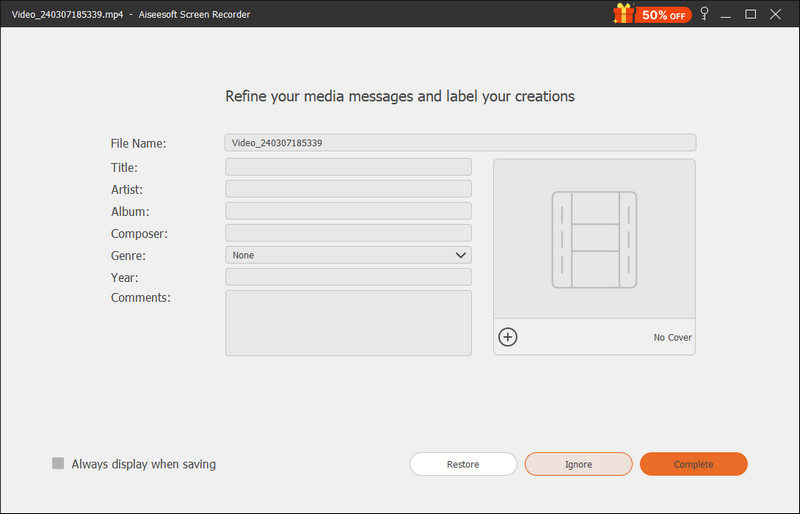
Edit Media Metadata
For your exported video or audio recording file, you can also add your personal tag by Edit Media Metadata.
Add the file name, title, album, composer, genre, year, comment, and video or audio cover.
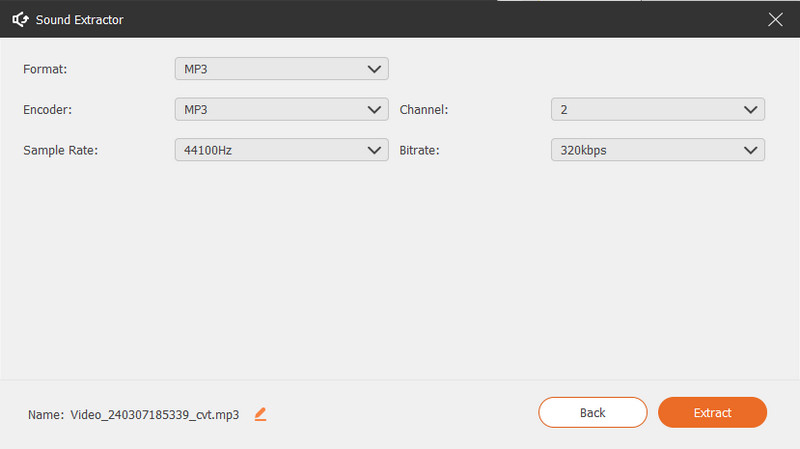
Sound Extractor
If you just want the audio file of your recorded video, Sound Extractor is a professional extracting tool that allows you to set audio format, sample rate, bitrate, etc.
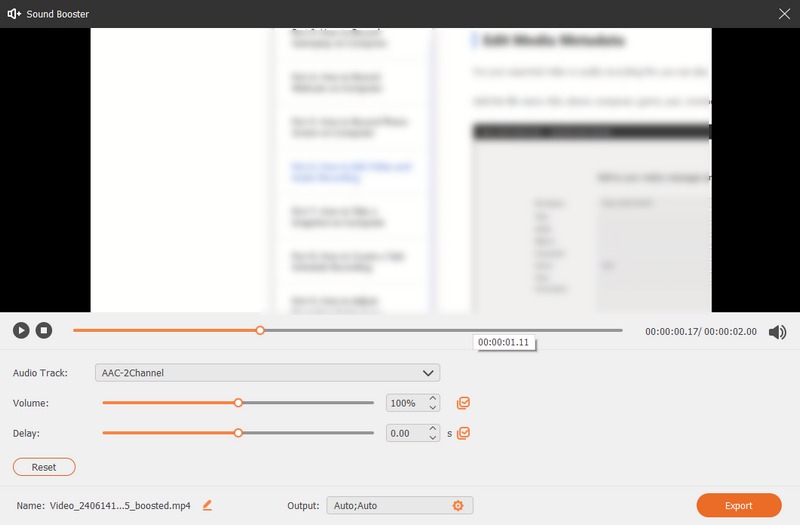
Sound Booster
Sound Booster is the other audio tool for your recorded video. It mainly helps you adjust the video volume or delayed timing. You can also select your picked audio tracks for better audio quality.
Part 7. How to Take a Snapshot on Computer
Step 1 Click the camera figure of Screen Capture in the main interface.
Step 2 You can freely set the screenshot area whether to capture an active window or a freehand area. Meanwhile, you can add your preferred labels like rectangle, circle, line, arrow, text, color paints to it.
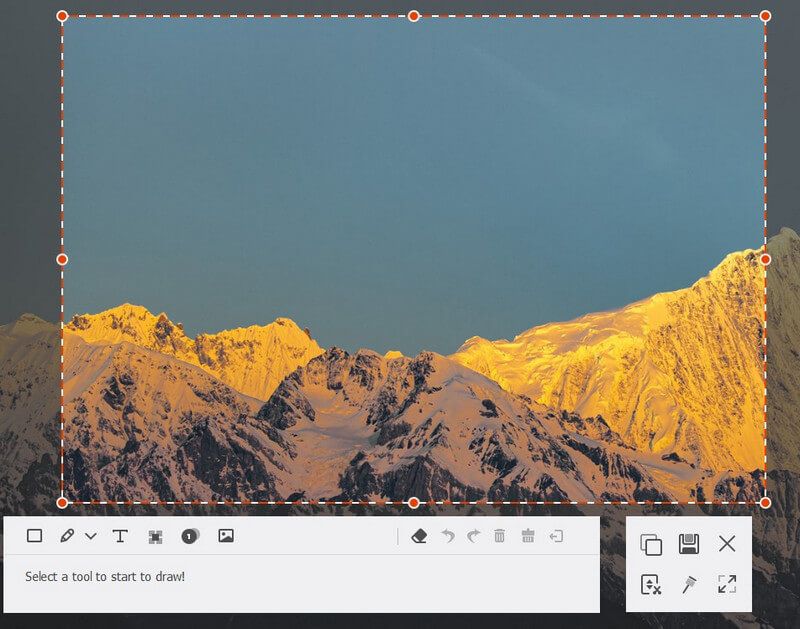
Step 3 After editing, you can click Save to save the snapshot as a suitable image format.
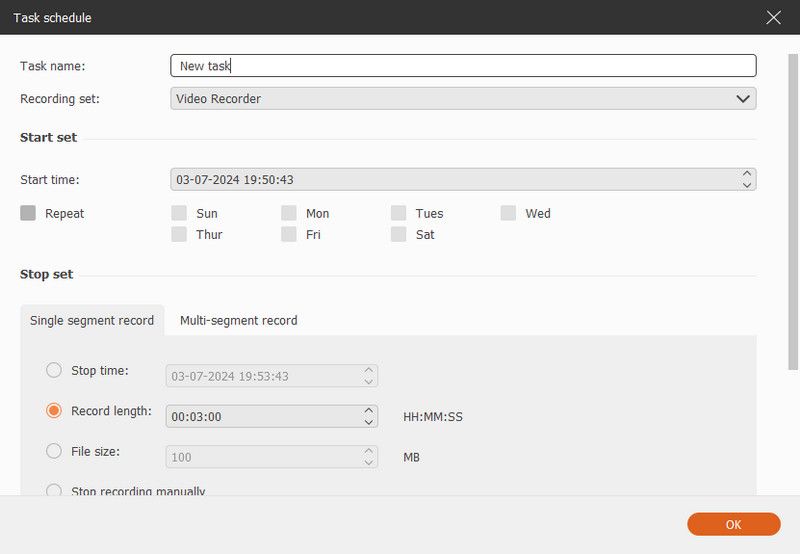
Part 8. How to Create a Task Schedule Recording
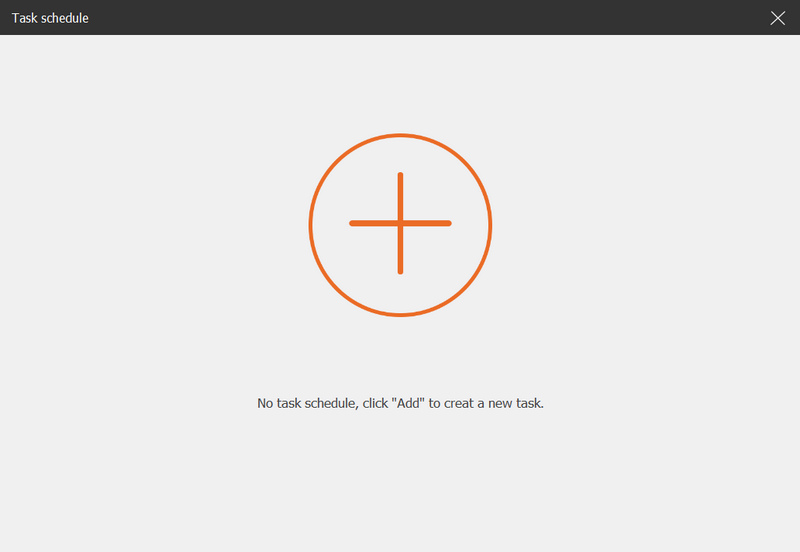
Step 1 Run Screen Recorder, and click Task Schedule at the bottom to start a task schedule recording.
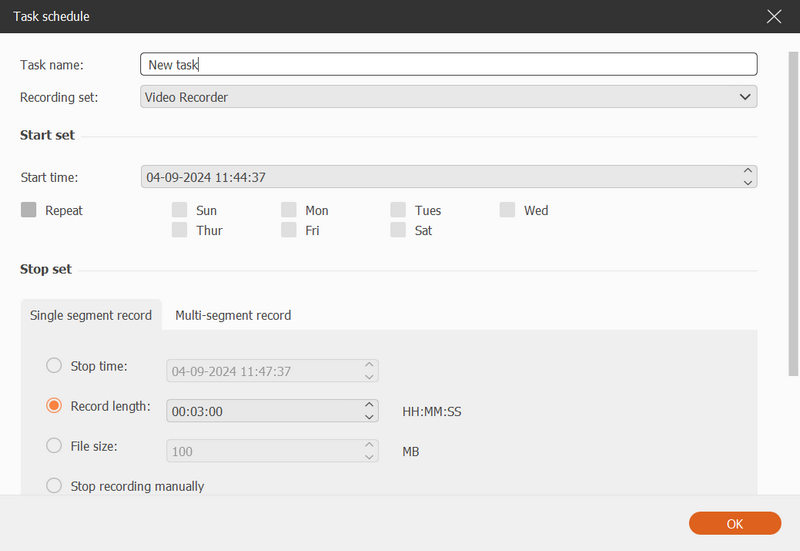
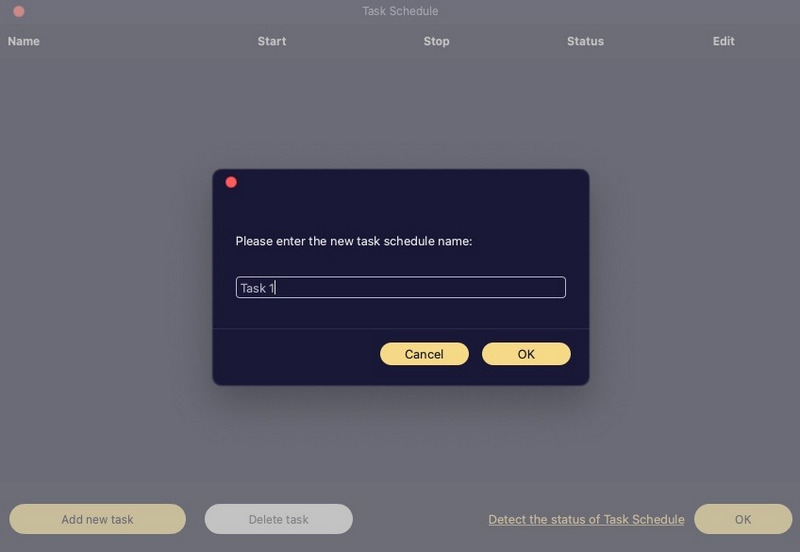
Step 2 In the Task schedule window, click the big plus add button to add a new task. You can enter a new name for the task. Click OK to move on.
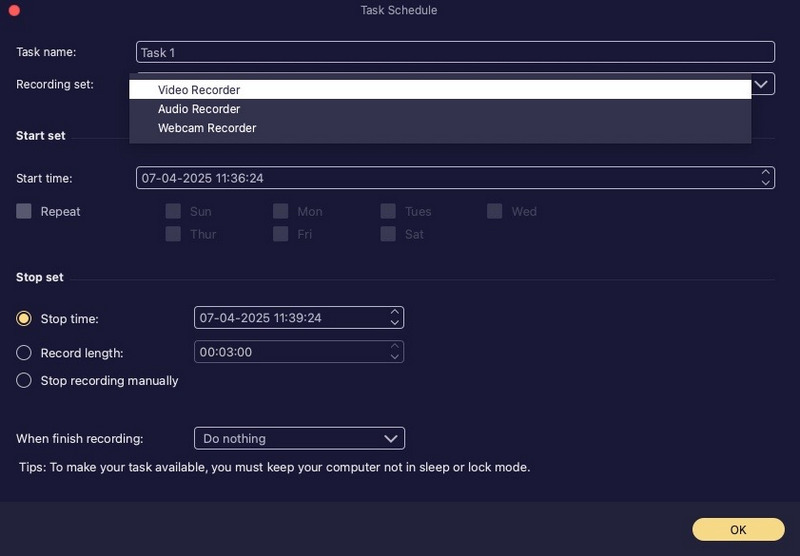
Step 3 Then you can set the starting time, ending time, recording length and the recording set for the recording.
Part 9. How to Adjust Recording Preferences
To get a desired recording, you'd better go to Menu and select Preferences to adjust settings for recording. Here are five recording options you can adjust.
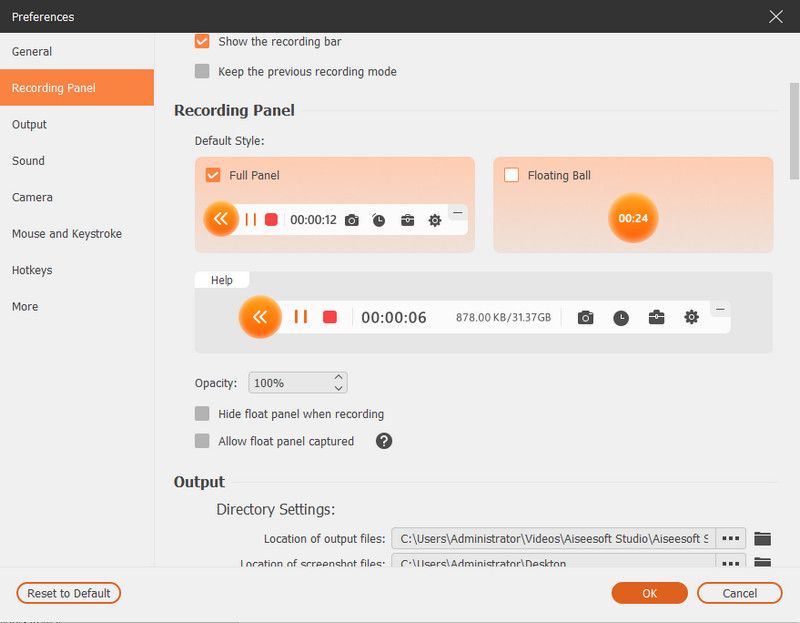
1. Recording
In the Recording Panel tab, you can make adjustments according to your needs like adjusting opacity, Hide float bar when recording, Allows float panel captured, etc.
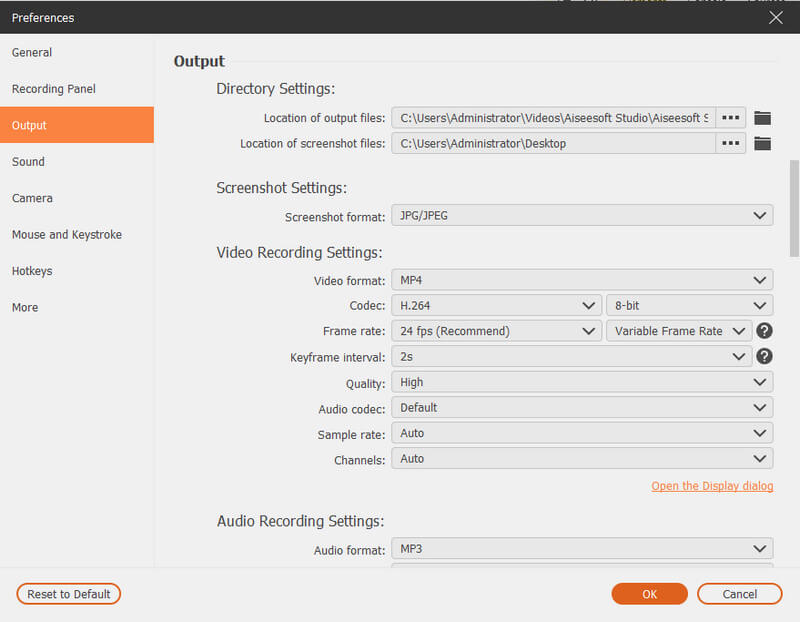
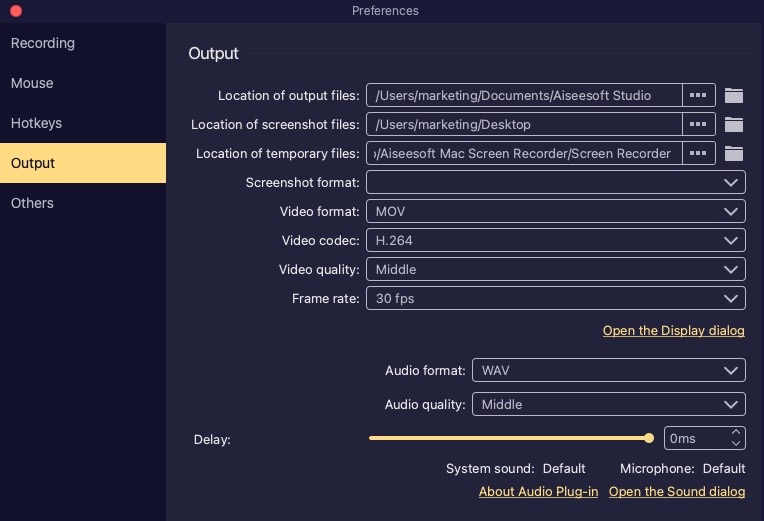
2. Output
The Output tab gives you chances to set the output folder for temporary files, recording and screenshot files. Besides, you can set the video/audio format and quality, video codec and frame rate, and screenshot format.
3. Sound
The Sound settings let you check the sound sources from system sound and microphone.
Moreover, you can adjust the system sound and microphone volume by moving the slide bar.
You can enable Microphone noise cancellation and Microphone enhancement here to create a microphone audio recording in high quality.
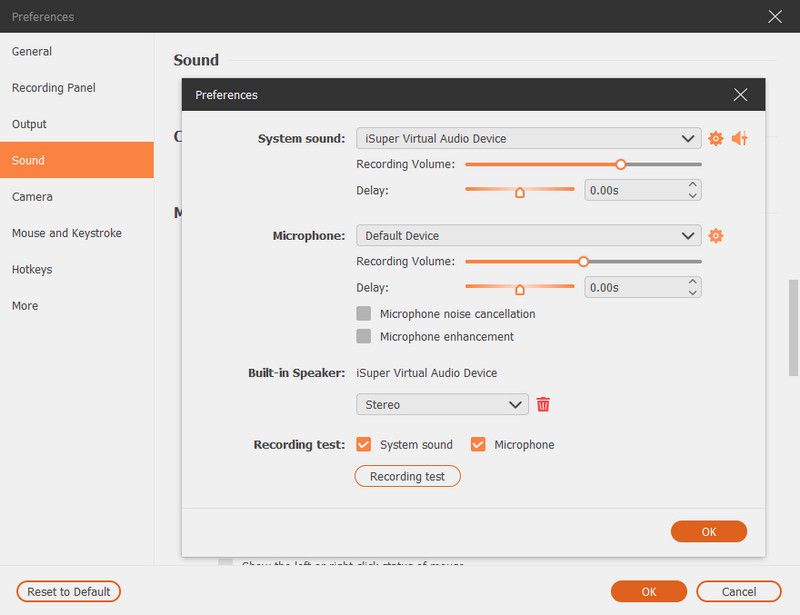
Before recording, you can test audio by click Recording test..
Then it will start an audio recording. Click the sound button next to the Recording test to stop recording and click the button again to listen to the audio recording.
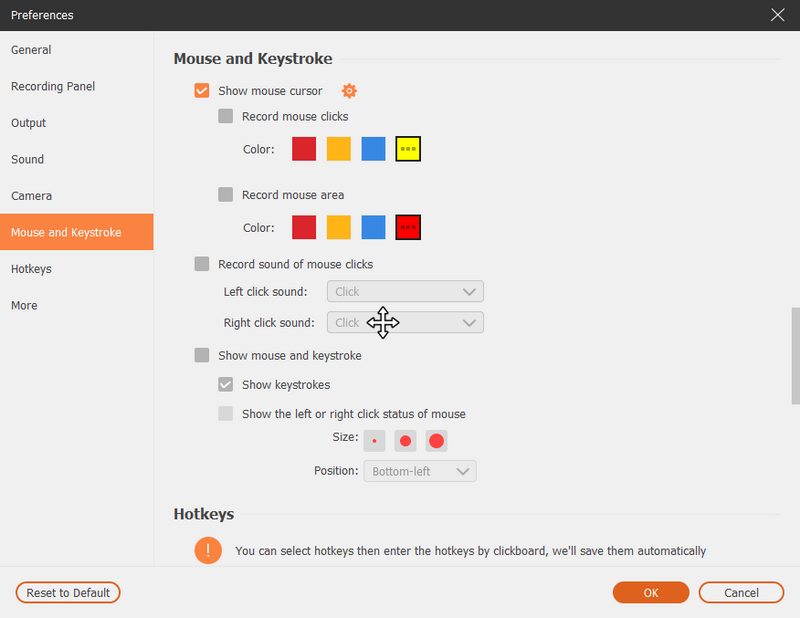
4. Mouse
In the Mouse section, you can choose to show the mouse cursor, and adjust mouse clicks and mouse area flexibly.
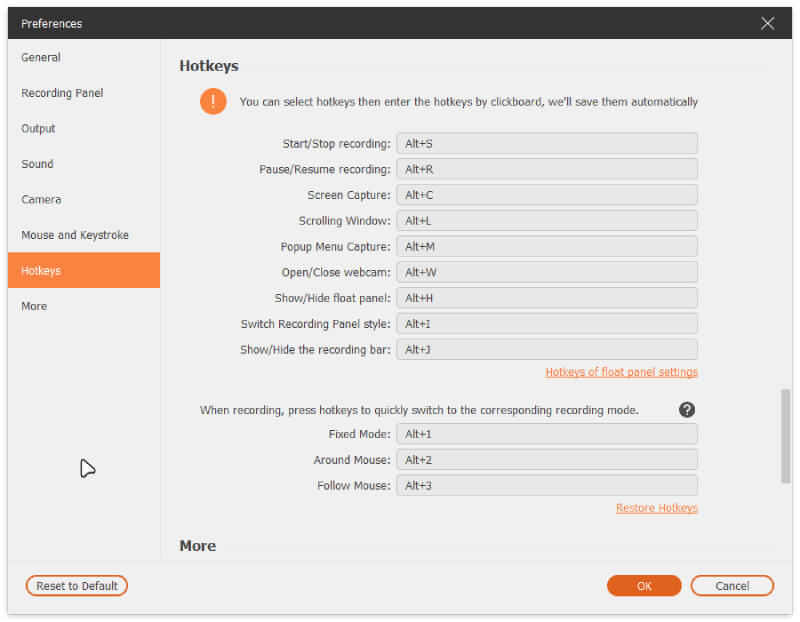
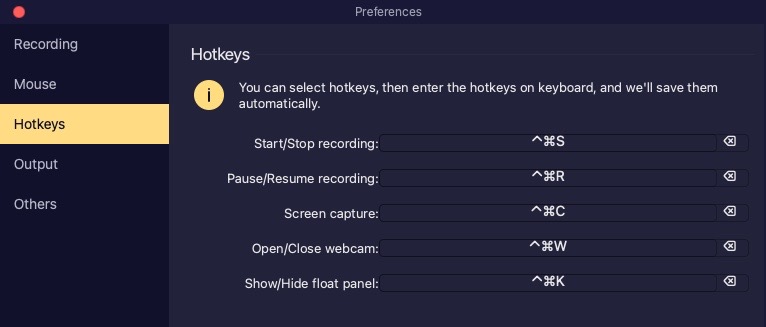
5. Hotkeys
In the Hotkeys tab, you can enter the key combination as the hotkeys for Start/Stop record, Pause/Resume record, Screen capture, Open/Close webcam, Show/Hide float panel.
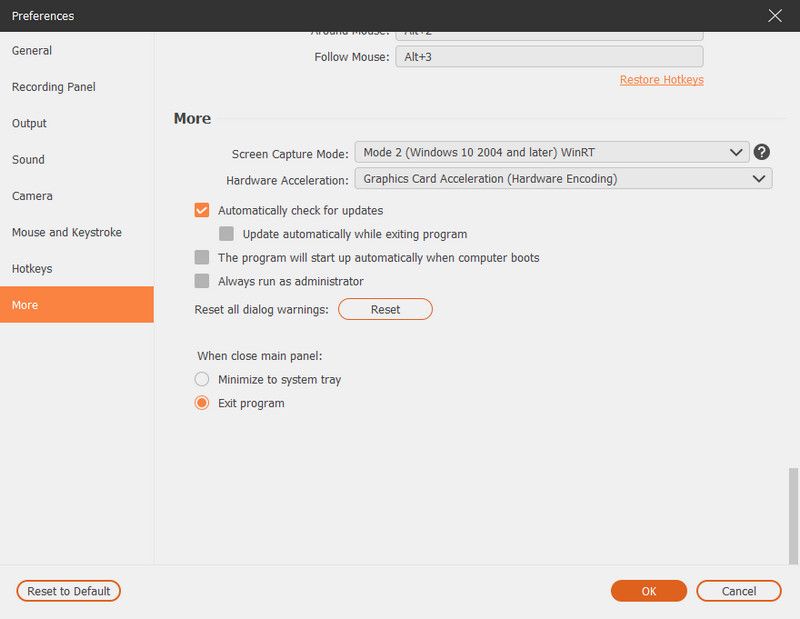
6. More
The More tab lets you enable hardware acceleration, automatic updates, and more.
Introduction Mac
Aiseesoft Screen Recorder is the most professional recording software you could find. It helps you to record video with high-quality output. Below, we have provided solutions for recording video and audio using the Aiseesoft Screen Recorder.
Part 1. Record Screen on Mac
Step 1 Download, install, and run Aiseesoft Mac Screen Recorder on your MacBook Pro/Air/mini or iMac.
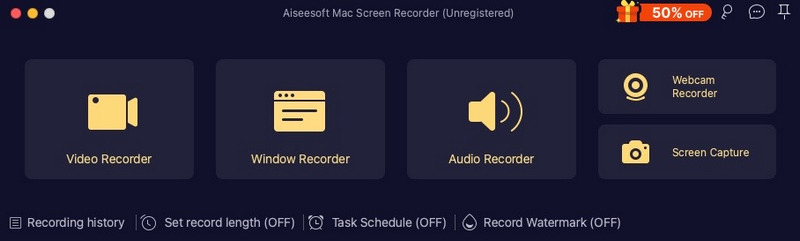
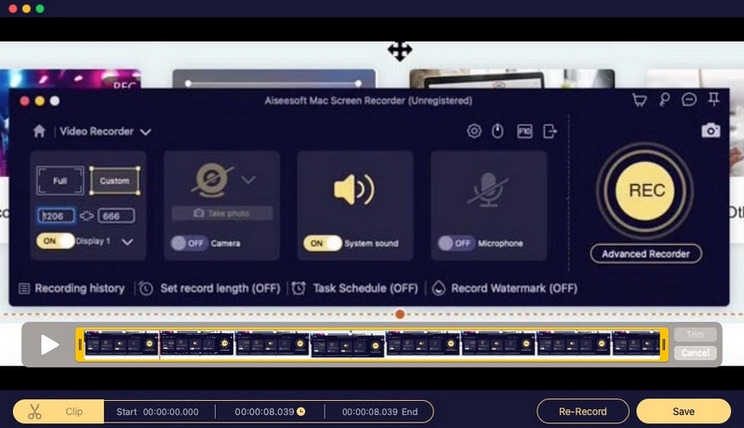
Step 2 Click Video Recorder to start the screen recording. You can click the Custom button to set the recording area. You can record the full screen, a fixed region, or a custom region, as you prefer. Choose the recording feature (click the webcam-like button) in the main interface if you want.
Step 3 Click the microphone-like button and make the audio settings for the built-in microphone or input. Besides, you are allowed to keep the system sound or microphone on.
Step 4 Click the REC button and start to record your Mac screen. After that, you can preview and trim the project as you like.
Part 2. Record Webcam on Mac
Step 1 Install Mac Screen Recorder.
Step 2 Click Webcam Recorder to use the feature. You are allowed to keep your microphone on. You can also take a snapshot.
Step 3 Click the REC button and start to record webcam on Mac.
Part 3. Record Audio/Music on Mac
Step 1 Install Mac Screen Recorder.
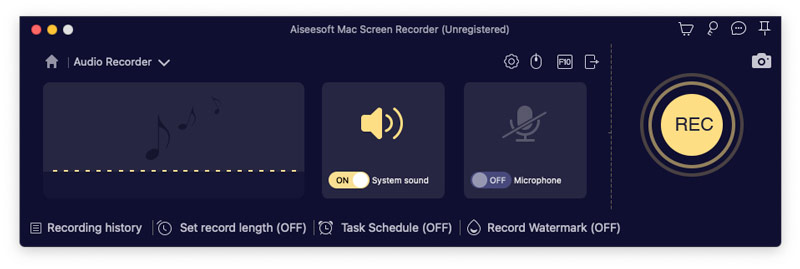
Step 2 Click Audio Recorder to use the feature. You can choose to keep the system sound or the microphone on.
Step 3 Click the REC button and start to record audio on Mac.
Part 4. Take a Screenshot on Mac
Step 1 Install Mac Screen Recorder.
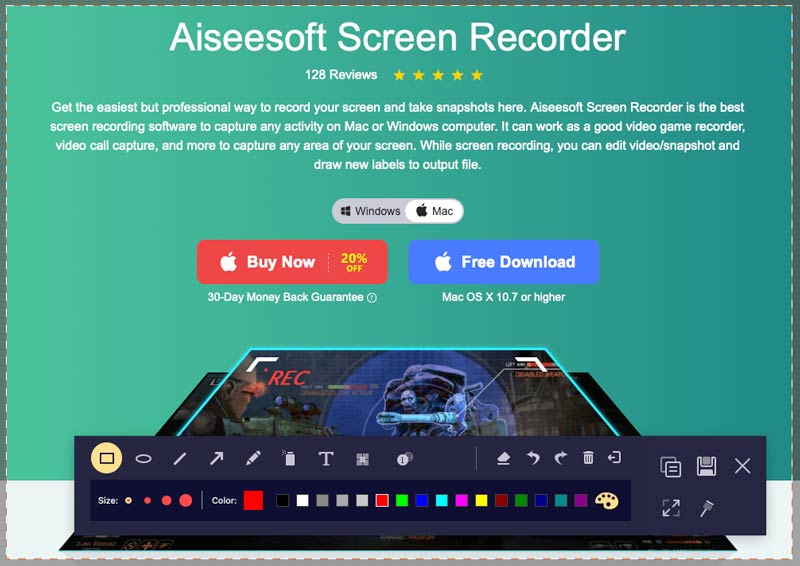
Step 2 Click the Screen Capture button to select the capture area (full screen, a fixed region, or a custom region based on your need).
Step 3 You can edit your photo by using these multiple tools below. Click Save to save the picture to your Mac.
Part 5. Create a Task Schedule Recording on Mac
Step 1 Install Mac Screen Recorder.
Step 2 Click Task Schedule at the bottom to start a task schedule recording, then tap Add new task.

Step 3 You can name the new task schedule.
Step 4 Then you can set the starting time, ending time, recording length, and the recording set for the recording.
Part 6. Adjust Recording Preferences on Mac
To obtain a satisfying recording, go to Settings and select Preferences to make some adjustments for recording. Here are five recording options you can adjust.
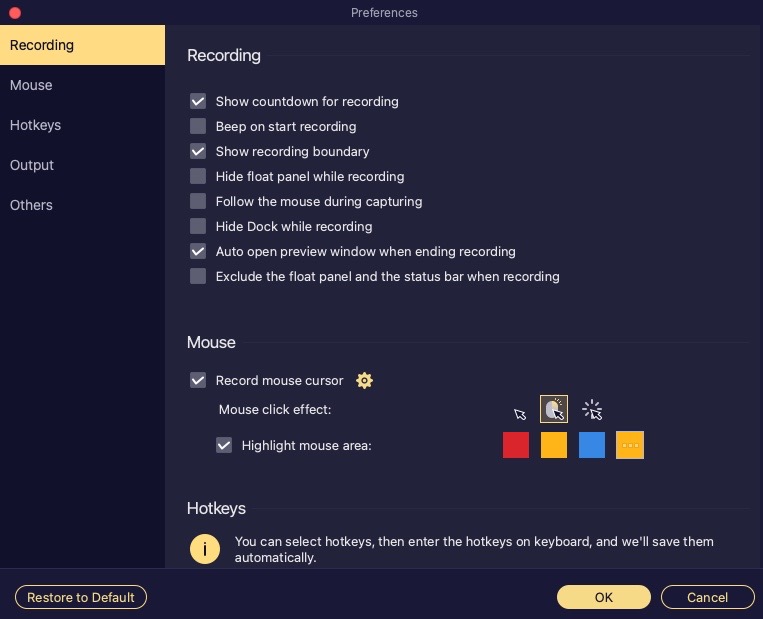
1. Recording
In the Recording tab, you can make adjustments according to your needs, such as whether to display a countdown for recording, whether to hide the float bar during recording, and whether to conceal the dock while recording, among others.
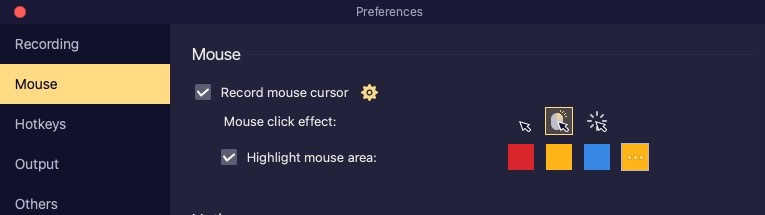
2. Mouse
The Mouse tab enables you to choose to show the mouse cursor and adjust mouse clicks.
3. Hotkeys
In the Hotkeys section, you can enter the key combination as the hotkeys for Start/Stop recording, Pause/Resume recording, Screen capture, Open/Close webcam, and Show/Hide float panel.
4. Output
The Output tab allows you to set the output folder for temporary files, recordings, and screenshots. Moreover, you can set the screenshot format, video/audio format and quality, video codec, and frame rate.
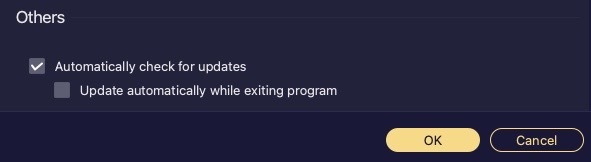
5. Others
In the Others section, you can choose whether to enable the app to check for updates automatically.
-
How to Transfer and Record Cassette Tape
What is the best cassette recorder to record cassette tape to MP3 or other audio format on your Windows or Mac computer? This article shows you how to record cassette tape.
 Posted by Jenny Ryan | 06.12.2016
 -
How to Rip CD to MP3 on Windows PC or Mac
Want to rip CD to MP3 for your iPhone/iPod/MP3 player? How can you copy CD audio to MP3? Read this article and find the best CD to MP3 Ripper.
Posted by Jenny Ryan | 30.11.2016 -
How to Capture Sound with Top 5 Sound Recorders
Want to record sound from Mac/PC/iPhone/iPad/iPod/Android devices? You can find the best choice from the top 5 sound recorders we list.
Posted by Jenny Ryan | 19.05.2016 -
Top 5 Best Free/Paid Online Audio Recorder in 2017
Audio recorders are very convenient and easy to use. This article introduces to you five best free/paid tool for voice recording in 2017.
Posted by Jenny Ryan | 27.04.2016 -
Voice Recorder - Record Audio on iPhone
You will not worry about how to record audio on iPhone. This post will direct you to record audio on iPhone step by step with iPhone audio recorder.
 Posted by Ashley Mae | 22.01.2021
 -
Top Best MP3 Recorder to Record MP3 on Windows or Mac
Want to record audio video in MP3 for playing on Windows, Mac, iPhone, iPod or Android phone? This article picks up some reputable professional or online MP3 recorders.
Posted by Jenny Ryan | 02.12.2016 -
How to Convert CDA to MP3
What is CDA? Want to convert CDA to MP3 to store on your hard disk? Read this article and find a CDA to MP3 converter alternative.
Posted by Jenny Ryan | 07.12.2016 -
The Best Replacemnt of Action Screen Recorder
Action is a popular gameplay screen recorder. Various alternatives of Action are in the world. Do you know which one is the best alternative of Action Screen Recorder is?
Posted by Jenny Ryan | 30.12.2015 -
Best and Free Dxtory Alternatives to Record Videos
Are you looking for Dxtory alternatives for recording gameplay? This article screens out the best alternatives of Dxtory from tons of video recorders for you.
Posted by Jenny Ryan | 04.01.2016 -
Is Microsoft Screen Capture the Best Tool to Record Screen
You have better choices when Microsoft Screen Capture is not the best screen recorder for you. This article will show you several alternatives to Microsoft Screen Capture.
Posted by Jenny Ryan | 16.04.2016 -
2017 Top 5 Best Screencast Software for Windows/Mac
This article introduces to you 5 best screencast software you can get for screencast Mac/Windows.
Posted by Jenny Ryan | 18.04.2016 -
Top 5 Best Video Capture Software
What is the most popular free video capture software? The article lists the top 5 popular video capture software and presents you the method to capture video with one of them.
Posted by Jenny Ryan | 02.03.2016 -
Find the Suitable Webcam Video Recorders to Capture Video from Webcam
Still feel blank of how to use the best webcam recording software to record webcam video? Follow this guide to brainstorm the solutions by yourself.
Posted by Jenny Ryan | 22.01.2019 -
3 Ways to Take A Screenshot on Dell
Want to take a screenshot on Windows PC? You can learn how to take screenshots on Windows 7/8/10 Dell (Latitude/Vostro/Inspiron/XPS) computer and Venue tablet.
Posted by Jenny Ryan | 18.05.2016 -
Top 5 Best Screen Recorders Apps for Recording Screen
Screen Recorder Apps can help you record your screen easily and clearly. Here, you can learn Top 5 best screen recorder apps to record screen on Android and iPhone/iPad.
Posted by Jenny Ryan | 22.04.2016 -
Three Alternatives to Snagit
Snagit is not the perfect companion for you? Then get Snagit alternatives. Read this post to get other 3 screen recorder software - Ezvid, FastStone Capture and Aiseesoft Screen Recorder.
Posted by Jenny Ryan | 25.12.2015 -
Top 5 Ways to Record Screen on Mac
Want to capture Skype chats, streaming videos, games and other on-screen actions on Mac? This article shows top 5 ways to record screen on Mac.
Posted by Jenny Ryan | 25.04.2016 -
Three Methods to Take Screenshots on Mac
Want to capture the impressive moments on your Mac screen? Here is an introduction about the best snipping tools for Mac and how to use them.
Posted by Jenny Ryan | 13.05.2016 -
Three Apps for Recording iPhone/iPad Screen
I'd like to record my iPhone screen without jailbreaking and complicated procedures. Is there any apps safe, reliable, easy for me to capture screen on iPhone?
Posted by Jenny Ryan | 31.12.2015 -
BestAndroid Screencasts to Capture Android Screen
In order to better record Android screen, this article recommends 5 of the best screencasts for Android to help you do that.
Posted by Jenny Ryan | 22.04.2016
