Taking a screenshot on Mac is a great way for work, for archiving, for sending to tech support, or simply to memory an interesting moment that happens on your screen. When you get the screenshot, you may be caught in a pinch and wonder how to remove unwanted parts of your screenshot and focus on the important part of this image. So if you're looking to crop a screenshot on Mac and achieve that perfect crop, keep reading to find out how to do this on your Mac.


Downloads
Screen Recorder – The Best Screen & Video Capture Software for Mac and Windows
![]() 100% Secure. No Ads.
100% Secure. No Ads.
![]() 100% Secure. No Ads.
100% Secure. No Ads.
There are two different methods to resize a screenshot on a Mac. Here we'll show you how to remove the unselected parts of the screenshot from view using Preview and Photos.
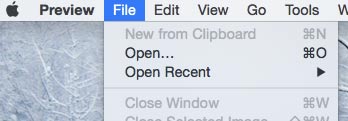
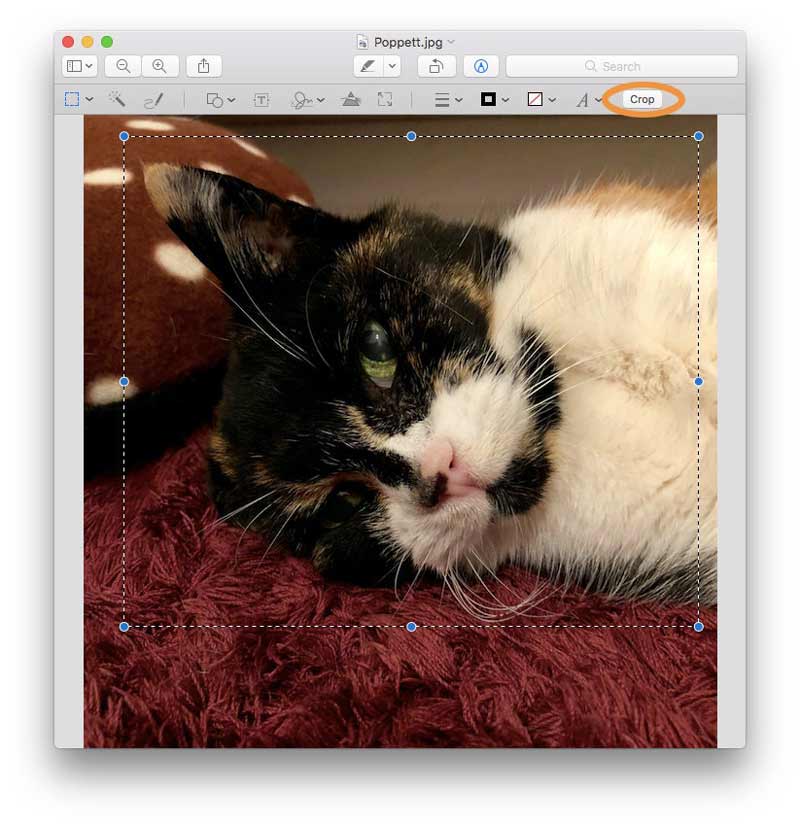
Preview is the default application in macOS for image files, like JPG and PNG, and PDF files. Although it is mainly used to view various documents, it has some quite cool image editing features. Therefore, you can use the Preview app to crop your screenshots on Mac.
Here's how to crop a screenshot using the Preview app on a Mac:
Apart from using the Preview app, you can also use the Photos app to resize your shortcuts after taking screenshots on Mac. This tool is available for Mac users and you will simply need to update your Mac to any Mac OS X from Yosemite and later to use this stunning native app.
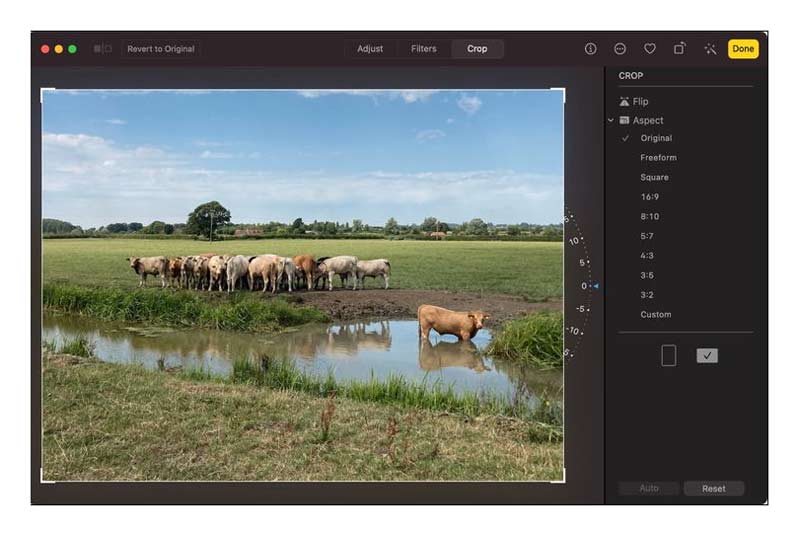
You can also use the Photos app for Mac to organize your photos, videos, memories, favorites, people, and more in a library.
Can I use Photoshop to crop my screenshots on Mac?
Yes, Photoshop is an excellent image editor that allows you to crop the image with ease. But it is not the default application on Mac, you need to download and install it before using it to resize your shortcuts. The easiest way to crop a screenshot on Mac is to use the default application like Preview.
Where do screenshots go on Mac?
By default, Mac screenshots are saved automatically on your desktop with the name "Screen Shot [date] at [time].png." In macOS Mojave or later, you can change the default location of saved screenshots from the Options menu in the Screenshot app. You can also drag the thumbnail to a folder or document.
How do I copy a screenshot to the Clipboard?
To copy a screenshot to the Clipboard, press and hold the Control key while you take the screenshot. You can then paste the screenshot somewhere else. Or use Universal Clipboard to paste it on another Apple device.
Conclusion
With the inbuilt photo editing apps of Preview and Photos, you don't need to install a complicated image editing program to crop and resize screenshots on your Mac and you can easily get the image cropping job done. It's just a matter of knowing how to use them and you can start enjoying them for free.
 How to Capture Still Image from Video in Windows Media Player
How do I capture a still image from a video? How do I take a picture from a video in Windows 10? How to capture a Windows Media Player screenshot? This post will show you how to capture still image from video in Windows Media Player in details.
 Where Are Screenshots Saved in Windows 10/8/7 PC
Where are screenshots saved? Where do you find the screenshots on your computer? This post will show you the location of the screenshots folder in Windows 10/7/8 PC.
 How to Access Steam Screenshot Folder
Where did my screenshots go? Where are Steam screenshots saved? Where are F12 screenshots saved? This post will tell you where to find your Steam screenshots in Windows, macOS and Linux. Also, you can get a better way to capture your Steam gameplay.
Screenshot Tips
Screenshot in Windows Media Player Screenshot Entire Webpage Screenshot Part of Screen Screen Record instagram Story Where are Steam Screenshots Saved Screenshot a Video Screenshot Alcatel Take a Screenshot on Lenovo Take Screenshot on HP Take a Screenshot in Minecraft Take a Screenshot of Google Chrome Use Snagit Scrolling Capture to Take Full-Page Screenshot Take Screenshots Surface Pro Screenshot on HTC Screenshot on Firefox Crop a Screenshot on Mac Crop Screenshots on Windows
Aiseesoft Screen Recorder is the best screen recording software to capture any activity like online videos, webcam calls, game on Windows/Mac.
![]() 100% Secure. No Ads.
100% Secure. No Ads.
![]() 100% Secure. No Ads.
100% Secure. No Ads.
*Required field
*Please enter a valid email
