Aiseesoft Screen Recorder
 100% Secure. No Ads.
100% Secure. No Ads.
Cisco Webex is a popular platform designed for businesses of all sizes. It provides various cloud-based meeting, screen sharing, and collaboration services. Webex Meetings is one of the most widely used video conferencing platforms. Whether you want to take notes, catch what you missed, save a searchable archive for your team, or for other reasons like training, you may want to record your Webex meetings.
The question is, how to record a meeting in Webex, especially as a participant? This guide walks you through three standard methods to do that as either a host or a regular participant.
Officially, Webex only allows the Host or Co-host to record meetings. They have access to the native Record button. As a general participant, you won’t even see the recording option in your control bar. We have to admit that Webex is quite stingy with recording rights. This is mainly for security and privacy reasons.
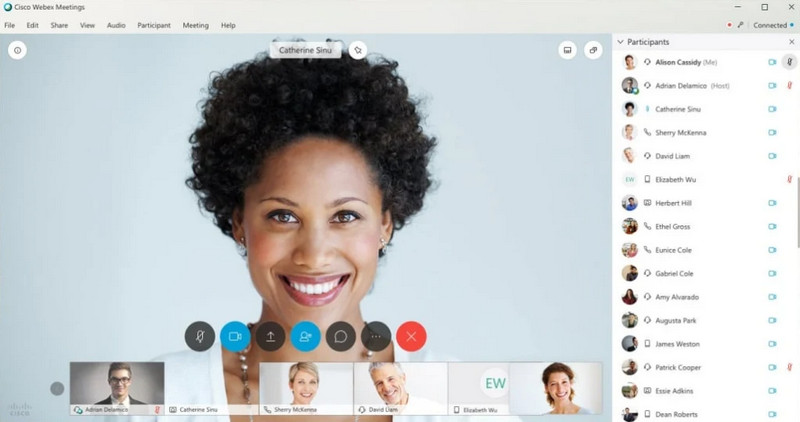
If you are a standard participant, you have to ask the host to make you a Co-host. That permits you to record a meeting in Webex.
If you don’t get the permission or think asking for permission is a bit awkward, you can turn to third-party screen recording software. These tools can bypass Webex’s internal restrictions and capture whatever is on your computer screen.
This section shares three efficient methods to record a meeting in Webex. You can select a desired way depending on your role (host or participant) and your technical needs.
If you are the host or co-host, you can use the built-in recording option to easily record a meeting.
When you are having a session in the Webex desktop app, you can find a circular Record icon in the control panel. You can simply click it to confirm the recording.
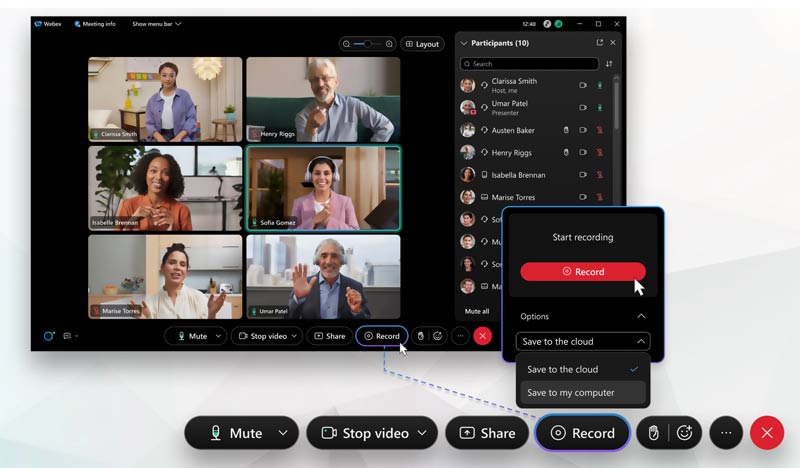
If you are under a paid plan, you can generate a link for sharing. For free and basic plans, you need to save the Webex meeting recording to your local hard drive as an MP4 file.
Once the meeting is finished, Webex will begin processing the recording file. If you choose to record to the cloud, your recording may require time to process.
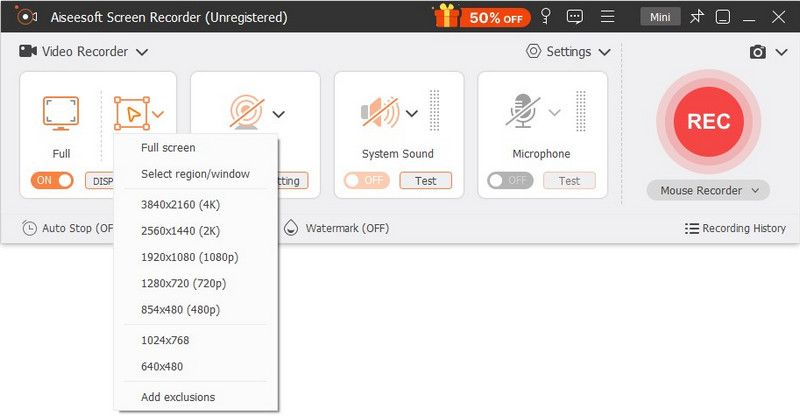
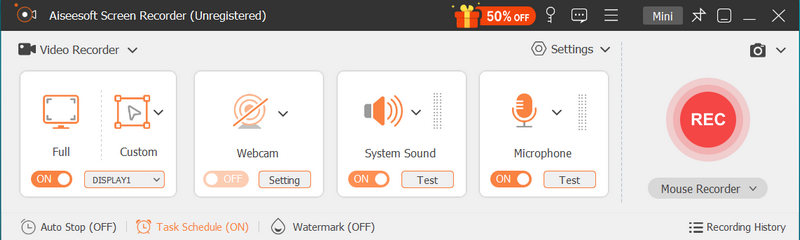
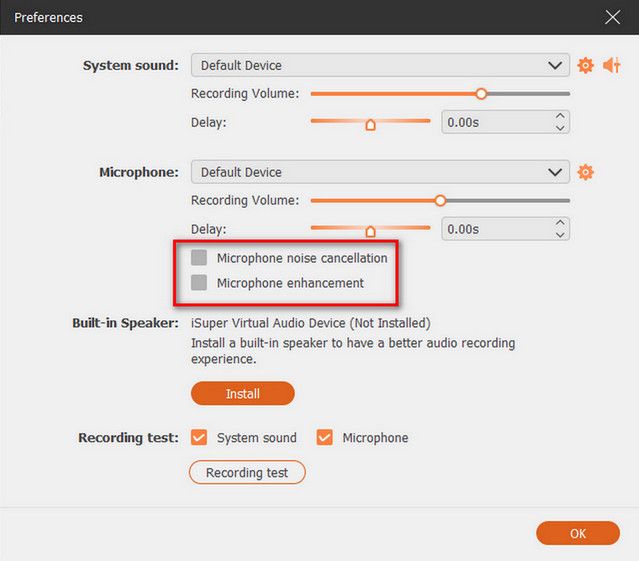
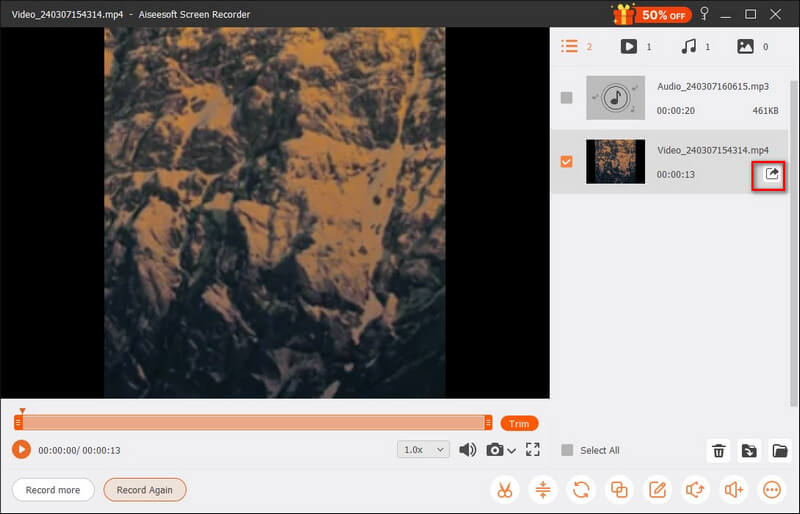
For participants who need high-quality recordings without asking the host for permission, Aiseesoft Screen Recorder is an ideal choice. It is specially designed to capture everything happening on your computer and phone. During the Webex recording, you can record audio from both the internal system card and your microphone.
100% Secure. No Ads.
100% Secure. No Ads.
If you are using Windows 11 or Windows 10, you can use the built-in Xbox Game Bar to record activities on your computer. The system recording tool is primarily designed for game capture. It can help you record meetings in Webex.
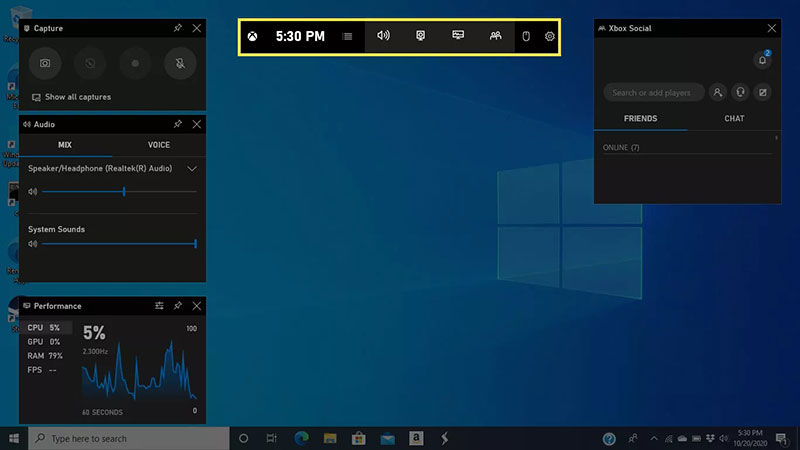
Game Bar is a lightweight recorder ideal for quick captures. Moreover, it works perfectly for recording any active window, including Webex Meetings.
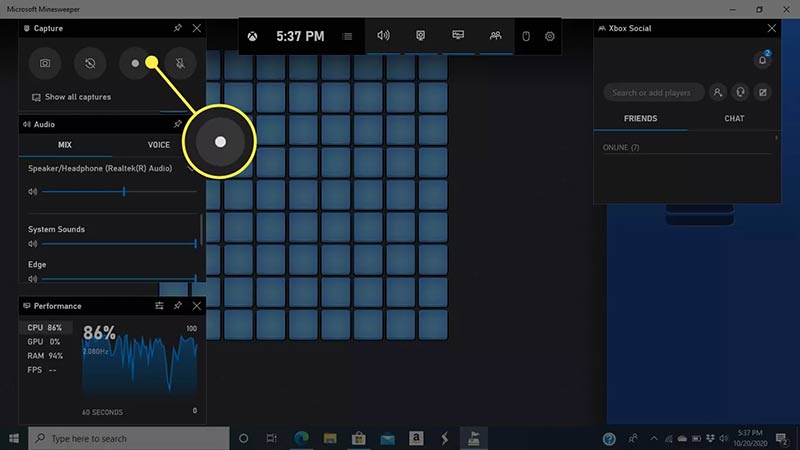
Note that the Xbox Game Bar only allows you to capture a meeting of less than 2 hours. If your meeting is longer than 2 hours, you may need to start another recording.
Question 1. Where to find your saved Webex recordings?
If you are the host and use a cloud recording, you can go to the Recordings tab from the navigation panel to find all recordings. As a host, you are allowed to share the recording link via email.
If you choose to save your meeting recordings locally, go to the default folder (Documents\Webex\Recordings) to locate them. If you record Webex meetings using a third-party meeting recorder app, you can select a desired destination folder before exporting. For Xbox Game Bar, the default folder is This PC > Videos > Captures.
Question 2. Why does my local Webex recording have no audio?
To capture a meeting in Webex with audio, you should choose Computer audio as your audio connection. If you use a phone or Call me option, your captured file will have no sound.
Question 3. How long will my Webex cloud recordings be saved?
If your Webex account is on a standard business plan, the platform typically saves your recordings for 360 days. For larger organizations or those that have upgraded to a Pro Pack license, the administrator often has much more control. An admin can set a custom retention policy from 7 days to around 10 years. If you have an important recording, it is always safer to download the MP4 file to your computer.
Conclusion
You can learn three methods to record a meeting in Webex. Whether you are a host or a participant, there are ways to save important content from a Webex meeting. If you are the host and have access to the built-in recorder, the native cloud recorder is the most seamless option. However, if you are a participant looking for a high-quality backup, a dedicated tool like Aiseesoft Screen Recorder is often a better choice. Select a proper method to record your meetings with ease.
 How to Share Screen on Webex Meeting & Display What Is On Your Screen
When you want to know how to share the screen on Webex, you will need a tutorial that will take you. Luckily, this article will show a complete guide on how to do it.
 How to Record Google Meet on Any Device with(out) Permissions
Do you want to know how to record Google Meet on any device? Read this article to find ways to record Google Meet on iPhone, Android, Windows, or Mac.
 Top 5 WMV Video Recorders to Capture Screen and Online Meetings
Here are top 5 best free and paid WMV video recorder software to capture screen and online stream on Windows, Mac and Linux.
 Leave your comment and join our discussion
Screenshot Tips
Screenshot in Windows Media Player Screenshot Entire Webpage Screenshot Part of Screen Screen Record instagram Story Where are Steam Screenshots Saved Screenshot a Video Screenshot Alcatel Take a Screenshot on Lenovo Take Screenshot on HP Take a Screenshot in Minecraft Take a Screenshot of Google Chrome Use Snagit Scrolling Capture to Take Full-Page Screenshot Take Screenshots Surface Pro Screenshot on HTC Screenshot on Firefox Crop a Screenshot on Mac Crop Screenshots on Windows
Aiseesoft Screen Recorder is the best screen recording software to capture any activity like online videos, webcam calls, game on Windows/Mac.
100% Secure. No Ads.
100% Secure. No Ads.

*Required field
*Please enter a valid email

