For Windows

 For Mac
 PDF Solutions
 Data Manager
 Other Tools
 Free Online Solutions
 Free Image Tools
 Desktop Freeware
Method 1: Enable the “Merge into one file” option
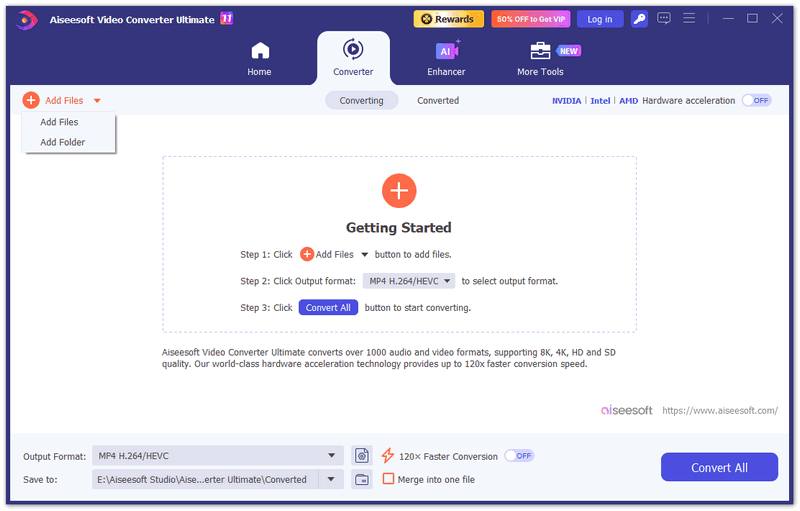
Step 1. Click on the "Add File" or "Add Folder" button at the top of the main interface to import all the videos you want to merge. You can select multiple files or an entire folder containing the videos. Alternatively, you can drag and drop the videos directly into the program’s interface.
Step 2. Once you’ve added the videos, you’ll notice a small "Merge into one file" checkbox at the bottom of the file list. Check this box to enable the merging feature.
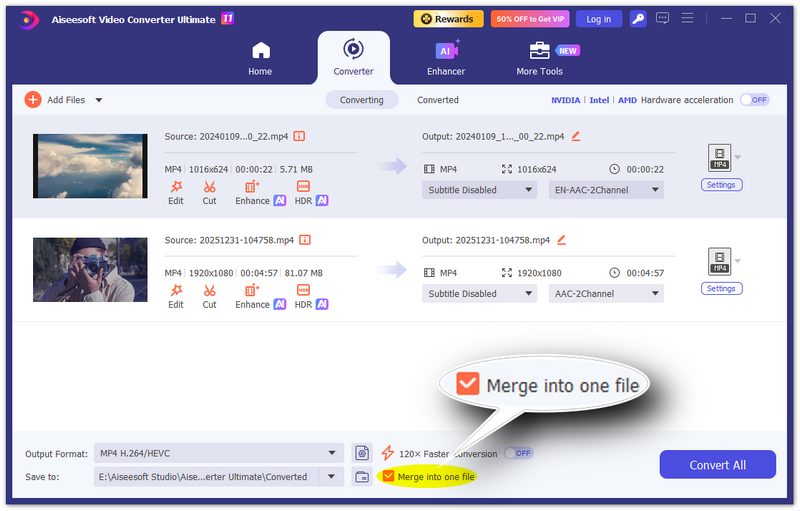
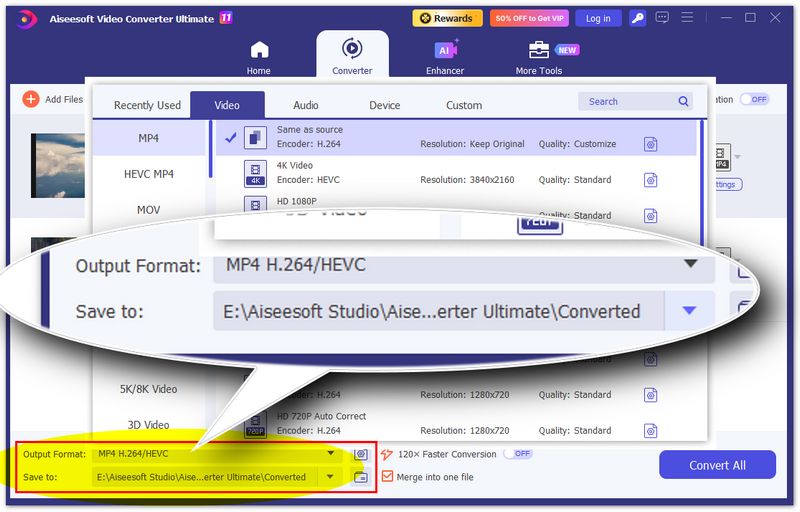
Step 3. If you like, you can click on the "Output Format" dropdown menu at the bottom of the interface to choose your desired output format (e.g., MP4, AVI, MKV, etc.) and click on the drop-down button next to “Save to” to select the folder where you want the merged video to be saved.
Step 4. Once you have all the settings configured, click on the "Convert All" button to start the merging and converting process. Aiseesoft Video Converter Ultimate will combine all the videos into one file and save it in the specified output folder.
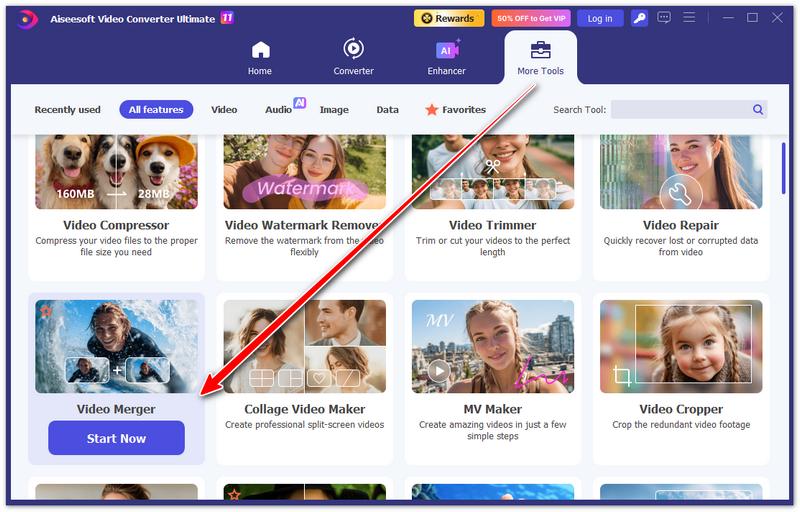
Method 2: Use the built-in “Video Merger’ tool
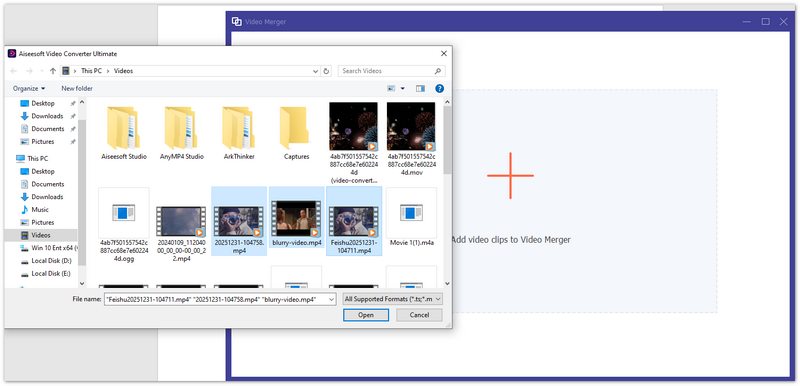
Step 1. Choose “Video Merger” under the “More Tools” menu.
Step 2. Click the add button in the main interface to upload your video. You can click Shift and your left mouse button to select multiple video clips at the same time.
Step 3. Then, you’ll enter the “Video Merger” screen, where you can adjust the order of the video clips by clicking “Forward” and “Backward”. You can also add a video clip before or after a specific video by clicking “Ahead” and “Behind”. If you want to adjust one of the clips, you can click “Edit” to rotate, add a watermark, filter, etc., to this clip.

Step 4. Now, you can adjust the export settings like output video formats, bitrates, audio formats, etc., in “Output” settings. You can also add a new background track arbitrarily. After all setting up, click “Export” to merge your videos.